# sipgate general information


# Blogpost: The future of telephony begins now – with sipgate Neo

With sipgate Neo, users benefit from better voice quality, the mobile app, and new AI features. Learn about the key changes and improvements.

### With sipgate Neo, our users benefit from better voice quality, the mobile app, and new AI features.

sipgate Neo is here. Thanks to comprehensive technical improvements, you can now enjoy crystal-clear voice quality with every call. And best of all, with satellite, the mobile telephony app, you can take sipgate with you—in your pocket, anywhere. The same outstanding quality you know from your desk, now also available on the go.

#### **The changes at a glance**

* **1. Significantly improved voice quality**
  * All calls now benefit from noticeably higher audio quality, regardless of the device.
* **2. The new mobile app**
  * The satellite app for iOS and Android is now available to all sipgate neo customers.
* **3. Channels replace groups**
  * Groups are being replaced by channels to simplify collaboration and improve clarity.
* **AI features for every phone call**
  * All intelligent features, such as transcription, call summaries, and notes, are now available for every call—regardless of the device used to make the call.

#### **Significantly improved voice quality**

The most important and immediately noticeable advantage: significantly improved voice quality. Over the past few months, we have made extensive changes to our technology, optimized our systems, and completely modernized our infrastructure. You can hear the results with every call: Clearer, more stable, and more natural sound—whether you're using a desk phone, app, or mobile SIM card. Calling with sipgate has never been so clear, so reliable, so good.

#### **The satellite App for iOS and Android**

With a rating of 4.6 stars in the App Store and over 26,000 positive reviews, satellite has long been the best telephony app on the market. Simply download it after the switch, log in with your existing sipgate login details, and start making calls.

Try out the apps after the switch—it's worth it! With the switch to Neo, the quality of the desktop app will also be significantly improved. Experience for yourself how easy and powerful modern telephony with sipgate can be, whether on your desktop or on the go. Both apps are of course available to you free of charge.

#### **Groups become Channels**

Each employee gets a personal channel, while teams work in shared channels. Channels no longer have user limits. The visual routing principle remains in place, but has been made much more intuitive and offers more options for organizing your telephony.

![](/files/zbLMsOwWa2SMPq3i0fX1)

**AI features for all phone calls:** Previously, AI summaries and transcripts were only available for calls made via the app. Now this works for all phone calls, regardless of whether someone is calling from a desk phone, mobile phone, or via the app. Once you have activated AI, all conversations are processed, summarized, and automatically transferred to the CRM if required.

**And what are the benefits?** Greater collaboration, regardless of the device. Calls to a user end up in their personal channel, calls to a team end up in the team channel. All users of a team channel share common phone numbers and have access to the channel inbox. This is where all information about the calls is collected. The live view of user status allows everyone to see who is currently available.

#### **Am I already a neo-user?**

Log in and click on your avatar in the top right corner. There you can see whether you are already using sipgate Neo or still sipgate Classic.

#### **What do I have to do?**

Nothing. The transfer is automatic and free of charge for you. Your telephone service will continue to work without interruption. We will notify you by email as soon as your account has been transferred.

Important for CLINQ Companion app users: The CLINQ Compagnion App will no longer work after the move. After the changeover, download the satellite App and log in with your existing access data. It takes two minutes—and it's definitely worth it.

#### **Here is the schedule**

All new customers who have joined since August 2025 will start directly on Neo. Existing customers will be migrated gradually from now on. Important note: The Neo offer is initially only available to our sipgate business customers.


# How do I get started with sipgate?

Quick-start guide for new sipgate administrators covering free trial setup, telephony routing, voicemail, and SIP credentials.

#### Welcome to sipgate!

This quick-start guide will show you how to create your first telephony routing with sipgate. It's meant for administrators who have just signed up for an account. All routing can be changed at any time in the future.

* Set up and use your free trial
* Navigate your account and access your telephony routing
* Edit your telephony settings
* Add a telephone number to your routing
* Set up voicemail divert
* Find your SIP credentials to connect a VOIP device

{% hint style="warning" %}
**Tip:** sipgate's Privacy Policy is also available to read online, or to download in PDF format, at [https://www.sipgateteam.co.uk/privacy-policy](https://www.sipgateteam.co.uk/privacy-policy%20%C2%A0)
{% endhint %}

#### Getting started with your 30-Day free trial

Your Sipgate team account starts with a 30-day free trial, providing you with:

* 3 free test telephone numbers
* 60 free minutes
* The ability to create unlimited users
* Access to all sipgate team features except CRM integrations

You can use sipgate fully and free of charge during the 30-day trial without providing any bank details. You'll receive a test number block with five local numbers. The trial ends automatically after 30 days, or if you upgrade to a full version during the trial.

{% hint style="info" %}
**Note:** All configurations and settings will be deleted when your trial account expires.
{% endhint %}

During the trial, you get 50 free minutes to landlines and 10 free minutes to mobile networks. Additionally, you can book a SIM card or eSIM with 500 MB of data for testing purposes.

Start your trial by clicking the **Free Trial** button on our website.

**Trial Extension** If you need to wait for a ported number beyond the trial period, you can extend the trial to retain your configurations and settings. Don't worry, your account won't automatically convert to a full version due to the porting request.

**Credit Top-Up** You can top up your account with additional credit during the trial. If you choose not to stay with sipgate, any remaining credit can be refunded. Important: Topping up during the trial will remove your test numbers, but the trial will continue without them.

**Trial Account** If you do not upgrade to a full version, your trial account remains, but your settings will be reset. You can still manage the account and upgrade to a full version at a later time.

#### Why are my UK trial numbers 056?

During your 30-day trial, we provide 3 non-geographic 056 UK telephone numbers for testing. These fully functional numbers allow you to make and receive calls, test call quality, forwarding, and call management setups.

Please note

* These numbers are for testing only and not intended for customer interaction.
* The 056 numbers cannot be retained or booked after the trial.
* Local numbers are not available for testing.

If you choose sipgate after the trial, we'll provide one free local number with your preferred area code.

<details>

<summary>Info: Data traffic generated by a sipgate call</summary>

During a one-hour phone call approximately 50-60 MB of data traffic will be used, using the G711 codec. During a phone call conducted through sipgate, there is on average 100 Kbits of data volume per second and direction (Up and Downstream). If you do not make a phone call, there is only an extremely small amount of data traffic which is used for the registration of the phone with the SIP Server. Lower bandwidth codecs are also supported.

</details>


# What are the basic requirements for using sipgate?

Learn the basic requirements for using sipgate, including internet connection, VoIP devices, softphones, and firewall settings.

sipgate's landline service is VoIP-based, but what does that really mean, and what are the requirements? Voice over IP (VoIP) means you make calls via your internet connection instead of using a traditional analog phone line. VoIP refers to transmitting voice data over the internet instead of through conventional phone networks, like ISDN.

#### Internet

The first requirement is a broadband internet connection from a provider of your choice, such as Deutsche Telekom, 1&1, or Vodafone. Speed is key: a single call over the internet requires around 100 kbit/s for both upload and download. This ensures clear voice quality. A low bandwidth can cause dropouts.

**Example**: With a standard DSL connection of 16,000 Mbit/s download and 1 Mbit/s upload, you can handle up to 10 simultaneous calls.

#### Devices and Softphones

How you choose to make calls is up to you. Want a "real" phone on your desk? Then VoIP phones from snom, Gigaset, Grandstream, and other brands are a good choice. These can be easily connected to your sipgate account. You'll find configuration guides on our website. Alternatively, you can keep using your existing analog phones by connecting them to a VoIP adapter, such as a VoIP-enabled Fritz!Box. Another option is softphones, which are software programs that let you make calls directly from your computer—ideally with a headset. You can choose a softphone from a third-party provider or use the free sipgate softphone.

![](/files/XL5Wf9nifRgwXkXv0fHf)

{% hint style="warning" %}
**Tip:** You can set up both a VoIP phone and a softphone at the same time. A typical setup: use the VoIP phone at the office and the softphone on your laptop when working from home, while staying reachable on the same phone number for both incoming and outgoing calls.
{% endhint %}

#### Firewalls and Routers – What should you consider?

When using a router with a firewall, make sure the firewall allows all the necessary ports for internet telephony. This is essential to avoid connection issues.

#### sipgate base plan overview

Explore the details of sipgate's plans and pricing:

* **Monthly base price**: [View all plans here](https://www.sipgateteam.co.uk/plans)
* **Outbound call rates**: [Check per-minute rates here](https://www.sipgateteam.co.uk/plans/call-rates)

**Important Notes**

* **International phone numbers** support up to 4 simultaneous calls.
* Each user is supported with:
  * **2 concurrent VoIP phone calls**
  * **2 simultaneous VoIP phone/device registrations**
  * **2 external telephones/endpoints** (non-sipgate numbers).
* The service supports multiple **validated Emergency Addresses** for UK 999 Emergency Services, without limiting the number of locations from which the service can be accessed.


# What types of VoIP phones and devices can I use?

Learn about the types of VoIP phones and devices you can use with sipgate, including deskphones, ATA adaptors, DECT phones, and softphones.

Any SIP Protocol compliant VoIP phone, device, or application should be operable with sipgate.

The four general types of VoIP phones and devices supported for use with sipgate are:

* VoIP IP Deskphones
* VoIP ATAs (Analogue Telephone Adaptors)
* Softphones installed on computers and smartphones
* IP-PBX's

ATA Adaptors will often be the most economical option and will suit most VoIP users' basic needs.

Adaptors and deskphones used in conjunction with a suitable DSL or cable internet connection will provide the best results.

If you're new to VoIP, before purchasing a VoIP phone, first try out sipgate by using a free VoIP application (softphone/app) before purchasing any hardware or software.

#### **ATA Adaptors**

An ATA adaptor connects your fixed line ([POTS](http://www.voip-info.org/wiki/view/POTS)) telephone handsets to your router so that they can be used for VoIP calls.

Routers with integrated VoIP adaptors are available. Unless you wish to replace your existing router, we'd recommend avoiding combination router-adaptor devices. The set up of these cross functional devices can be much more complex than a standard adaptor.

Examples of VoIP adaptors from established manufacturers can be found in our help centre.

More than one handset can be connected to a multi-line or multi-account adaptor. With a multi-line adaptor, you'll be able to make or receive more than one call at the same time with your sipgate team account.

#### **VoIP IP Deskphones**

IP deskphones are intended for office environments. As dedicated VoIP phones, they will often have more features and greater reliability (as well as a higher price tag).

We recommend business customers use deskphones with our sipgate team service. You can find some examples of phone manufacturers and models.

#### **DECT Cordless VoIP phones**

Similar to a VoIP adaptor, but for DECT phones. VoIP base stations can be purchased supporting multiple connected DECT cordless handsets and VoIP accounts/lines.

We recommend [Gigaset DECT](https://www.gigaset.com/en_en/) solutions. Some Gigaset devices, like the DX800A for example, combine an IP deskphone with a DECT base station.

Gigaset VoIP DECT base stations and IP deskphones should have 'IP' in their model name.

#### **Softphones for computers, smartphones and tablets**

VoIP softphone/app applications can be installed on computers, smartphones and tablets.

Softphones installed on a computer and used with a headset will tend to provide a more reliable service, and often better call quality than smartphone VoIP apps.

When it comes to softphone apps we recommend trying [Zoiper](https://www.zoiper.com/en/page/5b3c8e0b29749ab24a96c06c9f7ace7f?\&tr=0) which can be used across all platforms or [Counterpath's X-Lite](https://www.counterpath.com/x-lite/) for computers.

**Notes:**

Like most ITSPs, sipgate uses the **UDP** Protocol for signalling (not TCP).

We do not provide configuration support for third party IP PBXs when these are being used with sipgate products, examples of these being - Asterisk based PBX's or the 3CX Phone System. The full scope of our support for any 3rd party IP PBX's will be up to device registration with the sipgate system.

Be sure to choose a phone that is currently in production and fully supported by the manufacturer. End of Life or End of Production devices, while often cheaper, will not benefit from ongoing firmware, security updates, etc from the manufacturer.

**TIP:** Always use the most recent firmware and/or software versions.

It's not possible to provide set up guides for every phone or device currently available. If your device isn't listed please try the general configuration settings.

sipgate provides Bring Your Own Device (BYOD) telephony services. We don't supply VoIP phones or hardware.

As a BYOD service provider, any impartial recommendations made by our staff will be based on reliability, build quality, functionality, ease of use, and the manufacturer's support.

Over the last years, sipgate's support teams have tested a lot of production SIP phones, devices and applications and generally found that most SIP phones operate with the sipgate system, though, over this time we have also seen that some VoIP phones and devices can perform more reliably than others.

This doesn't mean that a device or phone from a manufacturer other than those we recommend or that can be found mentioned/shown in our help centre will be inoperable with sipgate.

Due to their being so many VoIP device manufacturers and SIP application developers available, it is not possible for us to be able to provide support for each and every phone and device out on the market. *In the end, support for your phone should be primarily provided by the manufacturer or your authorised dealer/vendor.*

The best we can offer is that we will try to assist you by recommending quality, reliable VoIP phones and hardware that we believe would best suit you.

Though, in the end, it's up to you to choose the VoIP phone/device that bests suits your needs and budget.


# How do I log in with my credentials?

Learn how to log in to your sipgate account using email, Google Social Login, or two-factor authentication, and how to reset your password.

You can access your personal sipgate account at <https://login.sipgate.com/>. There, enter either your email address (the one you used for registration) and your personal sipgate password, or your customer number and your personal sipgate password. You can find your customer number at the top right of your sipgate invoices or on your bank statements if payments are made via direct debit.

If you've forgotten your password or are unable to log in, please follow the instructions to reset your credentials.

#### Login – How to Access Your Personal sipgate Account

Whether you're an admin or a user, you can log in to your sipgate account anytime. Simply go to [sipgate.co.uk](https://www.sipgate.co.uk/) and click the login button in the top right corner. From there, you can either sign in with Google Social Login or use your email address and sipgate password.

#### First-Time Login as a User

If your sipgate admin has set up your account, you'll receive an email. Just open it and click the **Go to User Account** button.

#### Logging in with Google

If your company uses Google, you can log in directly with your Google account—no extra sipgate password needed. Simply click **Sign in with Google**. Your sipgate admin links your account automatically by using your Gmail address when setting up your account.

#### Logging in with Email and sipgate Password

After clicking the button in your email, enter your email address and select **Sign in with Email**. You'll then be prompted to create a secure password for future logins. For security reasons, we'll send you a one-time code via email. Once entered, you can choose to trust your current browser and device. If you select **Yes**, future logins will only require your email and password—no email code needed. We recommend enabling this only if your device isn't shared with others.

#### Two-Factor Authentication (2FA)

For added security, you can enable two-factor authentication (2FA) instead of relying on Google Social Login or email codes. Various free apps are available for this. After entering your login credentials, you'll receive a unique verification code via the app, which you'll need to enter in your browser.

#### Forgot Your Password?

If you've forgotten your sipgate password or can't log in, click **Forgot Password?**. For more details on resetting your login credentials, check out our [troubleshooting guide.](https://teamhelp.sipgate.co.uk/hc/en-gb/sections/201343422-Troubleshooting-Problem-Solving)


# What is the sipgate web app? A guide to the user interface

Guide to the sipgate web app interface, covering Account Management and My Telephony sections for admins and users.

The web app is your user interface for setting up and managing your account. When you log into your sipgate account, a dashboard with menu options will appear, guiding you to different sections of your account. The interfaces for admins and users differ: admins have access to **Account Management**, while users can only access the **My Telephony** section. This article introduces these sections and their features.

#### Account Management

The Account Management functions are divided into three sections: Telephony, Extra Features and Administration. In the **Telephony** section, you can configure all settings related to your connection, including user management and number bookings. The **Extra Features** section covers all additional products that can be added to the standard features. In the **Administration** section, you can view and update account and billing details.

![](/files/9WwHidjOy5bQEiYW7gTt)

#### My Telephony

At the top right, you can access **My Telephony** button, which links to the phone line associated with your account.

On the left side, there's a sidebar where you can access various settings for your phone line. Under **Event List** you can view your call history, including incoming and outgoing calls. The **Presence** indicator shows whether each extension is currently in use or available. You can store and access contact information under **Contacts**. The **Telephony** section includes routing, voicemail, fax settings, and device statuses.

![](/files/FDIzMjeIMsFBWoUuGskR)

#### Settings

Here you can customize settings for voicemail and your personal blocklist, manage notifications for specific events, and update your personal information.

![](/files/qfgYRWcJ4k0l8naJMnDo)


# sipgate roles: Admins and Users

Overview of sipgate admin and user roles, including capabilities for account management, telephony, and user permissions.

#### Admin capabilities

When you set up an account for your company, you automatically receive the **admin** role for this account with access to account management. This lets you manage everything, including adding new users.

{% hint style="warning" %}
**Tip:** As a sipgate admin, you can grant admin rights to others during setup for shared account management.

Each sipgate admin has access to the following settings:
{% endhint %}

* **Plans:** Order/book, change (upgrade or downgrade), and cancel.
* **Phone Numbers:** Order/book, port over, and allocate.
* **Users:** Create, allow Admin rights, block, and delete.
* **External Phones:** Integrate to a User's account (mobiles & landlines).
* **Groups:** Create, delete, and assign phone numbers to Groups.
* **Account Balance:** Top-up and view your current account balance.
* **Invoices:** See your itemised bill and call detail records (CDRs).
* **sipgate Mobile Phones:** Assign sipgate mobile devices to individual users.
* **Add IVRs and Call Queues:** (Requires the Pro Package add-on).
* **Change User Details:** Modify User emails, personal data, and login credentials.
* **Call Permissions:** Choose which destinations Users can call.
* **Access User Features:** Everything Users can do.

{% hint style="info" %}
**Please note:** Admins cannot access a User's event list or change their notification settings.
{% endhint %}

#### **User capabilities**

Users do not have access to account management but retain the ability to adjust or create many things themselves.

* **Telephony:** Make and receive calls, send SMS, and access voicemail.
* **Event List:** View and manage your personal event list.
* **Phone Numbers:** Administer and define where each phone number rings.
* **Devices:** Configure personal phones, voicemail, and Caller ID.
* **Filters and Forwarding:** Set up filters, notifications, and call forwarding.
* **Contacts:** Create and manage contacts.
* **Faxes:** Send and manage faxes.
* **SIM Cards:** Lock SIM cards.
* **Data Volume:** Book additional mobile data.
* **Caller ID:** Set your outgoing Caller ID number.


# What are the sipgate emergency call regulations?

sipgate emergency call regulations covering VoIP limitations, location registration requirements, and service outage considerations.

The sipgate emergency call regulations are also available on our [website](https://www.sipgate.co.uk/emergency-call-regulations).

## sipgate emergency call regulations

{% hint style="danger" %}
**Important notice:** In order to be able to contact the emergency services from your sipgate account, you have to configure and activate your emergency location! Please be sure to submit your correct and valid UK address as foreign addresses are not accepted. Without doing so, making an emergency call is not possible!

**Do not make any test calls to see if it works!**
{% endhint %}

{% stepper %}
{% step %}

#### Agreement

By signing up to the service you understand and agree with the following emergency call regulations.
{% endstep %}

{% step %}

#### Service Availability

If the service is fully operational, public emergency call services can generally be accessed from within England, Wales, Scotland and Northern Ireland.

However, you understand and acknowledge that there may be some limitations as set out in the following paragraphs.
{% endstep %}

{% step %}

#### Location Registration

For each phone line that you utilise the service with, you must register with sipgate, the physical location where you will be using the service. It is your responsibility to maintain the accuracy of your address via your online account. If you do not update us with any changes, it may or may not be possible for emergency operators and authorities to identify your location and phone number when you call emergency services. When you call the emergency services you will need to state your location and phone number promptly and clearly, as emergency operators and authorities may not have this information.
{% endstep %}

{% step %}

#### Service Outage Limitations

If there is a service outage for any reason, such outage may prevent access to public emergency call services. Also, the VoIP originated emergency call may have to pass over the public internet where it will not receive the same network priority or quality assurance as an emergency call made on a mobile network or on a circuit-switched fixed line. Please be aware that the VoIP application requires a power source and an enabled internet connection to make emergency calls.
{% endstep %}

{% step %}

#### User Responsibility

You agree to inform potential users of the service of the above limitations and you understand and accept that you should always have alternative means of accessing emergency services.
{% endstep %}

{% step %}

#### Service Suspension

If sipgate suspends the service you may not be able to call emergency services.
{% endstep %}
{% endstepper %}

sipgate GmbH, Düsseldorf, August 2014


# Quick start and Initial Set up


# What is the difference between sipgate classic and sipgate neo?

Overview of changes between sipgate classic and the new sipgate neo web interface, including channels, routing, devices, and app features.

In September 2025, sipgate launched a new web interface for telephony, which all new customers are already using to make calls. Existing customers will also be migrated as soon as all previous functions are available on the new web interface. To help you get started, the following article provides an overview of all changes:

#### Channels

In the old web interface, each created user have their own channel. At the same time, there are groups in which several users can be reached via a single phone number, and shared channels. In the new web interface, all users have a personal channel. In addition, users can be logged into several shared channels. The group function will not be included in the new web interface. One advantage of shared channels over groups is the number of users: groups are limited to a maximum of 25 users per group. Shared channels can accommodate any number of users. Furthermore, the event list is visible to all members of a channel. In addition, the status of the members of a channel is visible. Furthermore, administrators can activate ringing rules in shared channels. For example, a call can ring for all users at the same time or be forwarded in a specific order if the first available user does not answer the call.

#### Routing

In the new web interface, only an administrator can assign phone numbers and extensions for individual users. Users without administrator rights can still set forwarding rules for unanswered calls in the new web interface. In addition, the display for all routings will be adapted to channel routings.

Exception: Administrators can assign editor rights to individual users. The corresponding editors can make additional changes in shared channels that are not available to users.

#### End devices

In the old web interface, users can create their own routings with a maximum of three connectable end devices free of charge. In the new web interface, users have the option of registering any number of end devices in their personal channels. In addition, both the personal channel and all shared channels are displayed in the sipgate app and can be individually activated or deactivated there.

#### Statistics

Previously, administrators could view a summary of calls for the entire group for the past 30 days in the group statistics, in addition to the live display of the number of callers on hold. With the introduction of channels, administrators now have access to daily statistics and can perform individual evaluations of users in a channel if necessary. Admins also have the authority to grant access to the statistics to any user, such as the team lead, on an individual basis. The retroactive period for the statistics has also been extended so that the statistics can now be viewed retroactively over several months. Furthermore, the display of KPIs has been expanded to include additional parameters.

#### Sender number

With the new web interface, you can now set any sender number in the sipgate app. This can be customized individually for each personal and shared channel. It is also possible to set a free sender number.

#### Event list

The event list is divided into two sections in the new web interface. All incoming and outgoing faxes and SMS messages are still visible in the logged-in area in the section My Telephony → Fax and SMS. With the new web interface, all incoming and outgoing calls are now only displayed in the sipgate app in the respective channels.

#### Voice quality

The new platform offers improved voice quality across all devices (app, desk phone, SIM).

#### Migration and costs

The upgrade from classic to the new platform is free of charge and will be carried out in stages for existing customers. All new customers from August 2025 will start directly on the new platform.

Rest-API

All changes regarding the Rest-API can be found in a separate [article](https://teamhelp.sipgate.co.uk/hc/en-gb/articles/207307715-What-changes-will-the-new-system-bring-to-the-sipgate-REST-API-and-sipgate-io).

#### What has changed in the app?

**Setting the sender number**

The sender number is now stored individually for each channel and no longer needs to be assigned to a phone. The individual channels can be selected in the app's omnibar.

**Muting the sipgate app**

The desktop app can be deactivated as an extension in a channel; this can also be done from the app in the channel settings. Connected external phones are not affected by this setting.

**Displaying call forwarding**

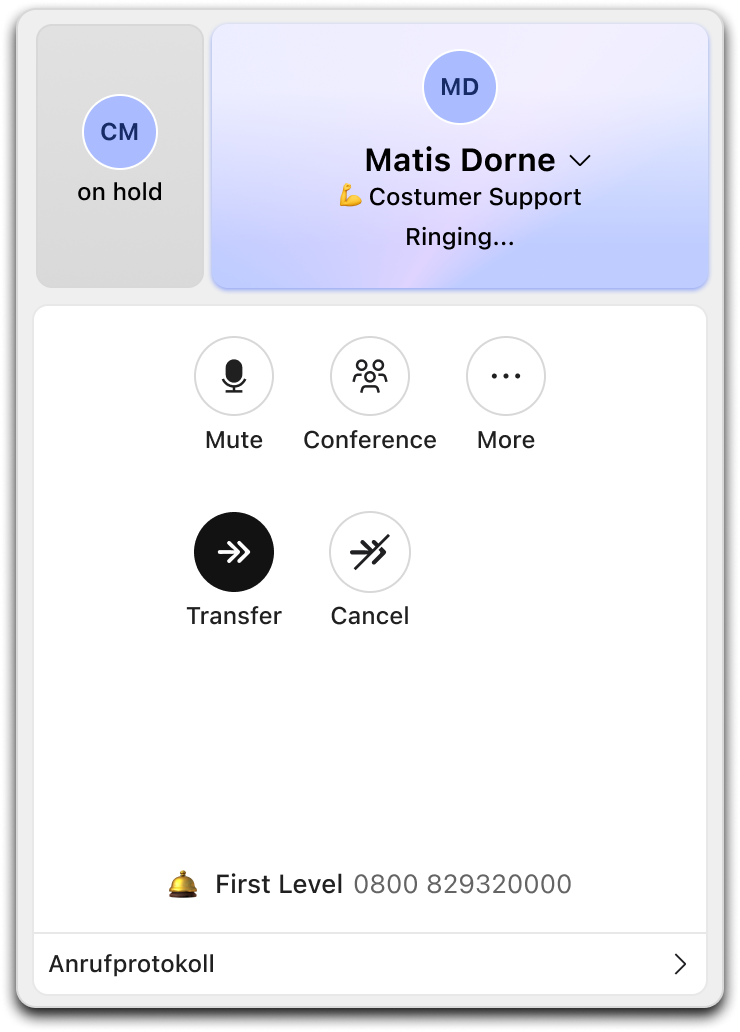
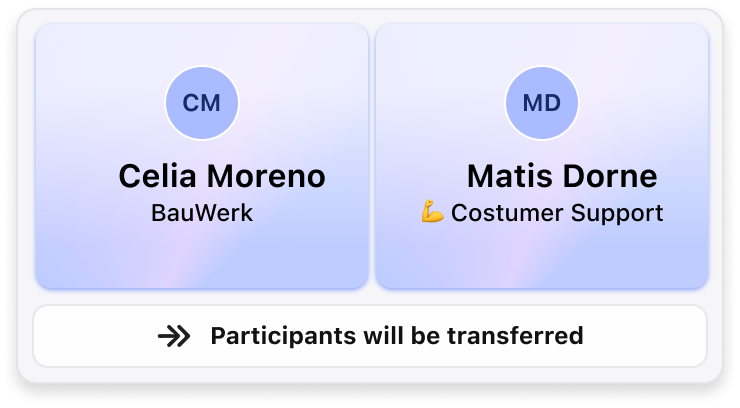
Call forwarding is displayed as an "Call forwarding" event type in the call screen. This shows who the call is being forwarded to. The same applies to a manually initiated transfer.

**DND**

When DND status is set, users remain logged into their channels. The DND setting is applied to all devices.

**Presence**

Users can set their status to "unavailable". They can still be available in shared channels without being reachable via their direct phone number. Logging in and out is done via the sidebar in the app by right-clicking. The status is visible to all members of the account via the app.

**Groups become channels**

Every user has a personal channel. Existing groups are converted into shared channels.

**Voicemails also in the inbox**

Notifications about incoming voicemails are now also visible in the app's inbox.

**Settings**

The app no longer has its own phone list. Availability is determined via the channels. Webhooks are an integral part of the AI functions in the new version. Previous beta testers of Smart Answers must switch to the AI functions.

**30-day storage period for calls also applies to the inbox**

All events in the inbox are stored for 30 days.

**Team contacts**

Team contacts are always called on their personal channel and no longer have multiple numbers. The respective contact is selected via the Omnibar.

**Call logging**

Missed calls in personal channels are logged. Missed calls in shared channels are not logged. There is no logging for call forwarding and voicemails.

**AI for all calls when activated**

If users have activated the AI functions in the app and use a different device for making calls, AI summaries and transcriptions are now also created for this.

**MS Teams integration (in the app)**

MS Teams integration is not yet possible in the new app.

**Mobile app**

sipgate neo users use the satellite app for their mobile connection to their sipgate account.


# Start Code for sipgate & trunking

How the sipgate Start Code works for address verification and account activation for sipgate team and trunking products.

Thank you for choosing sipgate as your telephone service provider.

After **finishing the online sign up** successfully we now require you to **confirm your postal address** before we can activate your account's (team or trunking) telephony.

This step in the sipgate and sipgate trunking product **onboarding** process is very important as it's this address that will be provided to the **emergency services** in case of an emergency call being made from your sipgate account.

A **letter of verification** containing a code (the **Start Code**) is sent to the address entered at sign up for a sipgate account as a form of manual address verification. It is also used as a way to avoid the fraudulent use of our services.

The **Start Code** letter is posted on the next working day after signing up. Generally we are seeing **2 to 3 work days** for delivery to addresses in mainland UK. Addresses outside the UK can take considerably longer.

After receiving the letter, please log into your account and enter the Start Code provided within the letter. Upon entry, **your account's telephony will be immediately activated.**

{% hint style="info" %}
**Important:** Please be aware that as long as your postal address is not verified, your account's telephony will not be made active, therefore neither incoming or outgoing calls can be made.
{% endhint %}


# How do I set up a sipgate account?

Step-by-step guide for setting up a sipgate account, including booking plans, phone numbers, adding users, and configuring devices.

You can only start making calls once you have verified your location. However, beforehand you have the option to add users, book numbers, assign users, and create groups. You can also configure your phones or other devices in advance.

Here you can see an overview of the **Accountmanagement**. This is the starting point from which administrators can perform all configuration steps. When you create a sipgate account, you are automatically assigned the role of administrator.

![](/files/BVjuvMTvSdE40sB3YSXo)

#### **Booking plans & packages**

To continue using sipgate after the trial period (30 days), you need to book a tariff in your account. You can learn [more about sipgate tariffs on this website](https://www.sipgate.co.uk/prices-tariffs). You can switch to a different plan at any time under **Account & Bills** in the **Accountmanagement**. However, since there is no automatic refund for the old plan, it is advisable to change tariffs at the end of a calendar month.

#### **Booking phone numbers**

{% hint style="info" %}
**Important note:** If you want to test sipgate, you have 3 test numbers available during the trial period. These numbers and the account settings will automatically expire after 30 days, so you should book your own numbers by then. You will only be able to make calls once you have verified your account with the start code.
{% endhint %}

* Go to **Accountmanagement** and select **Phone Numbers.**
* Now click on **Book** button in the right corner.

#### **Adding users**

Select the **Users** tile in the **Accountmanagement** section. On the detail page, click the **+ Add User** button to create a new User.

{% hint style="info" %}
**Note:** Once the process is complete, the newly created user will automatically receive an email with their login details.
{% endhint %}

#### **Assigning and adding phone numbers**

Assigning and adding numbers occurs on two interconnected levels:\
1\. Assigning a number to a user\
2\. The user assigns this number to a device

There are two ways to assign numbers to Users: either directly during the user adding process or afterward. If you want to assign a number to a user afterward, first go to **Accountmanagement** and click **Phone Numbers**.

In the overview, you will see all the numbers associated with your sipgate account. Click on **Set Call Destination** next to the number you want to assign to the User and select the appropriate users. Once you click **Save** in routing section, the number will be assigned to the User.

Users can now assign the number to a device themselves. To do this, they click on **My Telephony** in the left navigation menu of their user interface, and then on **Edit** routing in the upper right corner. In their routing diagrams, users can click **+ Add phone number** to assign the phone number to a device.

![](/files/0QZZszZ7mtXaoxjgjxrZ)

However, as an administrator, you can also perform this step for the users. To do this, select the **Users** tile in the account management section.

![](/files/qBZ2mXqk99q8PQ5EkELu)

#### **Additional Devices**

You can use two VoIP phones per user by default. Additional phones can be booked for an extra fee. To add another device, follow these steps:

In the account management section, select the users for whom you want to add a device (VoIP phone or external phone). This will open the user detail view. Click on **Add Device** in the upper right corner.

![](/files/LicDwYWNiHTA82O9CW4J)

A newly added device will appear in your account as a telephony endpoint or interface. However, this interface must still be connected to a desk phone, softphone, or another device to enable actual calling. You can find the configuration instructions for common devices [here](https://teamhelp.sipgate.co.uk/hc/en-gb/articles/20097785564957-How-do-I-set-up-my-VoIP-devices-softphones-and-router-for-VoIP-calls).

![](/files/Fejv4zGCnNRqsJL6flIW)

#### **Additional VoIP Devices**

You have the option to set up phones without assigning them to specific users. These phones can then be assigned to specific locations, for example.

{% hint style="warning" %}
**Note:** These additional VoIP devices do not have an event list.
{% endhint %}

Click on **Additional VoIP devices** in the **Accountmanagement** section, then click on **+ Add VoIP Additional Extension**. You can now enter the name for the new device.

![](/files/XaShhlDsZUOtKqUCr0Bg)

You can find the SIP credentials for configuration by clicking on the newly created extension under **SIP Credentials**.

![](/files/oKvYcS7TVqEtSCGIOxCR)


# How do I set up my VoIP devices, softphones and router for VoIP calls?

How to configure VoIP devices, softphones, and routers for sipgate, including auto-provisioning, general SIP settings, and IPv6 compatibility.

#### How do I configure a VoIP device or softphone?

Every Useraccount comes with a VoIP phone, visible as a telephony endpoint or interface. This interface must now be connected to a desk phone, softphone, or other device to enable calls. Navigate to the appropriate **User** in **Accountmanagement** section via the **User** tile. Click on the device you wish to configure. An info box will open, displaying all the details required for configuration: enter the SIP ID, registrar, and password into your device or softphone to complete the setup and enable calling.\
Users can also configure their devices themselves. In the navigation bar, click on **Telephony** to find the devices and proceed as described above. For more information on adding Users, see the article [**How do i sept up a sigpate account?**](https://teamhelp.sipgate.co.uk/hc/en-gb/articles/20124822422813-How-do-I-set-up-a-sipgate-account)

![](/files/GXbx2TrrlWVuCPgYpVX3)

**Need more detailed setup help?**\
In the info box, click on **Configuration Guides** for instructions on the most common devices and softphones.

**Testing your device**\
After configuration, you can test whether your device is working correctly by dialing the test number 10000. If you can reach this number, your device is set up correctly.

{% hint style="info" %}
**Important:** If you have automatic prefixing enabled, you will not be able to reach the test number 10000.
{% endhint %}

#### Recommended and popular phones

Whether cordless or desk-based, you can choose any VoIP-compatible device to use with sipgate. Here's an overview of popular compatible phones:

* **snom D785**: High-resolution color display, Gigabit switch, and Bluetooth functionality.
* **snom D385**: Reliable business phone with a color display and Bluetooth.
* **Gigaset Maxwell**: Color touchscreen and traditional keyboard for flexible, user-friendly communication.
* **Gigaset Professional Cordless Phones**: Comprehensive features with mobile flexibility.
* **Tiptel 3300**: Premium IP phone with a large color display and 10 function keys.

To connect your VoIP device to your sipgate account, visit our website for configuration guides. Select your device or manufacturer, log in to your account, and enter the provided details into your phone.

#### Plug & Play (Auto-Provisioning) for snom D-Series Phones

Plug & Play, also known as auto-provisioning or remote configuration, allows quick and easy setup of snom DXXX phones. Please note that **Plug & Play** is **not available for VoIP sub-accounts**. If multiple phones are assigned to a user, each phone will appear as a separate account on the device.

{% hint style="info" %}
**Note:** Ensure your snom DXXX device has firmware version 10.x or later.
{% endhint %}

Now log in to your sipgate account as an admin and navigate to **Accountmanagement**. Click Plug & Play.

Add a device by entering the MAC address and the User's name. The MAC address can be found on the packaging, on the underside of the phone, or in the System Information menu on the display.

After connecting the phone, it will download the configuration file and be ready to use. If needed, you can manually adjust the configuration file using the XML editor. To reassign the phone to a different user, click the gear icon in the top-right corner and make the change.

#### General Configuration Details

If your device or softphone isn't listed in the configuration guides, use the following details:

* **Domain/Realm**: sipgate.de
* **SIP Proxy**:
  * UDP: sipgate.de (Port: 5060)
  * TCP: sip.sipgate.de (Port: 5060)
  * TLS: sip.sipgate.de (Port: 5061)
* **Outbound Proxy**:
  * Same as above.
* **Register Expire Time**: 600 seconds
* **Username**: SIP ID of the endpoint (e.g., 1234567e0)
* **Authorization User**: SIP ID of the endpoint (e.g., 1234567e0)
* **SIP Password**: Your SIP password

#### IPv6 Compatibility

Here's a list of IPv6-compatible phones, either tested by us or confirmed by manufacturers

* **snom**: All 7xx and 8xx series devices.
* **AVM**: All FRITZ!Box models with FRITZ!OS firmware version 6.03 or later (e.g., 7270 v2 and newer) support dual-stack (IPv4 and IPv6).
* **Grandstream**: GXP110x, GXP116x, GXP140x, GXP1450, GXP2100, GXP2120, GXP2124, GXP2130, GXP2140, GXP2160.
* **Gigaset Pro Series**: DE900, DE700, DE410, DE310 (IPv6 only; no dual-stack).
* **Asterisk-based solutions**: Devices support IPv6 if the underlying Linux system does.

For additional details, visit our configuration guides or contact our support team.


# How to get started with sipgate – Admin Checklist

Admin checklist for getting started with sipgate, covering phone numbers, users, device setup, and softphone configuration.

As an admin, you can set up sipgate in just a few steps. Here's an overview of the first steps:

#### Book a Phone Number

As soon as you have created your account you are in the 30-day trial period and have access to five test numbers starting with the 056 area code. Afterwards, you can [book one or more phone numbers](https://teamhelp.sipgate.co.uk/hc/en-gb/articles/204123812-Booking-New-Phone-Numbers) for your account. Want to bring existing numbers to sipgate? You can initiate a porting process. Learn everything you need to know about number porting in our article on [Porting Numbers.](https://teamhelp.sipgate.co.uk/hc/en-gb/articles/204128432-How-can-I-port-my-existing-telephone-number-to-sipgate)

{% hint style="info" %}
**Important:** Before you can use a booked or test number to make calls, you must verify your location for legal reasons. You'll receive an email with the necessary steps. If you have questions, contact us.
{% endhint %}

#### Add Users

Want to share sipgate with your team? Then you'll need to add Users. Our article [How do I create and manage Users?](https://teamhelp.sipgate.co.uk/hc/en-gb/articles/204077432-How-do-I-create-and-manage-Users) explains how to do this step by step.

#### Assign/Add Phone Numbers

Assigning or adding phone numbers happens on two connected levels

* Assigning a phone number to a user.
* The user linking the phone number to a device.\
  For full details, check out our article [Assigning Phone Numbers.](https://teamhelp.sipgate.co.uk/hc/en-gb/articles/204212091-Assigning-Phone-or-Extension-Numbers-to-Users)

#### Add VoIP Phones, Mobile Devices, or External Phones

sipgate works seamlessly with VoIP phones. Both admins and users can add devices. To learn how to add and configure phones in your sipgate account, refer to the article [Basic User Settings.](https://teamhelp.sipgate.co.uk/hc/en-gb/articles/204208381-Changing-a-User-s-Email-Personal-Data-and-Login)

#### Configure VoIP Phones

What's the difference between adding a VoIP phone and configuring one? When you add a VoIP phone, you create a telephony endpoint in your routing—or the user's routing—but it still needs to be connected to a desk phone, softphone, or another device to make calls. [Configuring the VoIP phone](https://teamhelp.sipgate.co.uk/hc/en-gb/articles/20097785564957-How-do-I-set-up-my-VoIP-devices-softphones-and-router-for-VoIP-calls) connects it to the endpoint so it can be used.

#### Softphone

The [sipgate App](https://www.sipgate.co.uk/app-download) is preconfigured with your telephony data, making it the quickest way to start your first call. Download it, connect it with your user, and start calling right away.


# How do I set up a porting? - Transferring Phone Numbers to sipgate

How to port your existing UK geographic phone numbers to sipgate, including requirements, timelines, and supported service providers.

You can transfer your existing UK geographic phone numbers (01- or 02-) to sipgate through porting. However, non-geographic numbers (e.g., 03xx, 08xx) and mobile numbers (07xx) cannot be ported to sipgate.

#### Important points

* Your number must remain active with your current provider until the port is complete.
* Porting your number may automatically cancel your existing service. Use our porting form to initiate the process without canceling your contract yourself.

#### Submitting a porting request

* Complete your sipgate account setup, including activating your Start Code.
* Email **<porting@sipgate.co.uk>** with
  * The full number you wish to port
  * Your current service provider
  * Your sipgate account number
* Once sipgate confirms the number can be ported, you'll receive two application forms to complete and sign.
* After submitting the forms, sipgate will handle the port application and update you throughout the process.

{% hint style="info" %}
**Important:** Ensure all details (e.g., customer number and name) match those on file with your current provider to avoid delays.
{% endhint %}

#### Duration of Porting

* A single-line port takes at least 7 business days.
* Multi-line ports require at least 10 business days.\
  sipgate will notify you of the confirmed porting date once your current provider accepts the application.

#### Canceling a porting request

* Ports can be canceled if the completion date is at least seven calendar days away.
* To cancel, email **<porting@sipgate.co.uk>** with your sipgate account number and the affected phone number.

If the porting date is less than seven days away, cancellation is no longer possible.

{% hint style="info" %}
**Note:** Porting is free of charge. However, sipgate starter accounts do not support number porting.
{% endhint %}

#### Which service providers can sipgate port numbers from?

In general, it should be possible to port your UK 01- or 02- phone number to your sipgate account.

{% hint style="info" %}
**Important:** sipgate can not port any non-geographical numbers (03-, 05-, 08- and 09-) and also is not able to port mobile numbers (07-) as well.
{% endhint %}

**We cannot port numbers from:**

* BT Equinox Services
* Nine Telecom
* Vodafone UK Limited - Specific CUPID code 007

**The following is an list of some of the most common service providers sipgate can port geographic UK numbers from:**

* 8x8 UK Limited
* Andrews & Arnold
* AQL/Telepohny Services
* Aquiss
* B4RN
* Barritel Ltd
* Bicom Systems
* BT
* Buzz Networks
* Callagenix Ltd
* Causeway Telecom
* Central Technology Ltd
* Chess LTD
* Circle Loop
* Cloudcall Ltd
* COLT
* Coms.com
* Connexin
* Content Guru
* Core Telecom
* C\&W (Cable & Wireless)
* Daisy Communications (now Shell Energy)
* Dial9
* Digital Space
* DRD Communications Ltd
* DWS
* Easynet
* Eclipse
* Edge Telecom
* EE
* Entranet
* Equiinet/Switch
* Essensys Ltd
* Eurobell (Holdings) Limited
* Excell Group
* Firstcom
* FleXtel
* Fleur Telecoms
* Fulcrum
* Gamma Telecom
* GCI Network Solutions
* Global4
* Global Crossing (UK) Ltd
* Gradwell
* Hello Telecom UK
* Hive Telecom
* Hyperoptic
* IDnet
* i-Net Communications/Telecoms
* iHub
* Inclarity plc
* Invoco
* Invomo
* IP Wholesale LTD
* John Lewis
* Kalnet4U (Tamar)
* KCOM (Affiniti)
* Kinex
* Level 3
* Liquid 11
* Localphone
* Magrathea Telecommunications
* MDNX Enterprise Services Ltd
* Metronet UK
* Microtalk
* Mintaka
* Net Solutions Europe
* Net-Work Internet
* Network Services Ltd
* Nexbridge
* NFON UK
* Node4
* Nodemax
* NowTV
* NSN
* Numbergroup Network
* Numbers Plus
* One Bill
* Orange
* Orbital
* OrbTalk
* Origin
* Post Office
* PlusNet
* Phone Co-Op
* Pulse8
* Radius Communications
* Rainbow Telecoms
* Red Matter (Natterbox)
* Redcentric
* Resilient PLC
* RingCentral
* Simwood
* Six Degrees
* Shell Energy
* Sky
* Skype
* Soho66
* Spitfire
* SSE
* Suretec
* Swiftnet
* Syntec
* TalkTalk
* Telappliant
* Telecom2 Ltd
* Telephony Services
* Teleware
* Telserve
* TelXL
* Timico
* Tipicall
* Thus Plc
* Twilio
* Unicom
* UNO
* Utility Warehouse
* Verizon UK Ltd
* Virgin Media
* Vodafone
* Voiceflex
* Voicehost
* VOIP Unlimited
* VoIPfone
* VoIPstudio
* VoIPtalk
* Vonage
* Voneus
* Voxbone SA
* Wavecrest
* West
* Wightfibre
* Xinix
* XLN
* X-On (Storacall)
* Yay Ltd
* Your Communications
* Zen Internet

{% hint style="warning" %}
**Hint:** How to port a phone number to sipgate [can be found in this article](https://teamhelp.sipgate.co.uk/hc/en-gb/articles/204128432-Porting-my-existing-telephone-number-to-sipgate).
{% endhint %}

#### How long will it take to port my phone number?

A single line number port will take at least **7 business days** and a multi-line port will take at least **10 business days** to complete from the application date.

* sipgate will submit the application to port your telephone number within **1 working day** of receiving the porting application fee and your completed, hand-signed porting application forms.
* Your current service provider should respond to your porting application within **1 working day**. When your current service provider accepts your porting application they'll confirm the port completion date which will then be communicated back to you by sipgate by email.
* For a Single Line port, the port completion date will be **at least 5 business days** later. The time required for Multi-Line porting applications is longer and depend on your current service provider.
* New porting applications are processed and also complete Mondays to Fridays only. No port request will be processed or can complete on weekends or public holidays.

BT have the following time-scales for completing a number port (This is to be understood as a guideline only):

* Single line – **5 to 7 working days**
* Multi-line (greater than 10 lines porting at same time) – **17 working days**
* PBX 10 lines or less – **10 working days**
* PBX 11 lines or greater (or Centrex site) – **20 working days**
* ISDN 10 lines or less – **10 working days**
* ISDN 11 lines or greater – **20 working days**

{% hint style="info" %}
**Note:** With a sipgate starter account you cannot port numbers to sipgate.
{% endhint %}


# What are the basic User settings?

Overview of basic sipgate user settings including number assignment, device setup, VoIP configuration, and language preferences.

{% stepper %}
{% step %}

#### Assigning Numbers

As a user, you cannot book phone numbers yourself, but you can use numbers assigned to you by your admin in your personal call routing. Simply put: you can decide which number rings on which device, set up call forwarding, and manage your voicemail. To get started, click on **Telephony** in the navigation menu on the left. This opens your personal routing diagram. By default, you'll see all numbers and extensions assigned to you by your admin. Under **Edit Routing**, you can customize your numbers and call forwarding scenarios.
{% endstep %}

{% step %}

#### Adding a VoIP Phone, Mobile Device, or External Phone

To add a device, go to **Telephony** and click **Add Device** in the top-right corner. You can set up VoIP phones, mobile devices, or external phones.
{% endstep %}

{% step %}

#### Configuring a VoIP Phone

What's the difference between **adding** a VoIP phone and **configuring** one? When you add a VoIP phone (as described in step 2), you create a telephony endpoint in your routing. However, this endpoint still needs to be connected to your desk phone, softphone, or another device for it to function. This connection is made during the configuration step. To configure your VoIP phone, click **Edit Routing** and select the device you want to configure. A pop-up box will appear with all the information you need for setup. Click the arrow next to your **SIP-ID**, which will take you to detailed configuration guides on our website.
{% endstep %}

{% step %}

#### Activating a Mobile Device

If you've added a mobile device (as in step 2), it needs to be activated with a SIM card or eSIM to work. Simply follow the steps in the setup dialog. If you want to use the device for mobile data, click on **Mobile Network** in the left-hand navigation menu and follow the instructions provided.
{% endstep %}

{% step %}

#### The sipgate App

The sipgate app is pre-configured with your telephony data, making it the fastest way to get started. Download the app, log in, and start making calls right away.
{% endstep %}

{% step %}

#### Changing the User Interface Language

To change the language of your user interface to English, navigate to **My Telephony** and click **User Settings** in the left-hand menu. Under **Language**, click **Change** and select your preferred language.
{% endstep %}
{% endstepper %}

![](/files/KHaKZPflJGTKXp6BNTql)


# Letter of Authorisation: Porting your number to sipgate

How to fill out the Letter of Authorisation (LOA) required for porting your phone number to sipgate.

sipgate requires a **fully completed and hand-signed Letter of Authorisation (LOA)** as well as the Customer Port Details to submit your number porting application. You can simply send a scanned copy or a clear photo of the signed document via email.

{% file src="/files/it69MGxJfMQommcVVoCq" %}

{% file src="/files/kcABPaVlTiCyUCHac0yb" %}

{% hint style="info" %}
**Note:** The LOA is a standardised industry document used for both residential and business porting applications.
{% endhint %}

## Filling out the Letter of Authorisation

### 1st "Box"

**To field:** Already filled out, no need for any entries here.\
**From field:** please enter your Current Service Provider's name and address.

### 2nd "Box" - Customer Details section

**Company/Customer Name** enter either your company or your name dependent upon what is showing on the last bill received from your current service provider.\
**Company's / Customer's Registered Address** enter either your company's or your address\
**Company's / Customer's Registered Number** For business customers, please enter your company registration number (CRN). Residential customers and Sole Traders may leave this field blank.

### 3rd "Box" - Requester Details.

This is to be filled out by the person who is requesting the port to be processed, this can be different to the Customer details section, if the information is the same, please still enter it in both sections.\
**Name** Enter the name of the person who's requesting the port\
**Job Title** Please enter if a business request, Residential customers and Sole Traders may leave this field blank or enter a N/A etc.

**Contact Details** a contact email address or phone number will suffice here

### 4th "Box" - Site Address and Telephone numbers to be ported

**Site address** This is the address which your provider has registered on their system as to where your number is installed. The **Site, Installation or Emergency** address may differ from your Billing or even postal address. Hint: We often find ports being rejected due to the Site address bring incorrect and as such always suggest to contact your current provider and clarify the installation/Site address they have on their systems for your number.\
Regardless of service type all UK geographic numbers have an associated Site or Installation address. This is also true for VoIP numbers, though the "name" can very (site address, installation address, Emergency address etc)\
**Telephone number to be ported** Please enter the number or numbers which are to be ported, please enter the "full" number including area code.\
**And finally, and most important**\
The current service providers account holder must **hand sign** the Letter of Authorisation (a digital signature won't suffice).\
As mentioned above, an email copy of the hand signed LOA is all that is required from our side, this could be scanned copy of the original LOA or even a photo of the original, and then emailed back to us. There is no need to send the originals back to us in the post.

**Notes:**

Even if the Customer/Account holder is requesting the port, **both** the Requester Details and Customer Details fields must be completed.

Cases where the Customer and Requester details may differ:

* You're making the application on behalf of your company or employer;
* You, the Requester, are the owner of the sipgate basic account the number is being ported to, but not the account holder / Customer with the porting number's current service provider.


# Configuration guides


# How do I configure my devices for use with sipgate?

Overview of all available VoIP devices and softphones compatible with sipgate, including setup instructions and general SIP configuration settings.

We recommend our sipgate app for Windows, MacOS, and Linux, which provides you with a range of integrations. In the following article, you will find an overview of all available devices, as well as instructions for linking them with your sipgate account. Simply select your VoIP phone, log in to your sipgate account, and enter the configured data into your phone.

#### Manufacturers and systems:

|                                               |
| --------------------------------------------- |
| [**Android Softphones**](#android-softphones) |
| [**AVM**](#avm)                               |
| [**Cisco**](#cisco)                           |
| [**Fanvil**](#fanvil)                         |
| [**Gigaset**](#gigaset)                       |
| [**Grandstream**](#grandstream)               |
| [**iOS Softphones**](#ios-softphones)         |
| [**Mac Softphones**](#mac-softphones)         |
| [**snom**](#snom)                             |
| [**Swissvoice**](#swissvoice)                 |
| [**Tiptel**](#tiptel)                         |
| [**Windows Softphones**](#windows-softphones) |
| [**Yealink**](#yealink)                       |

#### Android Softphones

* [CSipSimple](https://app.sipgate.com/team/faq/setup/index/id/180)
* [Linphone](https://app.sipgate.com/team/faq/setup/index/id/207)
* [MizuDroid](https://app.sipgate.com/team/faq/setup/index/id/278)
* [Zoiper](https://app.sipgate.com/team/faq/setup/index/id/204)
* [Acrobits Groundwire / Softphone](https://app.sipgate.com/w0/team/faq/setup/index/id/185)

***

#### AVM

* [Fritz!Box 7530 AX](https://app.sipgate.com/team/faq/setup/index/id/247) (FRITZ!OS 7.50 - new menu)
* [Fritz!Box 7490](https://app.sipgate.com/team/faq/setup/index/id/205) (FRITZ!OS 07.29 - old menu)

***

#### Cisco

* [SPA112](https://app.sipgate.com/team/faq/setup/index/id/139)
* [SPA122](https://app.sipgate.com/team/faq/setup/index/id/139)
* [SPA504G](https://app.sipgate.com/team/faq/setup/index/id/138)
* [Cisco 68xx,78xx und 88xx](https://app.sipgate.com/team/faq/setup/index/id/244)
* [CP-7843](https://app.sipgate.com/team/faq/setup/index/id/244)

***

#### Fanvil

* [Fanvil V65](https://app.sipgate.com/w0/team/faq/setup/index/id/309)

***

#### Gigaset

* [DE IP Pro-Serie](https://app.sipgate.com/team/faq/setup/index/id/156)
* [GO-Serie](https://app.sipgate.com/team/faq/setup/index/id/130)
* [Maxwell 10](https://app.sipgate.com/team/faq/setup/index/id/239)
* [Maxwell 3 Pro-Basic](https://app.sipgate.com/team/faq/setup/index/id/123)
* [N510 IP Pro](https://app.sipgate.com/team/faq/setup/index/id/130)
* [Gigaset N870 IP PRO](https://app.sipgate.com/w0/team/faq/setup/index/id/322)

***

#### Grandstream

* [GXP-1630](https://app.sipgate.com/team/faq/setup/index/id/117)
* [GXP-2160](https://app.sipgate.com/team/faq/setup/index/id/117) / [GXP-2170](https://app.sipgate.com/team/faq/setup/index/id/117)
* [GXP-2200](https://app.sipgate.com/team/faq/setup/index/id/151)
* [GXV-3140](https://app.sipgate.com/team/faq/setup/index/id/151)
* [GXV-3240](https://app.sipgate.com/team/faq/setup/index/id/151)
* [HT812](https://app.sipgate.com/team/faq/setup/index/id/188)
* [HT813](https://app.sipgate.com/team/faq/setup/index/id/188)
* [HT814](https://app.sipgate.com/team/faq/setup/index/id/188)

***

#### iOS Softphones

* [Acrobits](https://app.sipgate.com/team/faq/setup/index/id/323)
* [Linphone](https://app.sipgate.com/team/faq/setup/index/id/256)
* [Zoiper](https://app.sipgate.com/team/faq/setup/index/id/164)

***

#### Mac Softphones

* [Linphone](https://app.sipgate.com/team/faq/setup/index/id/263)
* [Telefon](https://app.sipgate.com/team/faq/setup/index/id/126)
* [X-Lite / Bria 5](https://app.sipgate.com/team/faq/setup/index/id/194)
* [Zoiper](https://app.sipgate.com/team/faq/setup/index/id/281)
* [Bria Solo](https://app.sipgate.com/w0/team/faq/setup/index/id/293)

***

#### Snom

* [D300er Serie](https://app.sipgate.com/team/faq/setup/index/id/168) (FW version 8.x)
* [D700er Serie](https://app.sipgate.com/team/faq/setup/index/id/168) (FW version 8.x)
* [D800er Serie](https://app.sipgate.com/team/faq/setup/index/id/168) (FW version 8.x)
* [M300](https://app.sipgate.com/team/faq/setup/index/id/214)
* [M325](https://app.sipgate.com/team/faq/setup/index/id/214)
* [M700](https://app.sipgate.com/team/faq/setup/index/id/214)
* [C520 WiMi](https://app.sipgate.com/team/faq/setup/index/id/48) (Conference phone)
* [D-Serie](https://app.sipgate.com/team/faq/setup/index/id/200) (FW version 10.x)
* [D800-Serie](https://app.sipgate.com/team/faq/setup/index/id/111) (FW version 10.x -new menu)

***

#### Swissvoice

* [CP2501](https://app.sipgate.com/w0/team/faq/setup/index/id/7)

***

#### Tiptel

* [3120](https://app.sipgate.com/team/faq/setup/index/id/245)

***

#### Windows Softphones

* [X-Lite / Bria 5](https://app.sipgate.com/team/faq/setup/index/id/158)
* [Linphone](https://app.sipgate.com/team/faq/setup/index/id/40)
* [Phoner](https://app.sipgate.com/team/faq/setup/index/id/61)
* [Phoner Lite](https://app.sipgate.com/team/faq/setup/index/id/41)
* [Zoiper 5](https://app.sipgate.com/team/faq/setup/index/id/284)
* [Bria Solo](https://app.sipgate.com/w0/team/faq/setup/index/id/153)

***

#### Yealink

* [T41P](https://app.sipgate.com/team/faq/setup/index/id/213)
* [T46G](https://app.sipgate.com/team/faq/setup/index/id/213)
* [T48G](https://app.sipgate.com/team/faq/setup/index/id/213)

#### General configuration settings for your devices

Unfortunately, we can't provide instructions for every device or softphone available on the market. The general settings to use with any SIP compliant VoIP phone or device are:

* Domain/Realm: sipgate.co.uk
* SIP Proxy: sipgate.co.uk
* Outbound Proxy: sipgate.co.uk
* Register Expire Time: 600 Seconds
* Username: your SIPID
* Authorisation your SIPID
* SIP-Password: your SIP Password
* DTMF Method: RFC2833
* STUN-Server: stun.sipgate.net
* STUN-Port: 3478

Please first test without the STUN server included in your settings. You'll find your **SIP-ID** and **SIP Password** in your sipgate account as follows:

* If not already in your personal settings, click on **Personal Settings**.
* Hover over the device icon towards the top of the main screen and click.
* In the window you will find your SIP-ID, SIP Password and the Registrar.
* You will also find any option to take you to our set up guides.
* You will also find your SIP-ID and SIP Password at the bottom of the page.


# SNOM Phone responds slowly after auto-provisioning

How to fix slow Snom phone response after auto-provisioning by adjusting the contact synchronization interval.

If Snom phones have been auto-provisioned and contact synchronization is also enabled, the phone may respond very slowly or not at all to commands. This is usually caused by an excessive number of contacts being regularly synchronized.

To resolve this issue, increase the synchronization interval for contacts:

1. Log in to the Snom web interface.
2. Navigate to: **Identity -> Features -> Phone Download Interval**.
3. Adjust the interval settings. The maximum interval is 1,209,600 seconds (14 days).

{% hint style="info" %}
**Note:** Setting the interval to 0 will disable automatic synchronization. The phone will only sync upon reboot. Alternatively, you can schedule synchronization at a specific time. For example, to synchronize daily at 11:00 PM, use the following settings:

on abs 23:00

\<prov\_polling\_enabled perm="RW">on

\</prov\_polling\_enabled>

\<prov\_polling\_mode perm="RW">abs

\</prov\_polling\_mode>

\<prov\_polling\_time perm="RW">23:00\</prov\_polling\_time>
{% endhint %}

For further details, refer to the [Snom Help Center](https://service.snom.com/display/wiki/tbook_download_interval).


# How to configure signal encryption via TLS

Guide to setting up TLS signal encryption and SRTP media encryption for sipgate VoIP devices, including known device exceptions.

Transport Layer Security (TLS) is a security protocol used for encrypted data transmission over the Internet. It is the successor to SSL and ensures that third parties cannot easily access your SIP data. Currently, TCP/TLS connections are only available via IPv4 and not IPv6.

To set up TLS on your phone, router, or VoIP app, follow these steps

**-> Registrar/Domain:** Enter sipgate.co.uk

**-> Proxy/Outbound Proxy:** Enter sip.sipgate.co.uk

**-> Change Protocol:** On some devices, you may need to switch the signaling protocol from UDP to TLS.

#### Encrypting media data (SRTP)

With encrypted signaling, we also require voice data to be encrypted. Depending on your device, encryption may be enabled automatically. If manual configuration is needed, set **SRTP** in your device settings. If this setting is incorrect, calls will fail with the error **488 Not Acceptable Here**.

#### Exceptions

The following devices do not support TLS configuration

* **Speedport W7XX & W9XX**: No second server or TLS settings available.
* **Speedport Hybrid**: No second server or TLS settings available.
* **Speedport Pro**: No second server or TLS settings available.
* **Fritz!Box**: Requires at least firmware version 7.23 to enable TLS.
* **Zoiper Android**: Fails TLS registration with SIP 408 Timeout.


# How to configure the BLF function for Grandstream Phones

Step-by-step instructions for configuring the BLF (Busy Lamp Field) function on Grandstream GXP 2110, 2120, 2020, and 2124 IP phones with sipgate.

We have tested the BLF function with the following Grandstream models:

* GXP 2110 and GXP 2120
* GXP 2020
* GXP 2124

Please note that this feature is only available if you have subscribed to the sipgate business L or XL plan.

### GXP 2110 and GXP 2120

**Important:** The Pickup function (call pickup) via the BLF speed dial key is not available with these models.

#### Login

To access the Grandstream phone's configuration interface, first, find the phone's IP address.\
For most Grandstream models, the IP address is displayed directly on the screen. If not, press the **Menu** button, then select **Status -> Network Status -> IP** to view the assigned IP address (e.g., 192.168.0.5).

#### Create User for BLF

Enter the IP address in your browser's address bar to open the phone's configuration interface. If you received the GXP 2110/2120 unconfigured, the default password is **admin**. Go to **Settings -> Programmable Keys** in the menu.

![](/files/3AR07UbeyBP9w1xepDnE)

Here, enter the following data:

* **Key Mode:** Select **Busy Lamp Field (BLF)**
* **Account:** Select your sipgate account (e.g., Account 1)
* **Description:** Enter the name of the user
* **Value:** Enter the user's extension (e.g., "42" to monitor the status of extension 42)

Click **Save and Apply**. Often, the settings will only take effect after a reboot (click **Restart** in the top right corner).

### GXP 2020

#### Display IP Address

Ensure DHCP is enabled on your router. Most routers have DHCP enabled by default. Connect the Grandstream phone to the router via Ethernet, and the phone will receive an IP address. In most cases, the IP address will be displayed on the phone's screen.

If not, press the **Menu** button and select **Config -> Network -> IP** to view the current IP address. If it shows 0.0.0.0, check step 1 and restart both the router and the phone.

Enter the IP address (e.g., "192.168.1.100") in your browser to access the web configuration menu of the Grandstream phone.

#### Create User for BLF

Go to **Basic Settings** in the menu and enter the following data:

* **Key Mode:** Select **Busy Lamp Field (BLF)**
* **Account:** Select your sipgate account (e.g., Account 1)
* **Name:** Enter the user's name
* **UserID:** Enter the user's extension (e.g., "42" to monitor extension 42)

Click **Update** to save the settings. To enable the Pickup function, go to **Account 1 -> SIP Settings -> Advanced Features** and configure the Pickup function as shown in the image.

![](/files/sUbqVDYLFQpf4xrma5PK)

Click **Update** again and reboot the phone.

### GXP 2124

#### Login

To access the phone's configuration interface, find the assigned IP address as explained earlier (via **Menu -> Status -> Network Status**).

Enter the IP address in your browser to open the configuration interface. If the phone is unconfigured, the default password is **admin**.

#### Create User for BLF

Go to **Settings -> Programmable Keys** and enter the following data:

* **Key Mode:** Select **Busy Lamp Field (BLF)**
* **Account:** Select your sipgate account (e.g., Account 1)
* **Description:** Enter the user's name
* **Value:** Enter the user's extension (e.g., "42" to monitor extension 42)

![](https://teamhelp.sipgate.co.uk/hc/en-gb/article_attachments/201875862/BLF_MPK_GXP2020.jpg)

Click **Save and Apply**.

#### Enable Pickup Function

To use the Pickup function via the BLF key, go to **Accounts -> Account 1 -> SIP Settings -> Advanced Features** and configure the Pickup function as shown in the image.

Click **Save and Apply**. After configuration, reboot the phone to apply the settings.

For further assistance, refer to the sipgate Help Center.


# How to configure the BLF function with Yealink IP Phones

How to set up the BLF (Busy Lamp Field) presence function on Yealink T26P, T28P, and T46G IP phones with sipgate team.

{% hint style="info" %}
**Note:** Before your can use Presence/BLF, an account Administrator must first book the tariff **sipgate business L** or **sipgate business XL.**
{% endhint %}

This guide describes the setup of sipgate team Presence (BLF) with Yealink **T26P, T28P** and **T46G** phones. Yealink **T20P** and **T22P** don't have BLF functionality. Using the instructions in your device manual, please login to the Web Configuration Menu of your Yealink.

Tap the **ok button** on your Yealink phone to display the IP address of your phone. The IP address looks like this, for example: 192.168.0.1

#### Add User for the BLF

Enter the IP address in the address bar of your browser. You will now see the configuration interface of your telephone. Use the menu to switch to the Dsskey -> Line key 1-11 area. You can now enter the data as shown below in the following window.

![](/files/qcl8vo4A0r7zqR8IoJ81)

Please click on **DSSKey** and then choose the **Line Keys** option in the lefthand sidebar.

* **Type**: select BLF;
* **Value**: Enter your colleagues' extensions, e.g. use 42 to see the status of the user with extension 42;
* **Line**: choose the Line you've setup with your sipgate team account;
* **Extension:** please enter a meaningful value e.g. your colleague's name.

To make sure your changes take effect, please click **Confirm**.


# How to configure the BLF with Gigaset

How to configure the BLF (Busy Lamp Field) function on the Gigaset Maxwell 10 phone with sipgate business L or XL.

These instructions apply to Gigaset Maxwell 10 phones.

Please note that this function is only available if you have booked the **sipgate business L or XL** tariff.

#### Displaying the IP address of the phone

Please ensure that DHCP is activated in your router. DHCP is activated by default on most routers. First connect the Gigaset Maxwell 10 to your router. The phone is automatically assigned an IP address by the router. Open **Settings** -> **Wireless & networks** -> **Ethernet configuration** on the phone.

The current IP address is displayed. If 0.0.0.0 is displayed, please check point 1 and restart the router and phone. If the IP address is an individual IP adress, e.g. "192.168.001.100, please enter "<http://192.168.1.100>" in your browser without leading zeros. You will now be taken to the Maxwell 10 web configuration menu.

#### Create a user for the BLF:

In the web configuration menu of the Gigaset Maxwell 10, switch to the **Settings** tab , then in the menu on the left-hand side go to the **Function keys** area . Under **Programmable keys**, you can now enter the data as shown below. You can create these beforehand using the **Add** button. Aferwards, you can simply edit the programmable buttons (PK1 to PK14) using the **Edit** button.

![](/files/MLS59Iepd5ZFJX0erHuC)

Select **BLF** in the **Function** field. Then select your own sipgate account in the **Connection name** field. Enter the name of the user in the **Name** field. Enter the employee's internal extension number in the **Number** field. For example, enter 42 to see the status of the user with the extension 42. Enter \*9 in the **Code for call pickup** field so that you can also use the pickup function via the programmable keys. Confirm your entries by clicking on **Save**.


# How to configure the BLF with Tiptel

How to configure BLF (Busy Lamp Field) keys on Tiptel IP phones with sipgate, including prerequisites, setup steps, and status indicators.

#### Prerequisites

Before programming the Busy Lamp Field (BLF) keys, ensure the following:

Assign internal extensions to all users in your sipgate account via the web interface. These internal sipgate numbers are required to configure the BLF keys. The Tiptel IP phone must be registered with sipgate.

#### Configuration Steps

1. Log in to the Tiptel web interface and navigate to **Keys -> Function Keys**.
2. Configure the desired keys with the following settings:
   * **Key Type:** Set to "Busy Lamp Field (BLF)".
   * **Label Text:** Choose a custom label for the key.
   * **Parameter 1:** Enter the internal sipgate extension, e.g., 10
   * **Account:** Select the corresponding sipgate account.
   * **Parameter 2:** Enter the sipgate pickup code: \*9+extension. For example, for extension 10, enter \*910.

### Example

In this setup, extensions 10, 11 and 12 are assigned as BLF keys:

* BLF Key 1: Parameter 1 = 10, Parameter 2 = \*910
* BLF Key 2: Parameter 1 = 11, Parameter 2 = \*911
* BLF Key 3: Parameter 1 = 12, Parameter 2 = \*912

### Understanding the Status

* **Green Light:** The extension is free.
* **Blinking Red Light:** The extension is receiving a call.
* **Solid Red Light:** The extension is on a call.

For more information, refer to the sipgate Help Center.


# How do I configure BLF with Snom IP Phones

How to configure BLF (Busy Lamp Field) presence monitoring on Snom 300, 320, 360, 370, 710, 715, 720, 820, and 870 IP phones with sipgate.

{% hint style="info" %}
**Note:** Before your can use Presence/BLF, an account Administrator must first book the **ipgate business L oder XL tarriff** in your sipgate account settings.
{% endhint %}

{% hint style="info" %}
This guide describes the setup of sipgate Presence (BLF) with: Snom 300, 320, 360, 370, 710, 715, 720, 820 and 870 IP Phones. Using the instructions in your device manual, please login to the Web Configuration Menu of your Snom.
{% endhint %}

On the left side of your Snom's Configuration Menu, under **Setup** select **Function Keys**.

* **Context**: please select your sipgate account;
* **Type**: select **Extension**; (Firmware Version 6: the Key Type Extension is called Destination)
* **Number**: enter \<sip:**Extension**@sipgate.co.uk> e.g. use \<sip:**42**@sipgate.co.uk>to see the status of the team User with extension number 42.

![](/files/SKVOOO8ySUmU2EHodrH8)

Select your own sipgate account from the list in the left-hand column.\
In the centre column, select **Extension**.\
Enter '\<sip:<EXTENSION@sipgate.co.uk>>' in the field in the **Number column**. For example, enter '\<sip:<42@sipgate.co.uk>>' to see the status of the user with extension 42.\
Confirm your entries by clicking on **Apply**.


# Grandstream VoIP adapter configuration

Links to personalized VoIP configuration guides for Grandstream HandyTone adapter models including HT502, HT701, HT702, HT704, and HT812.

To access a personalized VoIP configuration guide with your specific SIP credentials, select your Grandstream model below:

* [HandyTone 502 (HT502 / HT-502)](https://app.sipgate.com/team/faq/setup/index/id/143)
* [HandyTone 701 (HT701 / HT-701)](https://app.sipgate.com/team/faq/setup/index/id/143)
* [HandyTone 702 (HT702 / HT-702)](https://app.sipgate.com/team/faq/setup/index/id/143)
* [HandyTone 704 (HT704 / HT-704)](https://app.sipgate.com/team/faq/setup/index/id/143)
* [HandyTone 812 (HT812 / HT813 / HT814)](https://app.sipgate.com/team/faq/setup/index/id/188)

For detailed instructions, refer to the configuration guide for your specific model.


# BLF with Cisco SPA525 IP Phone

How to set up BLF (Busy Lamp Field) presence monitoring on the Cisco SPA525G IP phone with sipgate team.

{% hint style="info" %}
**Note:** Before your can use Presence/BLF, an account Administrator must first book the **business L** or **business XL** tariff.
{% endhint %}

This guide describes the setup of sipgate team Presence (BLF) with **Cisco SPA525G** phones. Using the instructions in your device manual, please login to the Web Configuration Menu of your Cisco SPA Deskphone.

Open the **Phone Menu** and for the **Line key** to be used for BLF please use:

* **Extension**: Disabled
* **Shared Call Appearance**: Shared
* **Short Name**: please use a meaningful name e.g. the extension number or name of the sipgate team User;
* **Extended Function**: To setup BLF to monitor the extension 123 please use: fnc=blf;sub=<123@sipgate.co.uk>;

![](/files/QamC0yhU1sS4gYusdBea)

Next, please open the **Att Console**:

* Set the **Server Type** to **Asterisk**
* **Attendant Console Pickup Code: \*9**

![](/files/Iw9Bz5g3zXPTc4nPMtIN)


# Softphone Debug Logs

Instructions for collecting debug logs from various softphones including PhonerLite, Zoiper, Bria, X-Lite, Acrobits, and others for troubleshooting.

If you're having trouble using your softphone, the contents of its Debug logs may contain useful troubleshooting information.

#### PhonerLite

Close and re-open PhonerLite. After PhonerLite has restarted, open the Help menu and click on Debug

After replicating the problem at least twice:

* Open the Debug tab;
* Highlight the Debug tab's contents;
* Copy and paste the contents into a text file.

#### Zoiper

Windows, Mac & Linux OS:

* Open Help --> Enable debug log and click Yes to enable debugging.
* Try to replicate the problem.
* Re-open Help and click on Show Log Dialog.
* Disable Debug Log under Help

#### Bria

Android: Under Advanced Settings a Log can be sent to Counterpath support.

Desktop: Under Help --> Troubleshooting --> Diagnostics --> Advanced Logging choose a problem related to phone calls and audio and click Start Advanced Logging. The log will be saved to your computer.

#### X-Lite

Under Help --> Troubleshooting --> Support set the Logging Level to verbose and then click View Log

#### Acrobits (Android)

Under Settings --> Edit Program Settings --> Preferences enable Log Network Traffic.

Tap back to the Settings menu.

Under Information there will be a new Logs option.

#### Media-5fone

In Media5-fone's settings open the SIP Traces menu.

#### CSIP Simple

The steps to enable logging with CSIP Simple are described at: <https://sourceforge.net/p/csipsimple/wiki/HowToCollectLogs/>

#### Grandstream Wave

Under Settings --> Debug tap on SIP Message Trace to start recording SIP messages.

#### Telephone For Mac

Enabling debug information with Telephone (tlphn):

<http://www.64characters.com/telephone/faq/>


# Telephony


# How can I use sipgate in combination with starlink?

How to use sipgate VoIP telephony with Starlink internet, including tips for stable connections and bypass mode.

Some customers use Starlink as their internet provider when abroad. There are a few things to keep in mind when using sipgate in combination with Starlink:

In general, sipgate telephony via Starlink works without any problems with the standard Starlink router or the built-in Wi-Fi router, the Starlink Mini. It does not matter whether you use a business or private tariff. Connections can also be established with IPV6. When setting up, please ensure that the antenna is not blocked by any obstacles (such as branches or canopies) above it.

However, you should note the following for Starlink's private customer plan:\
The configuration offers the option of activating a bypass mode. This mode should be used if you want to use your own router and bypass the Starlink router. This gives your own router a public IP address, which avoids double NAT and thus improves the connection via VoIP.

VoIP calls work best when your Starlink connection is stable and error-free. You can easily check your connection via the Starlink app under the OUTAGES section. Short outages in the range of 0.1 to 2 seconds (first tab) are usually not a problem for real-time applications. However, longer outages of 2 seconds or more (second tab) can be critical, as calls may be briefly interrupted or completely dropped. If calls are sporadically unavailable, switching the protocol to TCP can provide a more stable connection.


# How do I select or suppress my caller ID?

How to select, change, or suppress your outgoing caller ID in your sipgate account settings.

In your sipgate account you can select, which phone number you wish to transmit when you start a call. **No sender number** is set by default. You can select a mobile number or a landline number, for example the number of your central office.

As Admin click the user you wish to configure. In the routing settings click **Edit** and then click on the device. Here go to **Device settings** and add the preferred **Caller ID**.

In the **displayed number** field, you can set an already assigned number as the sender ID or suppress the sender number. If you display the sender number by default, you can also **suppress it for individual calls** by pressing the key combination \*31# before the actual number.

Your original, incoming telephone number is visible to the police, emergency services, call centers and prosecuting authorities at all times. **Misuse of this service is punishable by law.**\
A function called **Clip no Screening** is used to transmit sender numbers that are not assigned to your account. As not all networks and providers support this, we cannot guarantee that the desired number will always be displayed at the destination, especially when calling abroad.\
If an **international number** is set as the sender ID, calls or faxes to special numbers such as 0800 are sometimes not possible. Some providers of special numbers only allow calls from local and mobile numbers.

**Note:** The sender number set here is not automatically transferred to the sipgate app. As user, you must set your sender number again in you app settings.


# How do I set up a central phone number?

How to set up a central phone number with groups, time profiles, and public holiday forwarding in sipgate.

{% hint style="info" %}
**Note:** This feature works differently in sipgate neo, so this article does not apply.
{% endhint %}

Most of our customers have a central telephone number that receives all incoming calls. This number is usually published in the telephone directory, on the Internet or on business cards - an in most cases this number is connected with the reception, the switchboard or the front desk.

In all sipgate tariffs, the central telephone number can be set up easily via a **group with time profiles**. This allows you to remain flexible if requirements change - for example over the holidays, company vacations or simply during your lunch break.

For example, if your central number is connected with your front desk and your co-worker is absent for a certain period of time, you can set up a forwarding to another user or to a voicemail.

#### Time-Based routing for Groups

First of all, you need to **set up a group** with an individual number of users an connect this group with your central phone number. In our example, we call this group "reception".

In the second step, please switch to the **group-routing** of the group "reception". Here, click "edit". Now you can set up the forwarding rules, either to a **voicemail** or to **another phone number**.

If you have opted for forwarding to a voicemail, you can now select an individual greeting. You have the option of creating several individual greetings in which you can, for example, draw attention to your opening hours and/or company vacations. You can also record these individual messages directly on your telephone.

Two time profiles are available to you. With the different profiles, you can set additional options within the routing so that **different redirects take effect at certain times**. For example, you can schedule your opening hours and lunch breaks. You can also set up two different voicemails. In the first voicemail, for example, you could activate the answering machine function to answer incoming calls. In the second voicemail, you can record a message in which you draw attention to the opening hours. It is also possible to **deactivate the answering machine function**.

In addition, you can set up forwarding to another user. Therefore, just add a user instead of a voicemail in the second step.

#### Automatic forwarding on public holidays for groups

You can not only set up specific time profiles for groups, but also automatic forwarding on **public holidays**. The time-based routing that has already been set is retained and automatically reused after the public holiday.

With the public holiday profile, you can use practical templates for the public holidays in your respective area to configure the routing in advance. This means that incoming calls on these days are immediately forwarded to voicemail with an individual greeting.

As an administrator, you can set up the public holiday profile for a group. Proceed as follows: Group ➔ Edit routing ➔ Public holidays ➔ Add public holiday profile.

Then select your area ( England, Northern Ireland, Scotland or Wales) from a drop-down menu. The public holidays for your selected area for the coming year will be displayed and updated automatically. If you still want your group to be available on certain public holidays, simply uncheck the box next to the relevant day. Click Next to save the settings.

In the next step, you can define a greeting for voicemail forwarding. You have the option of either using our ready-made greeting templates or uploading your own greeting. You can also specify a greeting that applies to all public holidays or upload individual greetings for individual public holidays - for example, to wish your customers a Happy New Year. Finally, click **save announcement** to save and activate your forwarding.


# How does HD telephony work?

How HD telephony works with sipgate, including requirements and codec support for high-definition voice quality.

HD telephony enables the highest possible voice quality currently available for landline and VoIP calls and is automatically included in all sipgate plans.

**How does HD telephony sound?**\
The simple answer: Clearer, fuller, and more natural. The technical background: Unlike conventional telephony, a larger frequency spectrum of the voice is transmitted. This doesn't require any additional bandwidth from your internet connection.

**What do you need for HD telephony?**\
You don't need to make or adjust any settings in your sipgate account. If your hardware meets the requirements, you'll automatically make calls in HD. For this, you need HD-capable phones or endpoints. Specifically, this means that your VoIP phone must support the required codec (G722 and Opus) that can transmit voice in HD quality. Many phones already support these codecs, but you may need to adjust the endpoint's configuration.

**You meet all requirements but don't hear a difference?**\
A phone call always goes in two directions. If the person on the other end of the line doesn't have HD telephony, you'll automatically call in normal voice quality. However: Many telephony and device providers have already switched to HD or are working on it. Therefore, it can be assumed that HD telephony will become the absolute standard in the near future – and with sipgate, you're already perfectly set up for it.


# How do I set up Time-Based Routing?

How to configure time-based routing in sipgate to adjust call availability to office hours and breaks.

You can activate your routing for specific time periods. This allows you to adjust your availability to match your office hours or set up call forwarding for after-work hours.

You can view your currently configured times under the time profiles as shown in the image below. To modify these times, go to **Edit Routing** in the routing overview and click on the **Gear icon**.

![](/files/MUSAzRDlv5eV2jxQr75H)

Now you can set the days and times for your previously configured routing. You can view the schedule either as a **Table** or as a **Graph**. In both views, you have the option to assign custom names to individual time profiles.

In the graph view, you can shift and set times with mouse clicks. If you have regular working and absence hours, you can copy schedules from one day and apply them to other days.

![](/files/ci3kDJChaiQBVoHrVvAK)

In the table view, simply click on the days when you want to activate the respective routing and enter the desired times.

![](/files/ZigFihRr7YvaNRCFAGfb)

Using the **Time Profile 2** button, you can set up an additional routing option to enable different forwarding rules at specific times. This can be useful when your team members have recurring meetings or lunch breaks and calls need to be forwarded to their respective backup contacts.

Click **Save** to complete the process. Besides the two time profiles, there is an area called **Remaining Time**. This is automatically created after you set up your time profiles. Under Remaining Time, you can set up forwarding to your voicemail where you can upload a message that informs callers about your business hours outside of operating times.

If you want to completely delete your saved schedules, simply click **Reset Schedule** and confirm the deletion by clicking the Delete button.

In our **Example Scenario** (Screenshot 1), **Time Profile 1** routing applies for the following times: Mon–Fri 8:00-11:59 AM and 1:01-4:00 PM. The routing for **Time Profile 2** (Screenshot 2) applies Mon-Fri during lunch break from 12:00-1:00 PM. In this case, calls are forwarded to Alex Test's phone, who handles calls during lunch break. Alternatively, a voicemail can be set up. During the remaining time, calls are automatically forwarded to voicemail (Screenshot 3).


# How to set up Plug & Play (Auto-Provisioning)

How to set up Plug and Play auto-provisioning for Snom D-phones using MAC addresses in sipgate.

Plug & Play, also known as Auto-Provisioning or Remote Setup, enables quick and easy configuration of Snom D-phones. To configure the phones, you'll need their MAC addresses.

{% hint style="info" %}
**Important:** The Plug & Play feature is only available for DXXX Snom devices with firmware version 10.x and above.
{% endhint %}

First, log in as an admin. Then, go to Account Management and click on **Plug & Play** in the navigation menu. To add a device, click **Add**.\
In the window that appears, enter the phone's MAC address and the name of the user whose phone you want to configure.

{% hint style="info" %}
**Important:** The MAC address can be found on the packaging or the underside of the phone. Alternatively, you can also find it in the "System Information" menu on the phone's display.
{% endhint %}

Once you connect the phone, it will automatically download the configuration file and be ready to use within minutes. If needed, you can manually adjust the configuration file using the XML editor. If you want to assign the phone to another person, click the gear icon in the top right corner and reassign the device.

#### Errors & Solutions

<details>

<summary>Error 1: After adding the MAC address, the window closes, and no phone is created.</summary>

**Analysis 1:** Press F12 in the browser, open the console, and try adding the MAC address again.

* **Cause 1.1:** The MAC address is already registered in the same account.\
  **Solution 1.1:** Check the list of MAC addresses, adjust the settings, or delete the phone.
* **Cause 1.2:** The MAC address is already registered in another sipgate account.\
  **Solution 1.2.1:** Log into the other sipgate account, delete the MAC address under Plug & Play, then log out and log into your own sipgate account to add the MAC address.\
  **Solution 1.2.2:** Contact sipgate support to have the MAC address deleted.
* **Cause 1.3:** The phone may have been purchased second-hand and is still registered with another provider.\
  **Solution 1.3:** Report the MAC address to sipgate support, who will ask Snom support to delete the MAC address. Once confirmed, you can store the MAC address in your sipgate account.

</details>

<details>

<summary>Error 2: Error 503 (Service Unavailable) when trying to access the API.</summary>

**Analysis 2:** Press F12 in the browser and open the console to add the MAC address.

* **Cause 2.1:** There is an outage.\
  **Solution 2.1:** Wait until the issue is resolved.
* **Cause 2.2:** A general issue with adding MAC addresses to SRAP's.\
  **Solution 2.2:** Report the MAC address and the error to sipgate support.
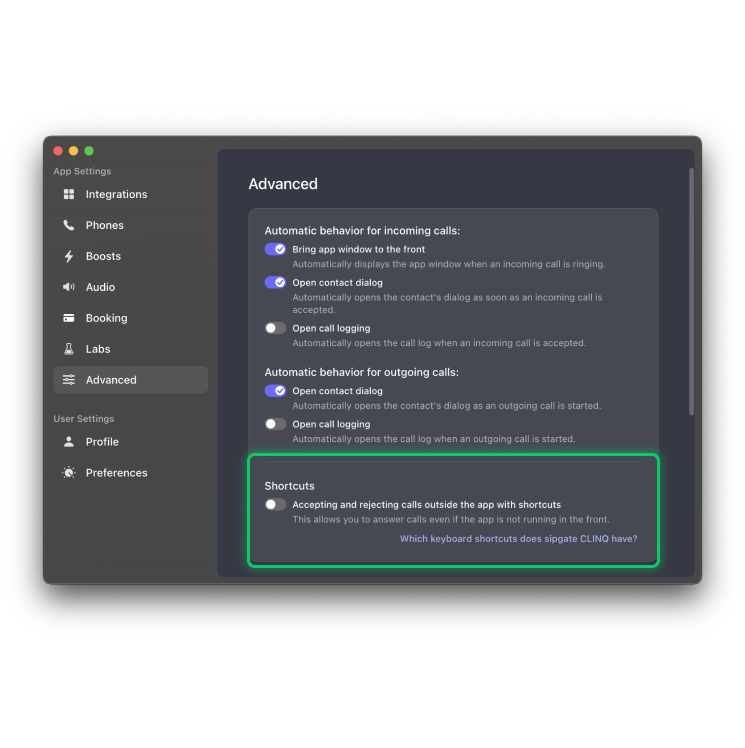
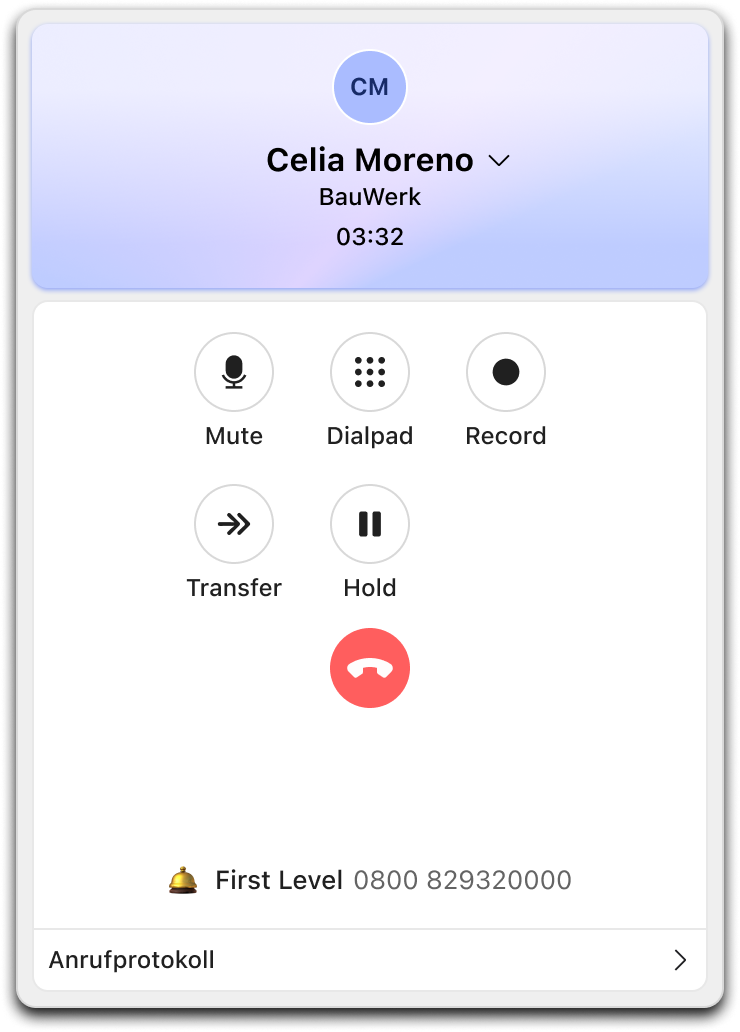
</details>


# How do I set up automatic area codes?

How to configure automatic area codes for local landline calls in your sipgate cloud phone system.

You can configure an automatic area code for your cloud phone system. If you dial a landline number without an area code, the predefined area code will be used automatically. This is especially useful for frequent local calls within a city.

{% hint style="info" %}
**Important:** This feature only applies to landline calls. You still need to enter an area code when calling mobile numbers.
{% endhint %}

#### How to enable automatic area codes

1. Go to **My Telephony**, then select **Telephony** from the left-hand menu.
2. Choose the phone for which you want to configure the settings by clicking the three-dot icon.
3. Select **More settings**.
4. Here, you can enable or disable the **Automatic area code** feature.
5. You can also adjust the area code as needed by clicking the settings icon.


# What do telephony & error codes mean?

Overview of common SIP telephony and error codes and their meanings in sipgate VoIP systems.

#### These are the most common error codes

| **401 Invalid credentials** | The SIP ID or SIP password is incorrect.                                                                                 |
| --------------------------- | ------------------------------------------------------------------------------------------------------------------------ |
| **404 Number unknown**      | The number doesn't exist, isn't assigned to a connection, or isn't configured in the recipient's device or phone system. |
| **486 Busy**                | The recipient's line is currently busy.                                                                                  |
| **487 Call ended**          | Standard signal when the other party hangs up.                                                                           |

#### Other commonly transmitted codes

| **100 Trying**                        | Call setup in progress.                                |
| ------------------------------------- | ------------------------------------------------------ |
| **180 Ringing**                       | The recipient's device is signaling an incoming call.  |
| **183 Session progress**              | Connection is being established.                       |
| **200 OK**                            | Call accepted or device registered.                    |
| **301 Moved permanently**             | Permanent call forwarding active.                      |
| **302 Moved temporarily**             | Temporary call forwarding active.                      |
| **400 Bad request**                   | Incorrect parameters in the request.                   |
| **403 Forbidden**                     | No permission to place this call.                      |
| **407 Proxy authentication required** | Authentication needed for outbound calls.              |
| **408 Request timeout**               | No response, possibly due to network issues.           |
| **480 Temporarily unavailable**       | Recipient unavailable (e.g., DND active).              |
| **481 Call does not exist**           | Status message not received.                           |
| **482 Loop detected**                 | Call forwarding loop detected.                         |
| **488 Not acceptable here**           | Unsupported codec, encryption, or transmission method. |
| **500 Server error**                  | General server issue.                                  |
| **502 Bad gateway**                   | Incorrect or faulty gateway.                           |
| **503 Service unavailable**           | SIP service temporarily down.                          |
| **603 Declined**                      | Call rejected manually or automatically.               |


# How can I make calls with sipgate?

Overview of ways to make calls with sipgate including Webphone, the sipgate app, and softphones.

{% hint style="info" %}
**Note:** This feature works differently in sipgate neo, so this article does not apply.
{% endhint %}

sipgate offers various options to make telephony easy and convenient. In addition to traditional VoIP phones, VoIP routers, and mobile networks, there are other ways to make calls with sipgate: via the [Webphone](https://teamhelp.sipgate.co.uk/hc/en-gb/articles/360009424798-What-is-the-sipgate-Webphone) or using the [sipgate app](https://www.sipgate.co.uk/app-download).

#### sipgate Webphone

With sipgate's Webphone, you can make and receive calls directly in a web browser, just like with a regular phone. No separate installation is required, you can start calling right away from your browser.

You can use the Webphone in your sipgate account anytime at no additional cost. Learn more about the sipgate Webphone in [this article.](https://teamhelp.sipgate.co.uk/hc/en-gb/articles/360009424798-What-is-the-sipgate-Webphone)

{% hint style="warning" %}
**Tip:** The Webphone is ideal if you want to try VoIP telephony or need only basic call functions, such as making and receiving calls.
{% endhint %}

#### The sipgate App

The sipgate app provides an extended range of business telephony features, integrating multiple tools with sipgate's cloud telephony in one place. It is included for free in every plan and offers the following functions:

* Various CRM integrations (e.g., HubSpot, Pipedrive, Salesforce, Zoho, and more)
* Contact synchronization for sipgate, Microsoft, and Google
* Call control
* Status display
* Real-time call notes
* Click-to-Dial extension for Google Chrome
* Call prediction
* Call logging
* Call statistics
* Callback list
* Noise suppression

Currently, you can download the desktop version of the sipgate app, available for macOS, Windows, and Linux.

There is also a web version that allows you to use a reduced range of features of the sipgate app.

{% hint style="info" %}
**Important:** Up-to-date information about the sipgate app can be found on our [website](https://www.sipgate.co.uk/app-download).
{% endhint %}

#### Which telephony solution is best for me?

A **Softphone** is perfect for advanced telephony features and a user-friendly interface, allowing you to make calls directly from your desktop.

The **sipgate App** provides a complete business telephony solution in one place, with numerous integrations that enhance customer conversations through seamless CRM collaboration.

{% hint style="info" %}
**Important:** Regardless of the telephony solution you choose, calls are automatically disconnected after 6 hours. For calls to external providers, the maximum call duration is 2.5 hours.
{% endhint %}


# How can I create and edit Telephony and Routing for a User?

How to assign phone numbers, create VoIP devices, and configure call routing for users in sipgate.

This guide provides steps for assigning phone numbers, creating a VoIP device connection, adding and editing call routes, and renaming routes and devices.

{% hint style="info" %}
**Note:** Administrators have full control over Call Routing for all Users, while individual Users can only manage their own.
{% endhint %}

#### Editing Call Routing for Administrators

**Assigning a Phone Number**\
To assign a phone number, log in, go to **Users**, and select the desired User.

![](/files/4OlksKz2nEze4F42zVwh)

Click **Edit**.

![](/files/TihQhTe0A5TarSOi0DCo)

In the routing diagram, assign a phone number to the User.

![](/files/lk1WM9wqYb5G6Jp6AEXV)

Then finish by clicking **Finish editing**.

**Creating a VoIP Device**\
To create a VoIP device, log in, select the User, and click **Edit Routing**. Then, click **Add a new device**.

![](/files/QITfqrKxCCuP5h7GmXyw)

This will generate a SIP ID and password for registering a VoIP phone. The device will now appear in the routing diagram, where you can toggle it on or off.

**Customising Call Routing for Devices and Numbers**\
Click **Add** to set up separate call routing for different devices and phone numbers.

![](/files/DKUCkOsFHJIUNZHAWPmr)

A new call route will be created, which you can customise by clicking **Edit routing.**

**Renaming Call Routes and Devices**\
We recommend renaming routes and devices for easier identification. To rename, click **Edit routing** for routes or the three-dot icon next to a device to edit its name.

#### Editing Call Routing for Users

Users can manage their own Call Routing by logging in and selecting **Telephony** from the sidebar. They will see the same routing options as administrators but cannot add new phone numbers to their routes.


# How do I use Do Not Disturb (DND) to mute my phones?

How to enable Do Not Disturb (DND) to mute phones and manage call forwarding in sipgate.

When **DND** (Do Not Disturb) is set, your phone is muted and will not will ring. Both Users and Administrators have access to this feature from within their sipgate account. Many desk phones will also have their own integrated DND or Mute button which should work too. For calls to extensions or phone numbers assigned to a User who has DND enabled, the User's Call Forwarding rules will be followed.

#### Setting DND in your phone/device from within your sipgate account

To set DND in your phone/device:

* Log into your account
* Choose **Telephony** from the navigation bar
* Click the device you want to enable DND for
* In the "Device Settings" section you'll find an on/off toggle for Do Not Disturb (DND)

As mentioned above, if your phone has a dedicated button/soft-key for DND, then it should be possible for you to use this as well.


# How can I send and receive SMS via sipgate?

How to send, schedule, and receive SMS messages via sipgate, including charging rates and delayed messaging.

#### Sending SMS

**Note:** Text messaging is enabled by default when a new user is set up. Account [administrators](https://teamhelp.sipgate.co.uk/hc/en-gb/articles/204130832) can enable or disable text messaging for any user under 'User Settings' in the navigation bar.

Please use the following instructions to send an SMS:

In users settings / Personal Settings:

1. Click on the blue **SMS** button above the left hand side "navigation" bar.
2. In the "SMS" window, Enter the full telephone number or sipgate contact name under **Recipient**.
3. Enter your message content/text in the area under **Message**.
4. Select the time the SMS should be sent. You have the choice of sending the SMS immediately or at a specified time in the future (Now, Today, Tomorrow and the next few (3) days will also be shown.
5. Click **Send** to send(or queue the SMS to be sent if you've chosen a later date/time) the SMS.

#### Delayed Messaging

When sending an SMS, you can choose to send it at a specific time.

You have the option of sending a text message:

* Today, at a specific time
* Tomorrow, at a specific time
* 2 to 4 days later, at a specific time

Here's how you can schedule an SMS:

* Click **SMS** at the top of the navigation bar
* At the bottom of the pop-up for your SMS, click "Now" under "SCHEDULED"
* A drop-down menu of times will appear
* Select the date you want, and you will then be able to select the time you want as well

Please ensure that SMS is enabled in the User's "**User Settings**" section by an account administrator before attempting to send a scheduled SMS.

In addition, please be aware of SMS costs and how to receive responses to SMS.

**Note:** When choosing Today, Tomorrow or any of the follow on dates, a hour and a minute field will open allowing you to enter the desired time when you want the message to be sent.

#### Charging Rates

SMS messages are charged at the following rates:

* Web-SMS 160 5.9 p ex VAT
* Web-SMS 310 11.8 p ex VAT
* Web-SMS 460 17.7 p ex VAT

You can also find the current SMS prices on our [rates page.](http://www.live.sipgate.co.uk/team/tariffs)

#### Receiving SMS

It's not possible to receive SMS at sipgate telephone numbers. Furthermore you need an active SIM Card or eSIM to receive SMS.

**Note**: Responses to messages you receive to your mobile will be answered via your mobile phone's number. if you'd like to reply to this message using your sipgate number, you will need to use our Web SMS service and not reply to this text via your mobile.


# What is the sipgate Webphone?

How to use the sipgate Webphone for browser-based VoIP calls, including features, transfers, and settings.

With sipgate Webphone, you can make calls directly from your computer - ideally using a headset. Calls are initiated or received directly in the browser, with no need for external software installation.

We recommend using the sipgate app, which you can download for free [here](https://www.sipgate.co.uk/app-download).

#### Supported Browsers

* Edge: from v79\* (manual download from Microsoft)
* Chrome: from v75
* Firefox: from v75
* Safari: Yes
* Brave: from v1.8.95
* Internet Explorer 11: No
* Edge (Chromium v78 or higher on Windows 10): Yes

#### Starting the Webphone

In the sipgate user interface, you'll find the **Webphone** option under **My Telephony** in the bottom left corner. Click the button, and your selected phone will connect automatically.

#### Webphone button not visible to use

The Webphone, you must have an active VoIP phone configured. You can add one under **Manage Phones**. The Webphone button will also not be visible if you are an admin switching to another user's account.

#### Which numbers are used for incoming and outgoing calls?

The Webphone interface shows the number used for incoming and outgoing calls. If you have multiple phones set up in your sipgate account, you can select the preferred one within the Webphone.

#### Test call

To test the Webphone's call quality, dial **10005** for free. This also helps verify that your microphone and audio output are working correctly. If issues arise, check your system's audio input and output settings.

#### Using the Event List and Webphone

Simultaneously open the Event List and Webphone in separate browser tabs for parallel use. In the Event List, click **Call**, enter the number, and select the first VoIP phone. Then, in the Webphone tab, accept the call and wait for the recipient to pick up. The call will appear in the Event List, where you can add comments afterward.

#### Adjusting volume

Modify the ringtone, incoming call volume, and microphone input level via your operating system's settings. Depending on your device, adjustments may also be possible directly on your headset.

#### Ringtone

* The ringtone sounds like this: mp3
* It cannot currently be changed.

**Calls from "Unknown"**

If the caller is not saved as a sipgate contact, **Unknown** will appear. You can add a new contact via the Event List or Contacts section. The next time they call, their name will be displayed.

#### Dialing by copying and pasting numbers

Use CTRL/CMD + C to copy numbers and CTRL/CMD + V to paste and dial them. Numbers can include spaces, dashes, plus signs, and parentheses.

#### Call Transfers

Option 1

1. Receive an incoming call.
2. Activate the keypad, enter \*3, type the number, and press #.
3. The Webphone connects to the transfer number.
4. Introduce the caller and then hang up. The caller and the transfer recipient are now connected.

Option 2

1. Receive an incoming call.
2. Click **Transfer**, search for the contact or enter the number, then click **Transfer** again.
3. The selected number is dialed and connects.
4. Introduce the caller and hang up. The transfer is complete.

#### Canceling a transfer

Open the keypad, enter \*8, and listen for the announcement. You can then speak with the caller and initiate a new transfer if needed.

#### Recording Calls

1. Start an incoming or outgoing call.
2. Open the keypad and enter \*6. Both parties will hear "Recording started."
3. To stop recording, enter \*6 again.
4. The recording is available in your Event List.

{% hint style="info" %}
**Note:** Only one recording can be saved per call.
{% endhint %}

#### Enabling desktop notifications

Go to Webphone settings at the bottom of the interface and enable push notifications. Note: If you use multiple monitors, notifications will only appear on Monitor 1.

#### Setting a separate ringtone output

This feature is available for Chrome, Brave, and Opera. In the Webphone settings, click **Audio Settings** and select a separate device for the ringtone.

#### Using Click2Dial

Currently, Click2Dial can be activated but is not functional. It only facilitates dialing numbers from the sipgate Event List. To enable Click2Dial for numbers on various websites, a browser add-on is required.

#### Three-Way conferencing

Currently, Webphone does not support three-way conferencing. However, you can use a VoIP app or VoIP phone for this function.

#### Which audio codec is used?

Webphone uses G.711 (60-100 kbit/s), without adjustments for low-bandwidth connections.

#### Is signaling and/or voice transmission encrypted?

Yes. Signaling is encrypted via TLS, and voice transmission is secured using SRTP.

#### Troubleshooting

For troubleshooting assistance, please refer to our German Help Centre.


# What is sipgate Call Recorder?

How to activate, use, and manage sipgate Call Recorder for automatic outgoing call recording.

sipgate Call Recorder is a feature that allows you to automatically record all outgoing calls on your sipgate account. Before using this feature, an administrator must enable it in the left-hand menu under Phone System ➔ Customisation. Incoming calls will not be recorded unless you dial \*6 to start an individual recording manually.

#### How to activate Call Recorder

After an Account Administrator has booked the feature, they must activate the Call Recorder option for each user on the account.

**As an Administrator**

* Open the Account Administration.
* Click on **Users** and select the desired user.

**As a User**

* Log in to your sipgate user interface.
* Click **Telephony** in the left-hand navigation.

The following steps are the same for both Administrators and Users:

* In the top bar, you will see an overview of devices. Click on the phone you want to activate Call Recorder for.
* A window will open—scroll down and click on **More Settings**.
* Toggle **Record all calls** so that it turns blue and reads "On."

The change should take effect immediately. All outbound calls made from this specific device will now be automatically recorded.

#### Custom Announcements

When Call Recording is enabled, a standard announcement will be played before each call, informing all participants that the call is being recorded. This message is audible to both/all call parties.

Administrators can replace the standard message with a custom MP3 file:

* In **Account Administration**, click on **Customisation** in the left-hand menu.
* Scroll down to find the **Call Recording Announcement** option.
* Upload your custom message.

Uploading a new announcement will automatically replace the default or any existing custom message. Only one custom message can be stored at a time.

#### Stopping a Recording

To manually stop a recording during a call, press **∗ 6** on your phone. The recording will be saved up to the point you stopped it. You can find the recording in your **Event List**.

#### Accessing and Storing Recordings

All recorded calls can be found in the **Event List** of the respective user. Users can download or delete recordings from their Event List.

Recordings are available for at least **12 months**. To ensure recordings are stored for the full contract duration:

* Go to **Account Administration**.
* Click on **Account & Billing** ➔ **Account Settings**.
* Set the **Event List Storage** to **Store for the entire contract duration**.

If set to **Store for 1 month**, recordings will be deleted after one month.

#### Pricing

The Call Recorder feature costs **£29.95 (ex VAT) per month**, plus **3.6p/min**. This per-minute charge is not included in any call package.

#### User Access

Only the **user who owns the Event List** has access to their recordings. Administrators do **not** have access to other users' recordings.


# How do I set up a VoIP device or softphone?

How to set up a VoIP device or softphone with sipgate using SIP credentials and configuration guides.

As outlined in the **Set up an account** article, each user account already includes a VoIP phone, which acts as the telephony endpoint or interface. This interface needs to be connected to a desk phone, softphone, or another device to enable calling. To do this, go to the **User** tile in account management and select the relevant person. Next, click on the device you want to configure. A pop-up box will appear with all the information you need: SIP ID, Registrar, and password. Enter these details into your device or softphone to complete the setup and enable calling.

Users can also configure their devices themselves. In the navigation bar on the left, click **Telephony**. From there, you'll find the devices and follow the same process.

Need more detailed setup guidance? Click on **Configuration Guides** in the info box. Here, you'll find instructions for the most common devices and softphones.

After the setup, you can perform simple tests to check if the device is working properly. Just dial the test number 10000. If you can reach this number, your device is connected correctly.

{% hint style="info" %}
**Note:** If automatic prefix dialing is enabled, you won't be able to reach the test number 10000.
{% endhint %}

For **Windows, macOS, and Linux**, we recommend using our **sipgate app**, which offers a range of integrations.

Below, you'll find a list of additional softphones that have been successfully tested with sipgate. We also provide configuration guides for these models.

#### Windows

* **sipgate app**
* PhonerLite
* Bria
* Phoner
* NinjaLite
* X-Lite
* Linphone

#### macOS

* **sipgate app**
* Telephone
* X-Lite / Bria
* Linphone
* Zoiper

#### Linux

* sipgate app

#### Android

* Bria
* MizuDroid
* CSipSimple
* Linphone
* Integrated Android VoIP client (from version 4.x)

#### iOS

* Linphone
* X-Lite / Bria
* Zoiper


# How can I set up Presence/BLF (Busy Lamp Fields)?

How to set up Busy Lamp Fields (BLF) to monitor colleague call status on your VoIP phone in sipgate.

#### What is Busy Lamp Field (BLF)?

If you want to see the call status of your colleagues directly on your own phone, the **Busy Lamp Field (BLF)** feature is the ideal solution. It is included in the **business L** and **business XL** plans.

Before using BLF, each user must be assigned an **internal extension**. Once correctly configured on a VoIP device, BLF displays the following three statuses:

* **Free:** The user is not on a call, and the busy lamp is off.
* **Busy:** The user is on a call, and the busy lamp is solidly lit.
* **Ringing:** The user is receiving an incoming call, and the busy lamp is blinking.

The configuration of BLF varies depending on the phone model. You can find setup instructions in your phone's manufacturer documentation or on their websites.

**We have tested BLF on several phone models and provide configuration guides for the following brands**

* [Snom](/use-sipgate/telephony/how-can-i-set-up-presenceblf-busy-lamp-fields)
* [Gigaset](/use-sipgate/telephony/how-can-i-set-up-presenceblf-busy-lamp-fields)
* [Yealink](/use-sipgate/telephony/how-can-i-set-up-presenceblf-busy-lamp-fields)
* [Tiptel](/use-sipgate/telephony/how-can-i-set-up-presenceblf-busy-lamp-fields)
* [Grandstream](/use-sipgate/telephony/how-can-i-set-up-presenceblf-busy-lamp-fields)

#### Alternative: Presence display in your sipgate account

Instead of BLF, you can also check the **Presence Display** in your sipgate account under **My Telephony**. This shows which users are currently available.

If a user is on a call, their tile, including their internal extension, will be displayed in **red**.

{% hint style="info" %}
**Important:** Every User must be assigned an internal extension for BLF and Presence to function properly.
{% endhint %}


# sipgate Softphone for Windows

How to install, log in, and use the sipgate Softphone for Windows, including call transfer and recording.

{% hint style="info" %}
**Note:** We recommend our sipgate app for Windows, MacOS and Linux, which offers various integrations. Support for the sipgate Softphone will be ending soon, with no further updates.
{% endhint %}

With the sipgate Softphone you can make calls via your Windows PC - ideally with a headset.\
Calls are started or answered from the app.

{% stepper %}
{% step %}

#### Installation

The latest sipgate softphone is available for you at\
<https://www.sipgate.co.uk/softphone?_ga=2.155087035.209884778.1658302544-1373436261.1655297564>

* Click on the sipgate-softphone.exe\\

  ![](/files/MSLjlUtFDFtWGYVxLJ03)
* The installation takes place in C: \ Users \ Users \ AppData \ Local \ Programs \ app-web \ Sipgate.exe.
* You can now start the sipgate Softphone via "Programs". A link to the app is also stored on the desktop.
  {% endstep %}

{% step %}

#### Log in

**Approach 1:**

* Start the sipgate softphone and click "Login in browser".\\

  ![](/files/MO712gQ1gT5K2itxK8MT)
* Your standard browser opens the sipgate login page.
* Now enter the e-mail address and password of your sipgate account.
* Confirm in the browser that the sipgate Softphone may be opened.
* The softphone is now successfully registered and you will see the input mask for a phone number. Please note that popups in the browser for app.sipgate.com must be allowed.

**Approach 2:**

* Start the sipgate softphone and click "Login in browser" - your standard browser opens the sipgate login page.\\

  ![](/files/MO712gQ1gT5K2itxK8MT)
* The browser reports that a pop-up has been blocked and now shows a manual login code.\\

  ![](/files/1Ml6ychWsZJcSnZt8hfw)
* Copy the login code and paste it into the sipgate softphone. Then click "Login".
* The softphone is now successfully registered and you will see the input mask for a phone number.
  {% endstep %}

{% step %}

#### Features and settings

**Call transfer:**

* You get an incoming call.
* Activate the keyboard, touch \* 3, enter the number and click "#" or "Transfer" button, enter phone number and click on transfer.
* The softphone now connects to the transfer number.
* Name the request and hang up on the softphone.
* The caller and forwarding number are now connected.

**Record conversations:**

* During the call, click the keypad and dial \* 6.
* Both sides will then hear "Recording started", if you select \* 6 again, you will stop recording.
* You will find the recording in the sipgate team account in your event list after ending the call.
* Please note that it may take longer for the recording to appear in your event list if the call lasted longer than 30 minutes. Only one recording can be saved per call.

**Set up desktop notification:**

* Click on the settings you can find in the softphone below. Turn on push notifications.\\

  ![](/files/0zdCcDggkiX2n7hFsosD)
* Please note that the desktop notification is only displayed on monitor 1 when using multiple monitors.

**Click2Dial for tel URI:**

**Windows 10**:\
Standard apps-> Standard apps according to protocol-> TEL: URL: tel-> sipgate softphone\
**Note**: Only phone numbers that are linked via HTML are recognized\
**example Link**.: \<a href="tel:+492111234567">+492111234567\</a>

**Besonderheiten bei verschiedenen Browsern:**

**FireFox:**\
**normal:** sipgate Softphone wird vorgeschlagen und je Anruf einmal bestätigen\
**optional**: klickt man auf **"dauerhaft speichern"** wird sofort via softphone angerufen

**Chrome / Edge v44 / Edge Chromium:**\
The query for the app cannot be saved, you have to select it each time you call.

**FireFox:**\
When querying for the app, you can use permanent save.\
**If the sipgate softphone is not available for selection:**\
Click on "Browse" and go to the path below and select the softphone.exe. "C: \ Users \ Username \ AppData \ Local \ Programs \ @ web-appsapp-web \ sipgate softphone.exe" When you click on a phone number again, the sipgate softphone is now optionally suggested.

**Set separate audio output for ringing:**

* Click on the audio settings found in the softphone below.
* Activate "Additional device for ringtone" here. You can then select the device you want to use for audio output.

**Test numbers for audio tests:**

* Test incoming audio: **10 000**
* Test double-sided audio:**10 005**

**Are three-way conferences possible?**

We are currently working on this option.

**Which voice codec is used?**

* G.711 (60-100kbit / s), there is no adaptive adaptation to low bandwidth if you are on the go.

**Is the signaling and / or speech encrypted?**

* Yes, signaling via TLS and voice via SRTP.
  {% endstep %}

{% step %}

#### Uninstall the sipgate softphone

Open Windows settings ➔ Open apps and features ➔ Tap sipgate Softphone 1.16.4\
Then click Uninstall in the menu.

To remove all files and settings from the PC, the following folders must also be deleted manually

C:\Users\Users\AppData\Local\Programs\sipgate-softphone\
C:\Users\Username\AppData\Roaming\sipgate-softphone
{% endstep %}
{% endstepper %}


# sipgate Softphone for Linux

How to install, log in, and use the sipgate Softphone on Linux, including features and troubleshooting.

{% hint style="info" %}
**Note:** We recommend our sipgate app for Windows, MacOS and Linux, which offers various integrations. Support for the sipgate Softphone will be ending soon, with no further updates.
{% endhint %}

With the sipgate Softphone you can make calls via your Linux - ideally with a headset.\
Calls are started or answered from the app.

{% stepper %}
{% step %}

#### Installation

The latest sipgate softphone is available for you at <https://www.sipgate.co.uk/softphone>

**How do I install?**\
There is no installation under Linux, the softphone can only be run as an application.\
To do this, follow this path:

* Open properties
* Access rights
* Execute and check "Execute file as program".\\

  ![](/files/JuX7DmU2aOZAwos4mpOi)

**Disadvantage**: Click2Dial for tel Uri is not possible.

**How do I start the sipgate softphone?**\
\- Double click on the sipgate Softphone AppImage\
\- The softphone starts.
{% endstep %}

{% step %}

#### Login

**Approach 1:**

* Start the sipgate softphone and click "Login in browser".\\

  ![](/files/oCv2qGqiRiJ8nZtXhZeo)
* Your standard browser opens the sipgate login page.
* Now enter the e-mail address and password of your sipgate account.
* Confirm in the browser that the sipgate Softphone may be opened.\\

  ![](/files/Bx0FnL6BDwLpwXG99j00)
* The softphone is now successfully registered and you will see the input mask for a phone number. Please note that popups in the browser for app.sipgate.com must be allowed.

**Approach 2:**

* Start the sipgate softphone and click "Login in browser" - your standard browser opens the sipgate login page.
* Now enter the e-mail address and password of your sipgate account.
* The browser reports that a pop-up has been blocked and now shows a manual login code.
* Copy the login code and paste it into the sipgate softphone. Then click "Login".
* The softphone is now successfully registered and you will see the input mask for a phone number.
  {% endstep %}

{% step %}

#### Features and settings

**Call transfer:**

* You get an incoming call.
* Activate the keyboard, touch \* 3, enter the number and click "#" or "Transfer" button, enter phone number and click on transfer.
* The softphone now connects to the transfer number.
* Name the request and hang up on the softphone.
* The caller and forwarding number are now connected.

**Record conversations:**

* During the call, click the keypad and dial \* 6.
* Both sides will then hear "Recording started", if you select \* 6 again, you will stop recording.
* You will find the recording in the sipgate team account in your event list after ending the call.
* Please note that it may take longer for the recording to appear in your event list if the call lasted longer than 30 minutes. Only one recording can be saved per call.

**Set up desktop notification:**

* Click on the settings you can find in the softphone below. Turn on push notifications.
* Please note that the desktop notification is only displayed on monitor 1 when using multiple monitors.

**Set separate audio output for ringing:**

* Click on the audio settings found in the softphone below.
* Activate "Additional device for ringtone" here. You can then select the device you want to use for audio output.

**Test numbers for audio tests:**

* Test incoming audio: **10 000**
* Test double-sided audio:**10 005**

**Are three-way conferences possible?**

We are currently working on this option.

**Which voice codec is used?**

* G.711 (60-100kbit / s), there is no adaptive adaptation to low bandwidth if you are on the go.

**Is the signaling and / or speech encrypted?**

* Yes, signaling via TLS and voice via SRTP.

**Use Click2Dial tel URI:**

\- is not possible
{% endstep %}

{% step %}

#### Errors and solutions

In [this article](https://teamhelp.sipgate.co.uk/hc/en-gb/articles/360011065957-sipgate-Softphone-errors-and-solutions) you will find a list of the known errors and solutions for the sipgate softphone.
{% endstep %}
{% endstepper %}


# How can I configure Call Forwarding Rules for Users?

How to configure call forwarding rules for users in sipgate, including conditional and time-based forwarding.

Call Forwarding can be set up to send incoming calls to voicemail and/or to another phone number either after a delay or immediately.

Calls forwarded to non-sipgate phone numbers will be charged according to the outbound call rate to that destination. This is the case even if you have a call package booked to your account.

{% hint style="info" %}
**Note:** Many VoIP phones offer their own call forwarding/diversion options. These can be used instead of, or in conjunction with, your online sipgate account's call forwarding options. More information about using a phone's internal forwarding is available here.
{% endhint %}

#### Configuring Call Forwarding

1. Log into your sipgate account and navigate to the **Telephony** section in the left-hand menu.
2. Click **Forwarding** or **Voicemail**.
3. Under **Forwarding**, select the connection for which you'd like to set up forwardings. Under **Voicemail**, click **Voicemail, Call Forwarding & Hunting**.
4. You will see a routing diagram where you can add forwarding rules by clicking **Edit Routing**.
5. Calls can be forwarded to up to three destinations (please note: when the call reaches a voicemail, the call is considered complete, and forwarding ends).

#### Admin Access

If you are an administrator and want to configure call forwarding for another User

* Go to the **Account Administration**.
* Select the corresponding user and edit their routing settings accordingly.

#### Setting Up Conditional Call Forwarding

You can choose to have a general call forwarding ruleset to be followed in all situations or configure special cases:

**When I do not answer**

* Set how long your phone will ring before forwarding.
* Choose whether to send the call to voicemail, another phone number, a specific user, or a group.

**When I am on the phone**

* Decide how long the call should wait before being forwarded.
* Choose whether to send the call to voicemail, another phone number, a specific user, or a group.

**When phone is offline/unavailable**

* Select whether to send calls received while offline to voicemail or forward them to another number, user, or group.

**You can also specify a timeframe when the forwarding rules should be active**

* Click **Enable time-based forwarding**.
* Select the days and times when calls should be forwarded.
* (Optional) Add different rules for weekdays and weekends.

#### Enabling immediate forwarding in all cases

If you want calls to be forwarded immediately, regardless of whether you are online, busy, or offline:

* Click **Edit Routing**.
* Click the **Edit** icon on the right side.
* Enable **Forward calls immediately in all cases**.
* Click **Save**.

{% hint style="info" %}
**Important:** Activating immediate forwarding will overwrite and delete any existing call forwarding rules. A confirmation prompt will appear before saving changes.
{% endhint %}

If you later wish to revert to separate forwarding rules for online, busy, or offline states, simply uncheck the immediate forwarding option in the settings.

**Example: Setting Up Call Forwarding for Workdays and Weekends**

1. Select the user profile at the top of the navigation bar.
2. Click **Voicemail**, then **Voicemail, Call Forwarding & Hunting**.
3. Choose whether call forwarding should be permanently active or only in special cases.
4. Set where calls should be forwarded and how long they should ring before forwarding.
5. Define a timeframe for when call forwarding should be active during weekdays.
6. Click **Add row** to configure different forwarding rules for weekends.
7. Select the voicemail option for calls received outside the defined timeframe.
8. Click **Save**.

**Note:** Forwarding to numbers outside your sipgate account as well as to mobile numbers is not included in the booked flat rates and will be charged separately at the regular minute rates. Forwarding to internal landline numbers is free of charge.

Related Help Article: [Setting Up a User's Voicemail](https://teamhelp.sipgate.co.uk/hc/en-gb/articles/204208491)


# sipgate Softphone for macOS

How to install, log in, and use the sipgate Softphone on macOS, including call transfer and recording.

{% hint style="info" %}
**Note:** We recommend our sipgate app for Windows, MacOS and Linux, which offers various integrations. Support for the sipgate Softphone will be ending soon, with no further updates.
{% endhint %}

With the sipgate Softphone you can make calls via your Mac - ideally with a headset.\
Calls are started or answered from the app.

{% stepper %}
{% step %}

#### Installation

The latest sipgate softphone is available for you at

<https://www.sipgate.co.uk/softphone>

* Open the loaded file in the Finder and drag it to "Programs".\\

  ![](/files/tcy9wXWo2jYmXsF1ikHe)
* Click "Authenticate" and then enter the administrator username and password to confirm the installation.\\

  ![](/files/SYPYdTSZhINYelC5AUhm)
* You can now start the sipgate Softphone via "Programs" in the Finder. You also have the option of displaying it permanently in the dock.
  {% endstep %}

{% step %}

#### Log in

**Approach 1:**

* Start the sipgate softphone and click "Login in browser".\\

  ![](/files/MO712gQ1gT5K2itxK8MT)
* Your standard browser opens the sipgate login page.
* Now enter the e-mail address and password of your sipgate account.
* Confirm in the browser that the sipgate Softphone may be opened.\\

  ![](/files/bXa2PlaH6ARaQmcl6BOW)
* The softphone is now successfully registered and you will see the input mask for a phone number. Please note that popups in the browser for app.sipgate.com must be allowed.

**Approach 2:**

* Start the sipgate softphone and click "Login in browser" - your standard browser opens the sipgate login page.
* Now enter the e-mail address and password of your sipgate account.
* The browser reports that a pop-up has been blocked and now shows a manual login code.\\

  ![](/files/YzgxATZplrkbSyNxQONP)
* Copy the login code and paste it into the sipgate softphone. Then click "Login".
* The softphone is now successfully registered and you will see the input mask for a phone number.
  {% endstep %}

{% step %}

#### Features and settings

**Call transfer:**

* You get an incoming call.
* Activate the keyboard, touch \* 3, enter the number and click "#" or "Transfer" button, enter phone number and click on transfer.
* The softphone now connects to the transfer number.
* Name the request and hang up on the softphone.
* The caller and forwarding number are now connected.

**Record conversations:**

* During the call, click the keypad and dial \* 6.
* Both sides will then hear "Recording started", if you select \* 6 again, you will stop recording.
* You will find the recording in the sipgate team account in your event list after ending the call.
* Please note that it may take longer for the recording to appear in your event list if the call lasted longer than 30 minutes. Only one recording can be saved per call.

**Set up desktop notification:**

* Click on the settings you can find in the softphone below. Turn on push notifications.\\

  ![](/files/0zdCcDggkiX2n7hFsosD)
* Please note that the desktop notification is only displayed on monitor 1 when using multiple monitors.

**Click2Dial for tel URI:**

**FireFox:**

When you click on a number, you are asked whether sipgate is allowed to call - see picture After opening the link, the call is carried out. Click on "Save selection for tel-links" so that the call can always be made immediately in the future.

**Chrome:**

When you click on a number, you are asked whether sipgate is allowed to call. After clicking on "sipgate" the call will be carried out.\
**Note**: The query for the app before a call is always made.

**Safari:**

When you click on a phone number, you are asked whether the call should be allowed. Click "Allow call", the call will then be made.\
**Note**: The query is made before every call.

**Set separate audio output for ringing:**

* Click on the audio settings found in the softphone below.
* Activate "Additional device for ringtone" here. You can then select the device you want to use for audio output.

Test numbers for audio tests:

* Test incoming audio: **10 000**
* Test double-sided audio:**10 005**

**Are three-way conferences possible?**

We are currently working on this option.

**Which voice codec is used?**

* G.711 (60-100kbit / s), there is no adaptive adaptation to low bandwidth if you are on the go.

**Is the signaling and / or speech encrypted?**

* Yes, signaling via TLS and voice via SRTP.
  {% endstep %}
  {% endstepper %}


# Enable Call Rate Announcement

How to enable call rate announcements in sipgate to hear applicable rates before outgoing calls.

You can enable or disable the Call Rate Announcement feature for your cloud telephony system. When activated, sipgate will inform you of the applicable rate before every outgoing call. This is particularly useful for calls to international numbers, allowing you to see exactly how they will be charged.

{% hint style="info" %}
**Important:** This feature only applies to calls that are not covered by a flat rate.
{% endhint %}

### How to enable Call Rate Announcements

1. Go to **My Telephony** and select **Telephony** from the left-hand navigation menu.
2. Under **Phones**, choose the phone for which you want to configure the announcement.
3. Click on the **three dots** next to the selected phone and choose **More Settings**.
4. Scroll down to **Tariff Announcement** and toggle the switch to activate or deactivate the feature. When enabled, the toggle will turn blue and display "On."


# How do I start Call Conferencing with sipgate?

How to set up and use call conferencing with sipgate, including booking rooms and three-way calls.

Multiple participants, easy dial-in, and flexible number assignment – with the conference room, you can organise group calls flexibly.

The conference room accommodates up to 25 participants and allows easy dial-in without requiring a PIN. You can choose which of your local or international phone numbers to assign to the conference room. Both UK and international numbers can be assigned simultaneously.

Once you've booked the room for group calls, it can be accessed from any device worldwide and is available during the trial phase. Anyone you share the conferencing phone number with can call in to join, and new participants are announced by a beep. You can book multiple conference rooms per account, and up to 25 callers can join a single call.

To add conferencing to your sipgate account, an administrator must go to the Account Administration section and select *Plans & Packages*. From there, the Conference Room plan (£29.95/month ex VAT) can be booked. Immediately after booking, you can assign a conference name and dial-in numbers.

#### Booking and managing a conference room

Only admins can book the conference room, and you can cancel it on a monthly basis. To book a conference room, go to the account management section under "Conference Rooms." Once booked, you can rename the room and assign an available phone number through routing.

#### Secure phone conferences

The sipgate conference room does not require a PIN. However, you always have control over your phone conferences. How? Each sipgate conference room has its own dedicated phone number, ensuring that no multiple accounts share the same room. The following features are available for your conferences:

* An audible signal to notify you when you're the first to join the room
* A signal to announce new participants
* The ability to assign any new phone number to the conference room at any time
* The option to enable or disable the conference room as needed

#### Starting a three-way conference

As is common with a telephone system, you can forward incoming calls directly to other employees or groups using keyboard shortcuts. This principle also applies to three-way conferences, where you can connect with two other participants.

To do this, simply call the first conference participant. Then add the second conference participant via transfer. Type **\*3\*** followed by the desired **target number** or **extension** and confirm the action with **#**. Now simply press **\*5** to connect all conference participants together. Want to leave the conference? Just hang up.


# How do I start a call from my Online Account (Click2Dial)?

How to use Click2Dial to start calls directly from your sipgate online account portal.

Making calls with sipgate is quick and easy, whether you're using a connected VoIP phone or an external device. With the intuitive **Call** feature in the online account portal, you can effortlessly connect with anyone. Follow these simple steps to initiate a call directly from your account and stay connected with just a few clicks.

* **Log in** to your account. You'll see the **Click2Dial** option labeled **Call** among the three blue buttons below your username in the left-hand Navigation Bar.
* **Click on Call.** This will open the **Initiate Call** window, where you can:
  * Enter the number you want to call.
  * Select the device or phone you want to make the call from (ensure the chosen device is online and registered).
* **Press Call.** Your selected device will ring. Once you answer, the number you entered will be dialed, and the call will connect as usual.

You can also call a contact directly from your contacts list. Simply click **Contacts** in the navigation bar, select the contact you wish to call, and click the highlighted **Call** button. This will open the **Initiate Call** window, allowing you to set up the call as described above.


# How can I use IVR (Interactive Voice Response) with sipgate?

How to set up and use IVR (Interactive Voice Response) with sipgate to route inbound callers automatically.

[Interactive Voice Response (IVR)](https://www.sipgateteam.co.uk/features/ivr) allows you to quickly and automatically connect your inbound callers with the correct destination.

IVRs are offered as part of the sipgate [Pro Package](https://teamhelp.sipgate.co.uk/hc/en-gb/articles/204078062).

An account [Administrator](https://teamhelp.sipgate.co.uk/hc/en-gb/articles/204130832) can book the Pro Package in your sipgate account's settings under **Account Administration** ➔ **Plans & Packages ➔** **Overview**.

As soon as you have booked the Pro Package, you can set up your first IVR.

#### Setting up a Single-Level IVR

* Navigate to **Account Administration**
* Navigate to **IVR** in the left-hand sidebar
* Select **+IVR**
* Give the IVR a Name
* Select a phone number from your available numbers with the **+ Phone Number** button and click **Add new IVR**
* Upload at least one [Main Greeting](https://teamhelp.sipgate.co.uk/hc/en-gb/articles/204167371) by pressing **Click2Record**. This is the greeting which all callers will hear when they call the number assigned to the IVR. Only one main greeting can be active at a time.
* Assign key presses to destinations under **Key Press Assignment**. You can configure up to 10 key presses (0-9 on a dial pad). Possible destinations are a User, Device, Greeting, Other IVR (see 'How to set up a multi-level IVR) and Group.

#### Professional Greetings

Once you have tested out your IVR flow, you may find that it does not sound professional enough. Luckily there are lots of voice recording services such as [VoiceBunny](http://www.voicebunny.com/) who provide professional voice-over artists for your greetings.

#### Important

* Deleting an IVR also deletes all uploaded greetings, so ensure you have a backup of these
* Until a Main Greeting has been uploaded, callers will only hear an engaged tone and cannot use the IVR
* If your destinations include Users or Groups, unanswered calls will follow the User or Group's Call Forwarding rules.


# What is the Presence Display (Busy Indicator)?

How to use the Presence Display in sipgate to see which users are available or on a call.

In your sipgate account, you'll find the **Presence Display** under **My Telephony**. This feature shows which users are currently available and serves as an alternative to a busy lamp field.

If a user is on a call, their tile—showing their internal extension—will turn red.

{% hint style="info" %}
**Important:** Each user must be assigned an internal extension for this feature to work.
{% endhint %}

#### Using the Presence Display

* In the left-hand navigation bar, you'll find the **Presence section** with all internal extension numbers.
* Clicking an extension will start a call to that colleague.
* If an extension is busy, its tile will appear red. If it's being dialed, the tile will have a red border, and the user's name will move.
* You can still place a call to a busy extension if needed.


# How do I activate the Call Queue?

How to activate and configure the call queue feature in sipgate for group call management.

A Call Queue allows you to receive incoming calls even when all participants in the group are on the phone. Callers will hear a message informing them that all lines are busy and that their call will be forwarded as soon as a line becomes available. Calls in the queue are forwarded to the next available extension in the order of their waiting time.

#### How to activate the Call Queue

In the group overview, select the group for which you want to activate the queue. Click **Edit Routing** to activate or deactivate the call queue in the routing diagram

![](/files/d78kEAsErejzZ5aijsCx)

Within the diagram, you can also manage audio files. In addition to a pre-recorded message, you can upload your own custom hold music. To do this, click on the queue card and then select **Edit Queue** via the settings gear icon.

{% hint style="info" %}
**Note:** Call Queuing is part of the paid Pro package. To use the Call Queue feature, you must activate it via Plans & Packages in your account settings.
{% endhint %}

![](/files/FlrLDIzfT6jQOJAxThjN)

Now you can upload your own audio files via drag and drop.\
Once the call queue is activated, all callers will be placed in the queue (with music) and forwarded to the next available user in the selected group. There is no limit to the wait time or the number of callers in the queue. The queue does not apply to internal calls made to the group.

{% hint style="info" %}
**Important:** When a queue is activated, all call forwarding is disabled. To ensure that calls outside of your business hours don't end up in the queue, you can set up a second time profile. In this profile, you can configure call forwarding, for example to voicemail. It is important to check the box for Forwarding should apply immediately in all cases.
{% endhint %}


# Which functions are available during a call?

Overview of in-call functions available in sipgate, including transfer, conference, recording, and pick up.

### You have the option to use any of the following functions during a call:

* **Transferring a call:** With this function, you can transfer a call to another person. First press **\*3**, then the desired phone number and lastly **#** to confirm. You will then be connected to one of your other home phones. When you hang up, the caller will then be transferred. If you do not want to transfer the call then press **\*8** to cancel the transfer function.
* **Attended transfer:** To inform the person the call is being transferred to that there's a caller on the other line, please stay on the line to make an attended or 'warm' transfer. You can then hang up and both parties will be connected.
* **Switching between parties on an Attended Transfer:** When the transferred call is answered on the other side, you can also press **\*4** to switch back and forth between the person you're transferring to and the caller.
* **Conference:** If you would like to speak with another person and the caller simultaneously, press **\*5** and your conference call will start immediately.
* **Recording a call:** Press **\*6** and recording will begin. Every person on the line in the conference call will hear the announcement that "recording has begun". Call recording must be initiated on a call-by-call basis.
* **Terminate Call Recording:** Press **\*6** and recording will stop. Every person on the line in the conference call will hear the announcement that "recording has stopped". The recording is located in your event list. You can listen to it directly from the event list or download it as an mp3 file.
* **Disconnect:** Press **\*8** and the current connection will be terminated.
* **Pick up:** **\*9** or **\*9** extension number **#**\
  When a phone in your office rings, pressing **\*9** will redirect the call, allowing you to answer it on your own phone. If you wish to answer a call directed at a specific phone in the office, press **\*9**, the extension number of the phone in question and then press **#** For example: \*913# for a phone with the extension number 13.
* **Hold Music:** After dialling **\*3**, the person you're speaking with will be put on Hold. To upload your own personalised Hold Music see this [Help Centre article](https://teamhelp.sipgate.co.uk/hc/en-gb/articles/204167381).

{% hint style="info" %}
**Important:** If you are connected with an IVR (Interactive Voice Response), then all of the entries requiring a preceding \* must be typed with \*\* instead. (e.g.\*\*6).
{% endhint %}

**Note:** \*4 and \*5 options are only available within the transfer (after a transfer has been initiated).

**Note:** To use our In-Call functions your phone must support and have [DTMF via RFC 2833](https://teamhelp.sipgate.co.uk/hc/en-gb/articles/204217191) enabled.

* **Snom Desk phones:**\
  To configure your Snom's own Transfer, Hold and Conference buttons for our functions please click [here](https://secure.live.sipgate.co.uk/faq/setup/index/id/174).
* **Grandstream Phones:**\
  To set-up a Grandstream Desk phones Multi-Purpose Keys for use with our functions please click [here](https://secure.live.sipgate.co.uk/faq/setup/index/id/199).
* **Yealink Phones:**\
  To configure a Yealink's Transfer key please open your phone's Web Settings and go to **Features** ➔ **General Information** and set **DTMF Replace Tran** to **Enabled** and **Tran Send DTMF** to **\*3**.


# What are codecs?

Overview of audio codecs used in sipgate VoIP telephony, including supported codecs and data usage.

In order to transmit acoustic signals from a transmitter to a receiver, they must first be converted into data. This task is performed by a codec. A codec is a coherent pair of algorithms that is responsible for encoding and decoding data. For larger amounts of data, a codec is also responsible for compressing and decompressing the data. Codecs play an important role in VOIP telephony, as they control the quality of the connection.

Compressing codecs can be divided into two groups, lossy and lossless codecs. Lossy codecs can achieve higher compression of the data packets and therefore require less bandwidth during transmission. However, this has a negative impact on quality. Lossless codecs transmit the data packets without compression and therefore without loss of quality, but require a higher bandwidth.

#### Which codecs are supported with sipgate?

* G.711a (sipgate VoIP/SIM/trunking)
* G.711u (sipgate VoIP/SIM/trunking)
* GSM (sipgate VoIP/SIM/trunking)
* G.722 (sipgate VoIP/SIM/trunking)
* OPUS (satellite and sipgate App)

***

#### Which RTP / Sprachcodecs are used by sipgate?

* G.711: approximately 100 kbit/s
* GSM: 13 - 20 kbit/s
* G.722/ HD

***

#### Which codecs are used by [satellite](https://www.satellite.me/) and [sipgate App](https://clinq.com/)?

* Opus: 6kbit/s - 510kbit/s

***

#### How much data is used during a standard call?

* VoIP call via G.711 / 10 Min. approximately 7,5MB
* VoIP call via GSM / 10 Min. approximately 0,975-1,5MB

***

If you are experiencing issues with lost audio or with speech quality please see [this](https://teamhelp.sipgate.co.uk/hc/en-gb/articles/204217301-Problems-making-and-receiving-calls) article.


# How can I configure Local Device/Phone Call Forwarding?

How to configure local call forwarding on VoIP phones from Snom, Yealink, Grandstream, Polycom, and Cisco.

If your VoIP phone or device supports call forwarding, your phone's own forwarding options can be used instead of, or in conjunction with, your sipgate account's online call forwarding settings.

Notes:

* Your VoIP phone or device must be registered online in order for its own local call forwarding rules to be followed.
* If you setup call forwarding both in your online sipgate account settings and also in your phone's local settings, sipgate will give handling priority to your online forwarding rules over your phone's local call forwarding rules.

#### Configuring your phone's Call Forwarding

**SNOM:**

Your Snom phone's call forwarding can be configured on-screen via the LCD Display or using the web configuration menu.

On-Screen:

Using your Snom's Up and Down keys, highlight the correct VoIP Account.\
Next, press your phone's 'Menu' key and select 'Call Features' ➔ 'Call Forwarding'.

Web Configuration Menu:

Under 'Setup' in your Snom's web configuration menu open the desired 'Identity' and click on the 'Features' tab:

![](/files/QfggthWYa1yRgQYgMC7y)

**Yealink**

On-Screen:

Press the 'Menu' key and then choose 'Features' ➔ 'Call Forward'.

Call forwarding rules setup using the LCD display will apply to all of the phone's VoIP accounts.

Web Configuration Menu:\
In the Yealink web configuration menu click on 'Features' to setup call forwarding.

* Some Yealink phones, including T4X series phones, support a second 'Custom' call forwarding mode:
* 'Phone' Mode: call forwarding will apply to all of the phone's VoIP accounts.
* Custom' Mode: different call forwarding rules can be setup for each of the phone's VoIP Account.

![](/files/UBYGbglRG6mpSzoupMfB)

**Grandstream**

GXP 21xx and GXP 14XX series:

Press the phone's 'Menu' button and choose 'Call Features'.\
Select the appropriate VoIP Account ('Account X').

Grandstream GXP16xx series:

Press the phone's Menu button and then choose 'Phone' -> 'Call Features'.

The following call forwarding options are available:

* Forward All
* Forward Busy
* Forward No Answer
* No Answer Timeout

**Polycom Soundpoint:**

Press the **Menu** button and select **Features** ➔ **Forward**.

**Cisco/Linksys SPA Adaptors and Deskphones:**

In the Cisco web configuration menu click on 'Admin Login' and 'Advanced'.\
Next click on 'Voice' ➔ 'Phone'.\
Under 'Supplementary Services' the following call forwarding options are available:

* Cfwd All — Forwards all calls.
* Cfwd Busy — Forwards calls only if the line is busy.
* Cfwd No Ans — Forwards calls only if the line is not answered.


# Nuisance Calls and Spam-over-Internet-Telephony

How to deal with nuisance calls and SPIT (Spam over Internet Telephony), including blocking and TPS registration.

{% hint style="warning" %}
**Tip:** In your sipgate account Settings you can blocklist numbers you've received as unwanted caller's numbers: [**Blocking Unwanted Calls (Blocklisting)**](http://teamhelp.sipgate.co.uk/hc/en-gb/articles/209540229).
{% endhint %}

Many telephone handsets and VoIP phones offer options to block anonymous or specific callers. If you are receiving calls from IP addresses or from incomplete or invalid numbers that are not listed in your sipgate account's **event list** (commonly known as SPIT calls, or Spam over Internet Telephony), you can find further information in this article. SPIT involves unsolicited and often automated calls made over the internet, similar to email spam but delivered via voice calls.

{% hint style="warning" %}
**Tip:** Inform unwanted callers that you do not wish to be contacted again, also do not engage with unwanted callers in further conversation and try to end the call as quickly as possible. Engaging with the caller in conversation may only lead to even more unwanted calls.
{% endhint %}

#### Telephone Preference Service (TPS)

As an option to reject unwanted calls, you can register for free with the Telephone Preference Service (TPS). The **Telephone Preference Service (TPS)** is a freely available service. It is the official UK central opt out register on which you can record your preference not to receive unsolicited sales or marketing calls. It is a legal requirement that all UK organisations (including charities, voluntary organisations and political parties) do not make such calls to numbers registered on the TPS unless they have your consent to do so. As TPS registration only prevents marketing calls, organisations will still be able to call you for the purposes of genuine market research.

{% hint style="warning" %}
**Tip:** You can register with TPS [using this link](http://www.tpsonline.org.uk/tps/number_type.html).
{% endhint %}

#### Blocking Spam and Anonymous Calls Directly on Your Device

Some devices already have the setting to block unwanted calls built into their functionality; these devices are summarized in the table with brief comments.

| **Snom IP Deskphones**    | With Snom Phones callers and Contact's can be easily added to a [deny list](http://wiki.snom.com/Settings/deny_all_feature). To block anonymous calls add the following contact in the [Directory](http://wiki.snom.com/Snom760/Web_Interface/V8/Directory) menu of your phone: Name: Anonymous, Number: <anonymous@sipgate.co.uk>, Contact Type: Deny List, Outgoing Identity: Active                                                  |
| ------------------------- | --------------------------------------------------------------------------------------------------------------------------------------------------------------------------------------------------------------------------------------------------------------------------------------------------------------------------------------------------------------------------------------------------------------------------------------- |
| **Gigaset DECT Handsets** | Many Gigaset DECT Handsets support "Anonymous Call Silencing". Some Gigaset handsets also come with blocklists to selectively screen or block specific numbers.                                                                                                                                                                                                                                                                         |
| **Yealink Deskphones**    | Yealink IP Phones offer anonymous call rejection and blocklisting options.                                                                                                                                                                                                                                                                                                                                                              |
| **Grandstream**           | Grandstream adaptors and deskphones support Anonymous Call Rejection.                                                                                                                                                                                                                                                                                                                                                                   |
| **Cisco/Linksys SPA**     | Anonymous calls can be blocked in the device settings. Using 'Selective Call Forwarding' specific numbers can be blocked.                                                                                                                                                                                                                                                                                                               |
| **Panasonic**             | Anonymous calls can be blocked in the device settings. Using 'Selective Call Forwarding' specific numbers can be blocked. Recent Panasonic DECT handsets offer Nuisance Call Block options to block specific callers and anonymous calls, while older handsets often offer some Call Barring options. Further information can be found in Panasonic FAQ: [Blocking Calls](http://eng.faq.panasonic.com/app/answers/detail/a_id/20784/). |
| **BT Home Phones**        | BT Home Phones offer call blocking as standard with a wide range of options available including Do Not Disturb.                                                                                                                                                                                                                                                                                                                         |

#### Receiving Direct IP (SPIT) Calls from Numbers Like 100, 1001 and IP Addresses?

Many phones support Direct IP calls allowing one VoIP phone to call another VoIP phone by dialling the destination phone's IP address, without using a service like sipgate. Unwanted or nuisance Direct IP Calls are called SPIT calls (Spam over Internet Telephony).These calls aren't being made to your sipgate phone number or routing over our network. You will need to review your local network and VoIP phone configuration to block these types of calls.

{% hint style="info" %}
**Important:** As this will be a local network and phone security issue, the best support and assistance will be provided by your local IT administrator with support from your VoIP device and/or router manufacturer's support teams.
{% endhint %}

Using a local or listen SIP Port value (e.g. 44160) other than the default port value 5060 should put an end to these types of calls. While this may stop these calls, this step alone is not a solution. Most recent VoIP phones will have an option to disable Direct IP Calls. Most quality VoIP phones and devices will also have other settings that can be used to block these SPIT calls:

| Device                                    | Comments                                                                                                                                                                                                                                                                                                                                                                                                                                                                                                                                                                                                        |
| ----------------------------------------- | --------------------------------------------------------------------------------------------------------------------------------------------------------------------------------------------------------------------------------------------------------------------------------------------------------------------------------------------------------------------------------------------------------------------------------------------------------------------------------------------------------------------------------------------------------------------------------------------------------------- |
| **Grandstream Deskphones**                | The available options will vary depending on the model of your phone. Most Grandstreams will have an option to "**Disable Direct IP Calls**" (**under Settings** → **Advanced Settings**). Under **Profile/Account** set **'Check SIP User ID for incoming INVITE:'** to **'YES'**. Otherwise please open **Account X** → **SIP Settings** → **Security Settings** and look for the option **'Accept Incoming SIP from Proxy Only'**. Please set this to **'YES'**.                                                                                                                                             |
| **Snom Deskphones (Firmware Version v8)** | Under **Advanced →** **QoS/Security**, set the option "[**Filter packets from Registrar**](http://wiki.snom.com/Settings/filter_registrar)" to **Yes**. Your router should also have a wide range of security options. You should contact your router manufacturer's support for advice and recommendations. At the very minimum as an initial step, please change your sipgate login and SIP Password, change the administrator passwords and update the firmware used by your VoIP phones, routers, and other networked devices as well as scanning your computers, smartphones, etc for viruses and malware. |

{% hint style="warning" %}
**Tip:** If your router firewall supports the option, you could limit VoIP traffic to our IP ranges: [**Security Settings: sipgate IP & Port Ranges**](https://teamhelp.sipgate.co.uk/hc/en-gb/articles/204176231).
{% endhint %}

Ultimately, your local network's configuration and its security is your responsibility and outside sipgate's scope of support. If you're receiving SPIT Calls, the best source of help will be provided by your VoIP phone and/or router manufacturer's support staff.


# How do I set up a VoIP extension?

How to set up a VoIP extension in sipgate for location-based phones without user assignment.

You can set up phones without assigning them to a specific User, and instead assign them to specific locations. Keep in mind that the VoIP extension does not have an event log. Each VoIP extension costs £ 4.95 per month.

#### How it works

In Accountmanagement, go to **Telephony,** then **Additional VoIP devices** and click the button: **+Add.**

![](/files/XNXd8Q8FalwcvDLwlOjg)

Enter any name for the extension and click **Add device**.

![](/files/ABkqP0GW5J7dqSqPtBVU)

Now, click on the new extension and go to **SIP Credentials**. Here you'll find the credentials needed to enter to an existing VoIP phone.

![](/files/t6FOglexs8TS9rK48NWO)

If the new endpoint should be reachable under a phone number, click **Add Phone Number** under Routing. This completes the VoIP extension setup.

![](/files/jWh5uYi6lAcBw8x92fnw)

#### Using as an Analog Fax or Video Phone

To use the extension as an analog fax or video phone, follow these steps:

Go to Settings and toggle the **Use as Analog Fax or Video Phone** option to **Yes**.

![](/files/x7wn6qnPvMAD6n8FPAiz)


# How can I block the destinations Users can call?

How to configure call barring and block expensive or international destinations for users in sipgate.

As an administrator, you can block certain call destinations for yourself and your team members. Whether it's expensive international destinations or specific premium-rate numbers, you have full control over call restrictions.

To manage call barring settings

1. Go to **Account Administration** and select **Users**.
2. Choose the team member for whom you want to set call restrictions.
3. Click **Permissions** on the left-hand side to access call barring options.

#### Configuring Call Barring

You can toggle different call barring options using the provided switches. Changes may take up to **15 minutes** to take effect.

#### International and Premium-Rate Numbers

Enabling this option prevents users from calling premium-rate numbers (e.g., 01801, 01802, 01803) and all international numbers. Pricing details for outbound calls are available in our rate list.

{% hint style="info" %}
**Important:** Some premium-rate numbers (e.g., 0137, 0138, 01212, 01807, 0185, 0181, 0188, 0900, and 118xx) are always blocked from sipgate's network and do not need to be manually restricted.
{% endhint %}

#### Chargeable Destinations

When enabled, users can only make internal calls or calls included in an active flat rate (e.g., Germany-wide flat rate, mobile flat rate).

#### High-Cost International Numbers

By default, newly created users have high-cost international destinations blocked. If a user attempts to call a blocked destination, they will hear the following message

***"Hello, for security reasons, some international destinations are blocked on your sipgate account. You will soon receive a link to lift these restrictions."***

Additionally, the administrator will receive an email notification.\
The list of blocked destinations is regularly updated, and we do not provide a full list of affected countries. However, destinations typically classified as **high-cost** do not include EU countries, the USA, or China.

#### Roaming Outside the EU (Mobile)

Outgoing and incoming calls using a sipgate SIM card outside the EU are blocked due to roaming charges.\
By adjusting these settings, administrators can control costs and enhance security for their team's telephony setup.


# How can I block unwanted calls (Blocklisting)?

How to block unwanted calls using the blocklist feature in sipgate, including anonymous call rejection and SPIT blocking.

Tired of telemarketing calls? Or do you have specific phone numbers you don't want to receive calls from? Then the **Blocklist** is the feature for you.

{% hint style="info" %}
**Important:** The voicemail feature must be booked and activated for the blocklist to work. Alternatively, you can book sipgate.io to enable call blocking.
{% endhint %}

#### Adding Numbers to the Blocklist

* Click on **My Telephony**, then go to **Settings** in the left menu.
* Select **Blocklist** and click **Add Number to Blocklist**.
* A pop-up window will appear where you can enter a phone number. You can either block an exact number or block all numbers starting with the same digits.
* Click **Save** to confirm.

Once added, all users on the account will see the blocked numbers in the blocklist settings. **The blocklist applies to all users on the account, and any user can view, edit, or remove blocked numbers.**

#### Unblocking Numbers

To remove a number from the blocklist

* Click on the **three dots** next to the blocked number and select **Delete**. Calls from that number will now ring again.
* The three-dot menu also allows you to **edit** a blocklisted number.

{% hint style="info" %}
**Note:** Your phone or device may have additional call-blocking or screening options.
{% endhint %}

#### Blocking Anonymous Calls

You can block calls with **no caller ID** or **withheld numbers**

* Go to **Personal Settings** > **Connections**.
* Select the connection you want to configure.
* Scroll down and toggle **Reject Anonymous Calls** on.
* Click the **cogwheel** icon to choose whether to block these calls completely or send them directly to voicemail.
* Repeat for all connections if necessary.

For **Groups**, each user must update their settings individually.

### Blocking Unwanted Direct IP Calls (SPIT)

Are you receiving **direct IP calls** from numbers like *100*, *1001*, or unknown IP addresses?

Many VoIP phones allow direct IP dialing, meaning a VoIP phone can call another directly via its **IP address**, bypassing sipgate's network. Unwanted **direct IP calls** are known as **SPIT (Spam over Internet Telephony).**\
\&#xNAN;*These calls do not go through sipgate's network, so they must be blocked locally on your VoIP device or router.*

#### How to Stop SPIT Calls

* **Change your SIP login & password**
* **Update firmware** on your VoIP phone, router, and other connected devices
* **Check for malware** on your computers and smartphones
* **Use a non-default SIP port** (e.g., **44160** instead of **5060**)

Most modern VoIP phones allow you to **disable direct IP calls** in the settings.

**Device-Specific Blocking Methods**

* **Grandstream Desk Phones**
  * Go to **Settings** → **Advanced Settings** → Enable **Disable Direct IP Calls**
  * Under **SIP Account Settings**, enable **Check SIP User ID for Incoming INVITE**
  * In **SIP Security Settings**, set **Accept Incoming SIP from Proxy Only** to **Yes**
* **Snom Desk Phones (Firmware v8 and above)**:
  * Go to **Advanced Settings** → **QoS/Security**
  * Set **Filter Packets from Registrar** to **Yes**

**Router Firewall Protection**

If your router supports **firewall rules**, limit VoIP traffic to **sipgate's IP ranges** for added security.\
Since **SPIT calls are a local network issue**, your **IT administrator** or your **VoIP device/router manufacturer's support team** can provide the best assistance.


# How can I reject calls when busy (Busy on Busy)?

How to enable the Busy on Busy feature in sipgate so callers hear a busy tone when you are on a call.

{% hint style="info" %}
**Note:** This feature works differently in sipgate neo, so this article does not apply.
{% endhint %}

Enable the **Reject Call When Busy** feature so that callers receive a busy tone when you are already on a call. This ensures that no additional calls come through while you're engaged in another conversation.

**To enable this feature, follow these steps**

1. Click **My Telephony** on the homepage.
2. In the left-hand menu, go to **Settings** and then **User Settings**.
3. Scroll down until you find the **Reject Call When Busy** section.
4. Click the toggle so that it turns green and says **Yes**.

Once activated, all phone numbers linked to your user account will play a busy tone if you're already on a call. This setting takes effect immediately.

If Busy on Busy is deactivated, you will hear a call waiting tone during an ongoing call if another call comes in. However, if you are in a channel with an activated waiting loop, call waiting is automatically suppressed to avoid interference.

{% hint style="info" %}
**Exception:** If you use the **sipgate app 2.x** for calls, the **Busy on Busy** function will not work. The sipgate app relies on a separate app extension for outgoing calls, which is not monitored by this feature. In this case, you will remain reachable, and incoming calls will still be routed to your VoIP phone or other devices.
{% endhint %}


# How to upload and manage customised music on hold

How to upload and manage custom music on hold for your sipgate account as an administrator.

You can replace the default **Music on Hold** played during call holding at the account level. This allows callers to recognize that their call is on hold, for example, during a transfer.\
To upload a custom **Music on Hold** MP3 file, you must be logged into your sipgate account as an **Administrator**.

#### Steps to add custom hold music

Go to **Account Administration** ➔ **Customisation**.\
Scroll down to the **Call hold** section and click the **gear icon.**

![](/files/DzlNOfC6I3RUhddfA2tl)

Click **Upload MP3** to add your custom audio file. Your file must be in **MP3 format** and can be up to **10 MB** in size. You can **rename, delete, or select** which hold music file to use.

![](/files/Sax3t14uzjo1uexEZcxk)

Click **Save** to apply your changes.

The uploaded file will now replace the default hold music played when calls are put on hold across your account.


# sipgate app


# What is the presence indicator?

Understanding the presence indicator in the sipgate app to see colleague availability and call status.

The presence indicator shows the current status of your colleagues – for example "available" or "on a call". This way you can see at a glance who is reachable.

#### For sipgate accounts created before 25.08.2025

You can find the presence indicator under **My Telephony**. It shows which users are available. If someone is on a call, the card with the internal extension appears in red.

**Important:** All users must be assigned to an internal extension.

#### For sipgate accounts created from 25.08.2025 onwards

The presence indicator is integrated into the **sipgate app**. You can see the status of your colleagues in several places:

* under **Contacts** in the sidebar in the **internal** tab and in the respective contact details
* in the channel under the **Availability** tab
* in your personal channel under the **Favorites** tab – here you can create your own availability display with favorited team contacts
* in the **omnibar**, which opens when you click on **Start call** in the sidebar and search for a team contact

**Which statuses are available?**

The presence indicator distinguishes between two types of statuses:

Global status – applies to you as a person, independent of the channel, and is displayed on the avatar:

* **Available** You are ready to answer calls
* **In a call** You are currently on the phone
* **In follow-up** You are in the configured follow-up time
* **Do not disturb** You have set yourself to "Do not disturb" and are not reachable for incoming calls
* **Offline** None of your devices or apps are connected
* **Not available** You are logged out of your personal channel

Channel status – only applies to a specific channel:

* **Logged in** You are logged into the channel and can answer calls there
* **Logged out** You are logged out of the channel

![](/files/AWfn3Bno25orW9BO4PQ2)

**How is the status displayed?**

The status is represented by a colored indicator on the avatar and a label below the avatar.

When someone is logged out of a channel, the avatar is grayed out and marked as "Logged out".

**What influences the status?**

Your global status is updated automatically:

* You start a call: Status changes to In a call
* You end a call: You can switch to In follow-up
* You log out of all channels: Status becomes Offline
* You log out of your personal channel: Status becomes Not available

You can also change your status manually, for example to Do not disturb when you want to work without interruptions

**The personal channel**

Every user has a personal channel. This is mainly used for internal 1-to-1 telephony. Your availability in this channel is particularly important

* Logged into personal channel + global status Available: You appear as Available (green)
* Logged out of personal channel: You appear as Not available, even if you are logged into other channels

Important: If you are logged out of your personal channel, your colleagues cannot reach you directly via internal telephony. You are then only reachable via channels you are logged in.

![](/files/vm13FY8wITeUeJfU3oPn)

**When am I available?**

You are considered Available when all of the following conditions are met:

* You are logged into your personal channel
* Your global status is not In a call, In follow-up, Do not disturb or Offline

**Special case: Available in this channel**

If you are logged into a shared channel but logged out of your personal channel, your colleagues will see "Available in channel" in the respective channel. This means: You can answer calls in this specific channel, but you are not reachable via your personal channel.

![](/files/80Q6LCaKmXXZ37DI2sub)


# Can I retrieve my AI-generated channel data via API interface?

How to retrieve AI-generated channel data via webhook API interface in the sipgate app.

{% hint style="info" %}
This AI Assist Webhook is part of **AI Assist** and is set up in the sipgate desktop app for an individual channel. It is different from [**CI Webhooks**](/use-sipgate/sipgate-app/how-do-i-set-up-ci-webhooks), which are configured in the App Web and transfer Conversation Intelligence data account-wide.
{% endhint %}

Note: This feature is only available to customers with a contract signed before August 25, 2025.

#### What requirements must be met?

With the sipgate app, you can use AI functions to create transcripts, summaries, tasks, and smart answers for each of your conversations. These are then automatically saved in the sipgate app. As an admin, you can also use a webhook to transfer the saved information from the shared channels to external databases or your CRM system for further analysis or processing. We explain how this works in this article.

Important: All admins share the same configuration. If several users of an account have the admin role, existing settings of one admin may be overwritten by the changes made by another admin.

First, you need a URL to which the data is automatically sent as soon as all AI-generated content is available after a phone call.

Important: Only calls from shared channels are taken into account here. Private phone calls are excluded from data transfer.

#### Where do I enter the configuration data?

As an admin open the sipgate desktop app, go to Labs → AI Assist Webhook. Enter the desired target URL there and save it. After each call from a channel, all AI-generated content will be transferred to this URL as a bundle via the webhook.

Important: The content is sent automatically after each channel call – however, it may take a moment, as the transfer only takes place once all AI-generated content is available.

#### What does it look like?

The data is generally provided in json format. However, you can set in the sipgate app whether it should be output in vCon format. "vCon" stands for Virtualized Conversations and is a special format for storing and sharing conversation data such as chat logs, transcripts, and recordings. You can find more information about this format [here](https://ietf-wg-vcon.github.io/draft-ietf-vcon-vcon-container/draft-ietf-vcon-vcon-container.html).

#### This is the JSON payload without vCON:

```json
{
  "callHeadline": "Customer asked about product availability and pricing",
  "call": {
    "id": "call_12345",
    "caller": "+491751234567",
    "callee": "+498912345678",
    "startTime": 1718202000000,
    "endTime": 1718202300000,
    "duration": 300,
    "direction": "inbound"
  },
  "channel": {
    "id": "channel_98765",
    "name": "Sales Hotline"
  },
  "transcriptions": [
    {
      "speaker": "caller",
      "startTime": 0,
      "endTime": 5000,
      "text": "Hi, I wanted to ask if the new product is available."
    },
    {
      "speaker": "callee",
      "startTime": 5001,
      "endTime": 10000,
      "text": "Yes, it is available and currently on a promotional offer."
    },
    {
      "speaker": "caller",
      "startTime": 10001,
      "endTime": 15000,
      "text": "Great! How much does it cost with the discount?"
    },
    {
      "speaker": "callee",
      "startTime": 15001,
      "endTime": 20000,
      "text": "The discounted price is 49.99 Euros including VAT."
    }
  ],
  "summary": "The caller inquired about the availability and pricing of a new product. The agent confirmed availability and provided the discounted price.",
  "note": {
    "content": "Customer seemed interested in the promotional offer and may convert soon."
  },
  "actionItems": [
    {
      "id": "action_1",
      "text": "Follow up with the customer in 2 days to offer further assistance."
    }
  ],
  "smallTalkItems": [
    {
      "id": "smalltalk_1",
      "topic": "Weather",
      "description": "Caller mentioned the sunny weather at the beginning.",
      "pinned": false,
      "dismissed": false
    }
  ],
  "smartAnswers": [
    {
      "id": "smartanswer_1",
      "question": "Is the new product available?",
      "answer": "Yes, it is currently available and on promotion."
    },
    {
      "id": "smartanswer_2",
      "question": "What is the price?",
      "answer": "The promotional price is 49.99 Euros including VAT."
    }
  ]
}
```

If you have any further questions about AI Assist Webhooks, please write to us at: <labs@sipgate.de>


# Using the sipgate app in a mobile browser

How to use the sipgate app in mobile browsers on iOS and Android, including PWA setup and troubleshooting.

You can use the sipgate App in a mobile browser - on your smartphone or tablet.\
Depending on your operating system and browser, there may be differences, especially in how incoming calls ring, how notifications appear, and how the microphone is accessed.

#### iOS: Safari, Chrome, and Firefox

The app works in all three browsers. However, Safari requires extra settings so that **incoming calls ring** and **the microphone** can be used continuously

#### **Allow Microphone Access (Safari)**

1. Open the app in Safari.
2. Tap **aA** or the website icon in the address bar.
3. Select **Website Settings**.
4. Set **Microphone** to **Allow**.

#### **Enable Ringing for Incoming Calls (Safari)**

Go to the **iOS Settings** app and select **Safari**.

![](/files/VtUj7EoaGCqlM6itPuUe)

Under **Advanced**, open **Feature Flags**.

![](/files/a5tsduRBUZDl7NOI8BrO)

Enable **AudioSession Full API**.

![](/files/5vDJmytB2DASVW8WppOx)

**Note:** This setting is required for Safari to play a ringtone for incoming calls.

#### **Chrome on iOS**

You can open and use the app, but incoming calls will not ring. iOS does not allow continuous background audio in these browsers.

**Firefox on iOS**

The app works without restrictions. Incoming calls ring automatically—no additional settings are required.

#### Android: Chrome, Firefox and Samsung Internet

The app works without restrictions. Incoming calls ring automatically—no additional settings are required.\
This applies both in the browser and if you install the app as a **Progressive Web App (PWA)**.

#### Adding the App to Your Home Screen (PWA)

Installing the app as a PWA gives you faster access. This is optional but recommended.

**iOS (Safari)**

1. Open: <https://workspace.sipgate.com>
2. Tap the **Share** icon.
3. Select **Add to Home Screen**.
4. Launch the app from the new icon.

**Important:** For incoming calls to ring, the **AudioSession Full API** feature (see **Enable Ringing for Incoming Calls Safari**) must be enabled.

**Android (Chrome)**

1. Open: <https://workspace.sipgate.com>
2. Tap the three dots in the top right corner.
3. Select **Add to Home Screen**.
4. Launch the app from the new icon.

#### Common Issues and Solutions

| Problem                                   | Possible Cause                       | Solution                                                                                   |
| ----------------------------------------- | ------------------------------------ | ------------------------------------------------------------------------------------------ |
| Incoming calls don't ring in Safari (iOS) | Feature Flag not enabled             | iOS Settings ➔ Safari ➔ Advanced ➔ Feature Flags ➔ Enable **AudioSession Full API**        |
| Incoming calls don't ring in Chrome (iOS) | Chrome does not support this feature | Add Chrome app to Home Screen to receive a notification sound **or** use Safari or Firefox |
| No system notifications (iOS)             | App not installed as PWA             | Add sipgate app as PWA via Safari                                                          |
| No ringing on Android (rare)              | Browser/device glitch                | Clear browser data, restart device, reopen app                                             |


# How can I allow notifications for the sipgate browser app?

How to allow browser notifications for the sipgate app in Chrome, Firefox, Safari, and Edge.

#### **Why does the sipgate browser app need notifications?**

The sipgate browser app uses notifications to inform you about incoming calls, even if your browser is in the background or the app is open in another tab. Without this permission, you won't be notified of incoming calls and could miss important conversations.

If you accidentally denied access to notifications or reset the permissions when you first opened the app, you can find instructions here on how to subsequently allow access.

#### **Adjust browser settings**

Depending on which browser you use, the steps are slightly different.

**Google Chrome**

1. Open the sipgate app on the web in Chrome and log in
2. Click on the settings icon (or lock icon) on the left side of the browser's address bar
3. In the "Notifications" section, activate the toggle switch on the right side
4. Reload the page if necessary

Option:

1. Click on the three dots (⋮) in the top right corner of your Chrome browser
2. Select "Settings" and then "Privacy and Security"
3. Click on "Website Settings" and then on "Notifications"
4. Search the sipgate website (<https://workspace.sipgate.com>) in the list and change the setting to "Allow"

**Mozilla Firefox**

1. Open the sipgate app on the web in Firefox and log in
2. Click the settings icon on the left side of the address bar
3. Click "Blocked" when sending notifications\
   \\

   ![](/files/zCq82jX6MV5E3WMjIuAG)
4. A banner will appear at the bottom of the app - click on "Enable"\
   \\

   ![](/files/3KpUOOYwmbjynv4FWqqL)
5. In the dialog that appears, select "Allow"\
   \\

   ![](/files/h0QaqDKfRKqdxxZd6LU2)
6. Reload the page

Option:

1. Click on the three lines (≡) in the top right corner of the Firefox browser
2. Select "Settings" and scroll to "Privacy & Security"
3. Scroll down to "Permissions" and click "Settings" next to "Notifications"
4. Search the sipgate website (<https://workspace.sipgate.com>) in the list and change the setting to "Allow"

**Apple Safari**

1. Click on "Safari" in the menu bar (top left)
2. Select "Settings..."\
   \\

   ![](/files/bPhTjhDrXvPSRmPxWZ2v)
3. Go to the "Websites" tab and select "Notifications" in the left sidebar
4. Search the sipgate website ([workspace.sipgate.com](http://workspace.sipgate.com)) in the list and change the setting to "Allow"\
   \\

   ![](/files/OQMjPA8puJVTEwW7kENs)
5. Reload the page

**Microsoft Edge**

1. Open the sipgate app on the web in Edge and log in
2. Click on the lock symbol on the left side of the address bar
3. Click "Permissions for this site"\
   \\

   ![](/files/r5HlQu7AInuOoGJDIo5E)
4. Set the "Notifications" setting to "Allow"\
   \\

   ![](/files/sqaBWXR6qL9zaclSRVku)
5. Close the settings and reload the page

#### **Checking the notification settings in the sipgate app**

You can check at any time in the sipgate app whether notifications are activated:

1. Log in to the sipgate app on the web
2. Click on "Settings"
3. Select "Preferences"
4. Here you can see the status of your notification approval

#### **Errors and Solutions**

If you still experience problems with notifications after changing the settings:

1. **Check browser settings**: Make sure that notifications are generally allowed in the general browser settings.
2. **Check system settings**: On some operating systems, you may also need to allow browser notifications in the system settings.
   * **Windows**: Settings ➔ System ➔ Notifications & Actions
   * **macOS**: System Preferences ➔ Notifications
   * **Linux**: Depending on the distribution used
3. **Restart browser**: Restart your browser completely and try again.
4. **Clear cache**: Clear your browser cache and reload the page.

#### **Importance of notifications**

Note: Keep in mind that without notifications enabled, you won't receive notifications of incoming calls if the browser is in the background or the app is open in another tab.


# How do I allow microphone access for the sipgate browser app?

How to allow microphone access for the sipgate browser app in Chrome, Firefox, Safari, and Edge.

#### Why does the sipgate browser app require access to your microphone?

The sipgate browser app requires access to your microphone to make or receive a call. The first time you launch the app, you'll be asked whether you want to allow access to your microphone. If you accidentally denied access or reset your permissions, you'll find instructions for the most commonly used browsers here on how to subsequently allow access again.

#### Google Chrome

1. Open the sipgate browser app in Chrome and log in
2. Click on the settings icon (or lock icon) on the left side of the browser's address bar
3. In the "Microphone" section, activate the toggle switch on the right side
4. In the dialogue that opens, change the setting next to "Microphone" from "Reject" or "Ask" to "Allow"
5. Reload the page if necessary

#### Mozilla Firefox

1. Open the sipgate browser app in Firefox and log in
2. Click on the Settings icon on the left in the address bar
3. Click on "Temporarily blocked"\
   \\

   ![](/files/Ri9sg3JXV9H4SjX5cqqJ)
4. Reload the page
5. After reloading, a banner will appear in the top right corner of the app - click on "Enable"\
   \\

   ![](/files/wHC4sUrg0iPOvJitYK8R)
6. In the dialogue that appears, select "Allow"\
   \\

   ![](/files/Dnc2nDOJeqGD7eGx5gOF)

   \
   **Note**: Activate the "Remember for all microphones" option to apply the setting to all connected microphones.
7. Reload the page if necessary

#### Apple Safari

1. Open the sipgate browser app in Safari and log in
2. Click on the website icon on the left side of the address bar
3. Select "Website Settings..."\
   \\

   ![](/files/4o2fdLuZZDI7Ie0RDH4e)
4. In the dialogue that opens, change the setting next to "Microphone" from "Deny" or "Ask" to "Allow"\
   \\

   ![](/files/bwra3CrHKUQtJnrOEqhd)
5. Reload the page if necessary

#### Microsoft Edge

1. Open the sipgate browser app in Edge and log in
2. Click on the lock icon on the left side of the address bar
3. In the "Permissions for this site" section, click the setting next to "Microphone" (currently set to "Block")
4. Set the setting for "Microphone" to "Allow"\
   \\

   ![](/files/QwVlZsqYQQjHK1u1SMKJ)
5. Reload the page if necessary

#### Problems and solutions

If you still experience problems after changing the settings:

1. **Check if your microphone is working**: Try testing your microphone in another application.
2. **Check the system settings (for your browser)**: Sometimes access must also be allowed in your computer's system settings for the browser.
3. **Restart browser**: Restart your browser completely and try again.
4. **Select the correct audio device**: If multiple microphones are connected, make sure the correct one is selected.


# How do I install the sipgate app on Windows?

How to install, configure, and troubleshoot the sipgate app on Windows 10 and 11 desktops.

To install the sipgate app on a Windows desktop, certain prerequisites must be met.

| **Requirements**      | x86 CPU or 64-bit support (Emulator) + PowerShell enabled |
| --------------------- | --------------------------------------------------------- |
| **Supported Systems** | Windows 10 / 11 (64-bit)                                  |

You can download the sipgate app from [here](https://www.sipgate.co.uk/app-download). Once the download is complete, copy the file **clinq.exe** to your computer. Then, start the installation process. It is important to note that installing from a network drive may lead to error messages, so it's recommended to run the file locally on your PC.

Currently, there is no way to perform mass installations of the sipgate app using an .msi file. However, you can create your own .msi file using various free and pro software solutions:

* InstallShield
* Advanced Installer
* MSI Factory
* WiX Toolset
* NSIS (Nullsoft Scriptable Install System)
* Microsoft Visual Studio Installer Projects
* Various other installer software

#### Installation path

During installation, the sipgate app is typically installed in the following directories:

* C:\Users\[Username]\AppData\Local\Programs\sipgate-desktop\\
* C:\Users\[Username]\AppData\Roaming\sipgate-desktop\\

#### Installing on a terminal server

It is possible to install the sipgate app on a terminal server, but this is not the default setup. Be aware that audio device connections between the desktop and the terminal server are not supported.

#### Setting sipgate App as the Default TEL App

If you are using Windows 11, you can set the sipgate app as the default app for TEL (telephone function) by going to **Default Apps** and selecting **Choose defaults by link type**. Then, choose **Tel: sipgate** as the default.

If you are using Windows 10/11 version 22H2 and the option to set the sipgate app as the default TEL app is not visible, you can resolve the issue as follows:

1. Exit the sipgate app.
2. Delete the **FirstRun** folder located in C:\Users\[Username]\AppData\Roaming\sipgate-desktop\FirstRun.
3. Restart the sipgate app.
4. You should now be able to select sipgate as the default app for the **Tel** link type.

#### Enabling notifications for the sipgate App

To ensure you receive notifications from the sipgate app on Windows 11, follow this path:\
**Settings ➔ System ➔ Notifications ➔ ON**. After enabling general notifications, go to the sipgate app and adjust specific settings: **sipgate app ➔ Settings ➔ Notifications ➔ ON**. To ensure visual notifications, activate: **sipgate app Settings ➔ Show Notification Banner.**

#### Network installation of the sipgate App

We recommend using the app on the web: <http://workspace.sipgate.com/\\>
Users always have the latest version and sufficient user rights.

Note: Local administrator rights are required to install or update the sipgate app on Windows.

To avoid manual updates by users, we recommend using a software management tool:

baramundi: Use [software distribution](https://www.baramundi.com/en-gb/solutions/software-distribution/).

installomator: Use the [GitHub](https://github.com/Installomator/Installomator) repository to find the latest [.yml file](https://desktop.download.sipgate.com/latest.yml) and automatically check for new versions.

Please note, we are currently unable to provide .msi files.

#### Errors & solutions

If the **installation** of the sipgate app on your Windows computer **does not work** as expected, you can try the following troubleshooting steps:

* Check Windows admin group policies that might be blocking the installation.
* Temporarily disable local software firewall/antivirus programs.
* On Surface Pro X SQ1/SQ2, test using a 64-bit emulator.
* If an error message appears after logging in, try resetting the cache in the sipgate app help options.

If none of these steps resolve the issue, send your sipgate logs along with a description of the error to the support team.

**Error: sipgate App Installation/Update Doesn't Work**\
Error Messages: **sipgate cannot be closed**. and **A JavaScript error occurred in the main process.**\
Cause: PowerShell is operating in **Constrained Language Mode**, which blocks PowerShell script execution.\
Solution:

1. Temporarily adjust group policies to allow PowerShell in FullLanguage mode.
2. Perform the sipgate app installation/update.
3. Re-enable group policies to return to the original state.
4. Example: Use Constrained Language mode in SRP/GPO.

Following these steps should allow the sipgate app installation or update to proceed without errors. Be aware that group policy changes should only be temporary to maintain security settings.

**Error: Microphone Not Selectable in the App**\
If a microphone cannot be selected in the sipgate app, you can enable access as follows:\
**Go to Windows ➔ Privacy & Security ➔ Microphone**

* Microphone access: ON
* Allow apps to access your microphone: ON

#### Uninstalling the sipgate app

How to completely uninstall the sipgate app:\
Go to Windows Apps and Features, search for sipgate app, and click **Uninstall**.\
Open the desktop in Windows and select **This PC.**\
Select **drive C:,** navigate to **Users**, and click on your **username**.\
Click on the **AppData folder**. If this folder is not visible, enable it through the options or follow a Google guide.\
Inside the Local and Roaming folders, locate the sipgate-desktop folder and delete it:

* C:\Users\[Username]\AppData\Local\Programs\sipgate-desktop
* C:\Users\[Username]\AppData\Roaming\sipgate-desktop

{% hint style="info" %}
**Important:** When uninstalling, settings, credentials, and contacts are unfortunately retained. These data must be removed manually.
{% endhint %}


# How do I install the sipgate app on MacOS?

How to install, set up notifications, and uninstall the sipgate app on macOS.

To install the sipgate app on your Mac, you can use this [download link.](https://www.sipgate.de/app?_gl=1*iiilxm*_gcl_aw*R0NMLjE3MjQzMjQ0NDkuQ2owS0NRand3NXUyQmhEZUFSSXNBTEJ1TG5PNUZQaDI4U0NMTlRtSUxiQ2lWRWdtQzRfYlk1a3FtUDhMYmpuWlVxX0dCR1lQRUVaU09oTWFBcUhpRUFMd193Y0I.*_gcl_au*Mjc3NTU3NjA4LjE3MjQxMzU2MDY.*_ga*ODg3Nzk1NTAxLjE3MjQxMzU2MDY.*_ga_VTZ61ES43V*MTcyOTE1NTU3Ni41MS4xLjE3MjkxNTU2MzQuMi4wLjA.#download) Once the download is complete, run the downloaded file to start the installation process.

When the sipgate.dmg window opens, simply drag the **sipgate icon** to the **Programs / Applications** icon in Finder. This will install the sipgate app on your Mac, and it can now be found in the Applications folder in Finder.

![](/files/glE9ccfaSwkOkcAKVshc)

{% hint style="warning" %}
**Tip:** You can find more articles about the sipgate app [here](https://teamhelp.sipgate.co.uk/hc/en-gb/sections/21923349133853-sipgate-app-CLINQ).
{% endhint %}

#### How to set up notifications in the sipgate app?

To see sipgate app notifications in the notifications panel, go to your **Mac settings** and select the Notifications section. You should see sipgate there, but it will likely be marked as **off**. To receive notifications from the sipgate app, switch it to on and choose **Banner** as the alert style. Depending on your preferences and needs, you can customize further settings.

#### How to set the sipgate app as default app for calls?

To set the sipgate app as the default for calls, follow this path: FaceTime ➔ Preferences ➔ General ➔ Default for Calls ➔ Set sipgate App as Default.

#### Network Installation of the sipgate app

We recommend using the app on the web: <http://workspace.sipgate.com/\\>
Users always have the latest version and sufficient user rights.

Note: Local administrator rights are required to install or update the sipgate app on Windows.

To avoid manual updates by users, we recommend using a software management tool:

baramundi: Use [software distribution](https://www.baramundi.com/en-gb/solutions/software-distribution/).

installomator: Use the [GitHub](https://github.com/Installomator/Installomator) repository to find the latest [.yml file](https://desktop.download.sipgate.com/latest.yml) and automatically check for new versions.

Prerequisites

**Hardware**: x86 CPU or ARM CPU (M1/M2/M3/M4)\
**Software**: macOS 10.16 / 12.x / 13.x / 14.x / 15.x

**Not supported**:

* macOS 10.13 (High Sierra)
* macOS 10.14 (Mojave)
* macOS 10.15 (Catalina)
* Terminal server usage

#### How can I uninstall sipgate?

You can easily uninstall the sipgate app by:\
**macOS ➔ Finder ➔ Applications ➔ Dragging the sipgate app icon to the trash.**

If you want to remove all app files from your computer, follow these steps:

1. Open Finder.
2. Go to /Users/$USER/Library/Application Support/sipgate-desktop
3. Delete this folder.

**Replace $USER with your Mac username.**\
Example: /Users/Mustermann/Library/Application Support/sipgate-desktop


# How do I install the sipgate app on Linux?

How to install and configure the sipgate app on Linux, including troubleshooting for common errors.

On a Linux operating system, you don't need an installation file for the sipgate app. Instead, you can simply launch the sipgate.AppImage file as an application. You can download this file using the following ***link***. The prerequisite for using it is an **AMD CPU**.

{% hint style="warning" %}
**Tip:** However, you can install the AppImage file using the AppImage Launcher software. By doing this, you can set up the sipgate app to automatically start when Linux boots. You can refer to the Ubuntu Wiki Autostart guide for this.
{% endhint %}

To start the sipgate app, follow these steps: Right-click on the sipgate.AppImage file and select **Permissions**. Then, enable the option **Allow executing file as program.** Afterward, you can start the sipgate app by simply double-clicking the sipgate.AppImage file.

#### Installation exception

There are some exceptions depending on your Linux distribution that need to be considered previous to the installation of the sipgate app:

* For **Ubuntu 22.04/23.04**, install the Fuse2 packages with the command **sudo apt install libfuse2** in the terminal.
* For Debian 10, there is a workaround to start the sipgate app without a sandbox. Open the terminal and enter the command **./sipgate-desktop --no-sandbox.**
* Alternatively, you can upgrade from **Debian 10** to **Debian 11.5** to start the sipgate app normally.

#### Network installation of the sipgate app

We recommend using the app on the web: <http://workspace.sipgate.com/>\
Users always have the latest version and sufficient user rights.

Note: Local administrator rights are required to install or update the sipgate app.

#### sipgate AppImage + Click2Dial chrome extension / Click2Dial tel:

Steps to manually link **tel:** and **callto:** with the sipgate app:

* Depending on your Linux distribution, the content and file paths may vary. Please check your distribution's specific requirements.
* Open the terminal and use the following commands to link "tel:" and "callto:" with the sipgate app:

**gio mime x-scheme-handler/tel sipgate-CLINQ.desktop**

**gio mime x-scheme-handler/callto sipgate-CLINQ.desktop**

* Example: Create a file labeled **tel: callto: link.**
* Create a file **.config/autostart/sipgate-CLINQ.desktop**
* and another file **.local/share/applications/sipgate-CLINQ.desktop**.\
  The file might look like this:

*\[Desktop Entry]*\
\&#xNAN;*Name=sipgate-softphone*\
\&#xNAN;*Comment=sipgate CLINQ*\
\&#xNAN;*Exec=/opt/sipgate\_CLINQ-1.9.5.AppImage %U //Versionsnummer anpassen*\
\&#xNAN;*Icon=/usr/share/icons/hicolor/128x128/apps/sipgate-softphone.png*\
\&#xNAN;*Terminal=false*\
\&#xNAN;*Type=Application*\
\&#xNAN;*Categories=Network;Application;*\
\&#xNAN;*Keywords=voip;sip;internet;sipgate*\
\&#xNAN;*Encoding=UTF-8*\
\&#xNAN;*MimeType=x-scheme-handler/tel;x-scheme-handler/callto;*\
\&#xNAN;*StartupNotify=false*

#### Enable notifications for the sipgate app

To ensure you receive notifications from the sipgate app on Linux, follow this path: **Settings ➔ Notifications ➔ Files ➔ Enable all desired notifications.**

Errors & solutions:

Error message when starting the app in the terminal: **FATAL:setuid\_sandbox\_host.cc(157)] The SUID sandbox helper binary was found, but is not configured correctly. Rather than run without sandboxing I'm aborting now. You need to make sure that /tmp/.mount\_sipgatkaQrRB/chrome-sandbox is owned by root and has mode 4755**

**Cause for Ubuntu 24.04:** The Chrome sandbox requires root permissions.\
**Solution for Ubuntu 24.04:** Assign root permissions to the sandbox:\
$ sudo chown root chrome-sandbox\
$ sudo chmod 4755 chrome-sandbox

**Workaround for Ubuntu 24.04: + terminal:**

* Start the sipgate app via terminal with the additional argument --no-sandbox
* start the sipgate app via double-click instead of the terminal.

**Cause for Debian 10:** There is no **chrome-sandbox** folder.\
**Solution for Debian 10:** Unknown.\
**Workaround for Debian 10:**

* Update to Debian 11.5 to start the sipgate app normally, or start without sandbox via terminal: .clinq.AppImage --no-sandbox

**Fedora 39 > 40 Update:**\
Starting via double-click hangs with an empty login window.\
Starting via terminal shows: Could not load window main: / Error: ERR\_FAILED.\
**Cause:** Nouveau driver.\
**Solution:** Remove and reinstall/sign Nvidia drivers.


# How do I set up the sipgate app?

How to book, download, install, and set up the sipgate app for your business telephony.

The sipgate app is included for free in your business plan and offers advanced features for your business telephony, including seamless integration with the sipgate cloud telephone system. For additional features, you can upgrade to the Business or Premium packages at any time.

{% hint style="info" %}
**Important:** For current information about the sipgate app, please visit our website.
{% endhint %}

#### Booking the sipgate app

Log into your account and navigate to **My Telephony** in **accountmanagement**. In the left sidebar of the menu, you will find the option to book the sipgate app directly. Additionally, as an admin, you can book the sipgate app for your users in their respective profiles.

The packages differ between **Business Integrations** and **Premium Integrations**. You can find the [functionality of the respective CRMs here](https://www.sipgate.co.uk/features/integrations?_gl=1*13sokqx*_up*MQ..\&gclid=CjwKCAjw68K4BhAuEiwAylp3ktPcvX7hC-rb39WHLEU0shLf1HkKVLt_68W5ux2tCf8mBAZbica91RoC7jcQAvD_BwE).

#### Downloading the sipgate app

Once you have booked the app, you can download the required file directly from your account. Each user will also automatically receive a download link via email, allowing them to download and use the app.

In the next step, select your operating system and download the necessary files. You can also copy a download link if needed.

Open the configuration file next and follow the instructions displayed in a pop-up window to install the app on your computer.

#### Setting up the sipgate app

After successfully installing the sipgate app, you need to link it with your sipgate account. Log in using your sipgate account details and confirm the login with the verification code sent to your registered email address.

![](/files/eDiDxSijRWYaTgdFfLlL)

{% hint style="warning" %}
**Tip:** If your Google or Microsoft account is linked to your sipgate account, you can also use social login to sign in.
{% endhint %}

During your first login, you should agree to the listed permissions for the sipgate app.

If you have multiple phones set up, the next step is to select the VoIP phone you want to configure with the app. You can change this setting at any time.

First, you can adjust your audio settings by selecting a microphone and a speaker/headset. Next, you can synchronize your contacts with the sipgate app by clicking **Connect** next to the desired provider. In the next step, enter the API URL and the API key. For some CRM systems, you will be redirected directly to log in to your CRM instance without having to enter the API information. This confirms the data exchange between sipgate and your CRM system. In the final step, synchronize your contacts with the sipgate app by clicking **Connect** next to the desired provider.

Lastly, please check that the region on your device is set correctly to United Kingdom so that the phone numbers in the call list are displayed correctly. Go to **Windows Settings ➔ Time & Language ➔ Language & Region ➔ Set Region** and save your changes. You only need to perform this setting on your PC or laptop.

{% hint style="warning" %}
**Tip:** If your Google or Microsoft account is linked to your sipgate account, you can also use social login to sign in.
{% endhint %}

You have now successfully set up your sipgate app and can start using your telephony features immediately.

{% hint style="warning" %}
**Tip:** If you want to learn more about configuring the sipgate app, you can find additional articles here.
{% endhint %}


# How do I set the sipgate app as default for calls?

How to set the sipgate app as the default application for phone calls on iOS and Windows.

When you try to call a phone number in your browser or use Click-to-Dial on iOS or Windows, typically FaceTime or another phone app will open. If you want to make calls with the sipgate app instead, you can set it as the default app for calls.

#### Setting up for iOS

* Open FaceTime on your Mac.
* Then, click on **FaceTime** in the top menu bar and select **Settings**
* Scroll down and under **Default for Calls**, select sipgate.

#### Setting up for Windows

* Open the **Settings**.
* Go to **Default Apps** and then select **Default Apps by Protocol**.
* In the left menu, look for **TEL** or **URL:tel.**
* There, you can set the sipgate app as the default app for calls.

#### Errors and Solutions

To set the sipgate app as the default app for TEL (Click2Dial):\
**Windows 11**: Go to Default Apps ➔ Choose Defaults by Link Type ➔ \[Tel: sipgate App]\
**Windows 11 22H2**: If the sipgate app cannot be selected:

* Exit the sipgate app.
* Delete the folder C:\Users\Benutzer\AppData\Roaming\sipgate-desktop\FirstRun
* Restart the sipgate app.
* Then go to Default Apps ➔ Choose Defaults by Link Type ➔ \[Tel: sipgate] in the app.


# How can I set my sender number in the sipgate app?

How to set and change your sender number (caller ID) in the sipgate app for calls and channels.

#### Setting a sender number in the sipgate app

You can set a sender number in the sipgate app, which will appear on the **recipient's device** as the **incoming caller ID**. To set your **individual sender number**, open the sipgate app and click the **gear icon** in the top right corner.

![](/files/t6Mg8muVkLc6ZZ5FemE0)

{% hint style="warning" %}
**Tip:** If you haven't set a sender number after the latest update, you will see a pop-up notification.
{% endhint %}

Now you can choose your individual sender number.

![](/files/Kxy5a3Qi3zdNxRrZi7q0)

{% hint style="info" %}
**Important:** The selected sender number must be assigned to a VoIP phone, as it's currently not possible to choose a number without linking it to a phone..
{% endhint %}

You can set the sender number for each individual call. Before placing a call, you can select the desired sender number from the dropdown menu. You can also choose to hide the number for a single call.

{% hint style="info" %}
**Important:** The sender number will only change within the sipgate App. In the logged-in area, you will still see the default sender number.
{% endhint %}

#### Sender number for Channels

Similar to the Inbox, you can also select the desired sender number for your Channels through the dropdown menu. Go to the desired Channel and click the gear icon in the right corner.\
In the window, choose the VoIP phone and select the desired sender number from the dropdown menu.

{% hint style="info" %}
**Important:** The selected sender number must be assigned to a VoIP phone, as it's currently not possible to choose a number without a phone.
{% endhint %}

If no available phones are left, you can click *Add Phone* to create a new VoIP phone in your account (Appweb) and assign a sender number to the Channel.

In the final step, click *Save*.

You can always see and change your sender number in the right corner.


# How do I start a call in the sipgate app?

How to make an outgoing call using the sipgate app by searching contacts or entering a phone number.

To make an outgoing call from the sipgate app, click on "Start call" in the top left corner.

![](/files/95Wc78UjmynjkyJk34YL)

Then, either search for an existing contact or enter a phone number.

![](/files/CuKSiNTwe2816T3IV2sL)

Once you've found the contact or fully entered the number, click on the green phone icon next to the number. The call will then be initiated.

![](/files/ySzILGHxbswQmTNJa7M5)


# How do I configure User settings in the sipgate app?

How to configure user settings in the sipgate app including appearance, offline behavior, and shortcuts.

The sipgate app allows you to customize various User settings. These include the **Dark/Light Mode**, **Offline behavior**, **Focus Mode** (for iOS mobile), and **keyboard shortcuts**. This article explains how to configure these settings.

**Click on your avatar in the left sidebar and select Settings.**

![](/files/4S2htmyg7VLCbAiDp9AW)

Under **User Settings**, you will find the **Preferences** section.

![](/files/D5yxRRXOcPC8Njbm0dhn)

#### How do I change my appearance in the sipgate app?

First, you can adjust the appearance and switch between **Light and Dark Mode** for the app. You can also set the interface language to **English** or **German**.

![](/files/RW8G7wAzhQZShAF4oAnM)

#### How do I set my offline behavior?

The **Offline behavior** in the sipgate app can be turned on or off. By default, it is disabled to ensure that calls are always routed through **the sipgate app** and **sipgate app for iOS/Android**.

![](/files/GbXJ4xGJAS8AfEmX3BXx)

If you want to enable **Offline Routing**, only the sipgate App should be used. If the **Offline behavior** cannot be activated, **the sipgate app for iOS/Android** might still be connected. In this case, please contact sipgate support to remove the mobile device.

#### What keyboard shortcuts can I use in the sipgate App?

In the article [**What keyboard shortcuts can I use in the sipgate App?**](https://teamhelp.sipgate.co.uk/hc/en-gb/articles/21976931162397-What-keyboard-shortcuts-can-I-use-in-the-sipgate-App-CLINQ) you can find the most important **shortcuts** for the desktop version of the sipgate App. Additionally, you can use **shortcuts** to accept or decline incoming calls, even when the app is not in the foreground.

#### Can I automatically set my app status to "busy" when my iPhone is in Focus Mode?

If you are using the mobile version of the sipgate App on an **iOS device**, you can set up a shortcut in the **device settings**. This will automatically set your status to **busy** when your device switches to **Focus Mode** (also known as **Do Not Disturb Mode**). You can configure this automation using the **Shortcuts app**. If you haven't already installed it, you can download it from the **App Store**.


# What is the sipgate app mobile?

Overview of the sipgate mobile app for iOS and Android, including features and setup instructions.

The mobile sipgate app is the perfect companion to the sipgate desktop application. It enables seamless and flexible usage, allowing you to communicate just as efficiently on the go as you would in the office. With this app, you can access your contacts, calls, and messages anytime and anywhere.

#### If you're not using the sipgate app yet

1. Install the [sipgate app](https://www.sipgate.co.uk/app-download) on your desktop.
2. Start the app and complete the setup.
3. Log into the mobile sipgate app using the same login credentials.

#### iOS features

* Make and receive calls
* Access local, Google, and Microsoft contacts
* With sipgate app Pro: CRM integration (e.g., Hubspot) to display caller information
* Select the configured phone for outgoing calls
* Display the status of your sipgate app contacts and a DND (Do Not Disturb) mode is available at any time
* Calls are displayed in the device's native call list, marked with sipgate app Audio

#### Android features

{% hint style="info" %}
**Important:** The app is available for Android version 8.1 or newer.
{% endhint %}

* Make and receive calls
* Access local, Google, and Microsoft contacts
* With sipgate app Pro: CRM integration (e.g., Hubspot) to display caller information
* Select the configured phone for outgoing calls
* Display the status of your sipgate app contacts and a DND (Do Not Disturb) mode is available at any time
* Optional: Calls are displayed in the device's native call list
* Handover: Transfer calls between the desktop and Android device
* Features for favorites, transfer, and call swapping available


# sipgate app errors and solutions

Common sipgate app errors and their solutions for Windows, Linux, and Mac platforms.

#### General Errors

**Error:** **Calls cannot be made. There is no sound.**\
**Solution**: Check the app's microphone permissions.

In **Windows 11**, go to **START ➔ WINDOWS SETTINGS ➔ PRIVACY & SECURITY ➔ MICROPHONE**.\
Activate the following options:

* **Microphone access**
* **Allow apps to access your microphone**
* **Allow desktop apps to access your microphone**

In **Apple macOS**, open **SYSTEM SETTINGS ➔ PRIVACY & SECURITY ➔ MICROPHONE**, and activate microphone access for the **sipgate app**.

**Error: Calls cannot be made, and an audio error message appears.**\
**Cause**: The firewall is blocking usage.\
**Solution**: Allow IP and port ranges for **sipgate** in the firewall.

**Error: The login window briefly opens and closes, showing the error message: "An error occurred. Please try again."**\
**Analysis**: sipgate App ➔ Help ➔ Export Logs ➔ Save Zip\
Search in the **renderer.log** for **\[date time] \[error] \[app] other**\
**Cause**: **login.sipgate.com** is blocked by the firewall or **pi-hole**.\
**Solution**: Allow **login.sipgate.com**.\
Example: Fritz!Box ➔ Internet ➔ Filter ➔ Edit Blocked Internet Pages ➔ Remove login.sipgate.com from the filter.

#### Windows

**Error: Login works, but then "Oops! Something went wrong. Reload the app or try again later."**\
**Analysis**: **sipgate App ➔ Help ➔ Export Logs ➔ renderer.log**\
\&#xNAN;**\[error] \[ws] Socket disconnected io client disconnect**\
**Error**: Cannot read properties of undefined (reading 'some')\
**Workaround**: sipgate App ➔ Help ➔ Reset Cache and restart the App.

**Error**: **"Update could not be installed. Check your internet connection and try again."**\
**Cause**: sipgate App was started without internet access.\
**Solution**: Click on **Open sipgate App**, activate internet via WiFi/LAN, then try to install the update again.

**Error**: Notifications are not showing.\
Activate notifications in **Windows**:\
**Win11**: **System ➔ Notifications ➔ ON**

* **sipgate App: ON**
* **sipgate App ➔ Notifications: ON**
* **sipgate App ➔ Show Notification Window: ON**

**Error**: **"An error occurred. The switch cannot be started. Please turn off active ad blockers or change the pop-up settings in your browser."**\
**Problem**: When opening the **sipgate App**, clicking **Sign In** redirects to **sipgate.co.uk**, but the browser blocks the pop-up, causing the above error message.\
**Cause**: A pop-up blocker is active in the browser.\
**Solution**: Disable the pop-up blocker in the browser, restart the browser, and log in to the **sipgate App** again. Once signed in, you can re-enable the pop-up blocker in the default browser.

**Error**: 1-minute white screen before the login window appears, followed by a 5-minute loading spinner before login completes.\
**Problem**: Contacts are not loading; you can only see phone numbers, and favorites couldn't be found in your CRM contacts.\
**Cause**: The folder is read-only **C:\Users\Username\AppData\Roaming\sipgate-desktop\IndexedDB**.\
**Solution**: Remove contacts from favorites. Grant write permissions for the folder.

**Error: \[info] \[contacts] Destroying IndexedDB for contacts... in the renderer.log.**\
**Cause**: There is a problem with the database.\
**Solution**:

* Uninstall the **sipgate App**.
* Manually delete the folder **C:/Users/User/AppData/Local/Programs/sipgate-desktop**.
* Manually delete the folder **C:/Users/User/AppData/Roaming/sipgate-desktop**.
* Reinstall the **sipgate App**.

**Error**: **sipgate App installation and/or update fails.**\
"Sipgate App cannot be closed."\
"A javascript error occurred in the main process."\
**Cause**: **PowerShell is running in "Constrained Language Mode", restricting the execution of PowerShell scripts.**\
**Solution**: Temporarily allow PowerShell to run in **Full Language Mode** via Group Policy, perform the **sipgate App** installation/update, then re-enable the Group Policy.\
Example: **Constrained Language Mode SRP/GPO**.

#### Linux

**Error**: **./clinq.AppImage: cannot execute binary file: Exec format error**.\
**Cause**: i386 / arm64 is not supported.\
**Solution**: Use **Linux amd64**.

**Error: You briefly see the call list without phone numbers, followed by an error message.**\
**Problem**: IndexedDB cannot load contacts from the App configuration.\
**Analysis**: sipgate App ➔ Help ➔ Export Logs ➔ Zip ➔ renderer.log\
**Cause**: IndexedDB is inaccessible.\
**Solution**: Open Linux Terminal and execute: rm -rf .config/clinq-desktop/.

**Error: sipgate App window is gray; images and buttons do not load.**\
**Workaround**: Close the sipgate App, open Terminal, and execute the following commands: find \~/.config/CLINQ/ -name "GPUCache" | xargs rm -rf or find \~/.config/clinq-desktop/ -name "GPUCache" | xargs rm -rf. Reopen the sipgate App; menus and graphics should now load correctly.

#### Mac

**Error:** When selecting sipgate SSO, the email is already logged in, and you can only enter the password, preventing logout and login with another sipgate user.\
**Cause**: /Users/$USER/Library/Application Support/sipgate-desktop stores the email address.\
Solution:

* Uninstall **sipgate App**.
* Open **Finder**, go to **Go To**, and delete **/Users/$USER/Library/Application Support/sipgate-desktop**.
* Replace **$USER** with your Mac username. Example: **/Users/Mustermann/Library**.
* Then, install the **sipgate App**, delete the desktop folder, and log in with **sipgate SSO**.

**Error: Updates cannot be installed. Please check your internet connection.**\
**Cause**: **sipgate App** was not moved to the **Applications** folder.\
**Solution**: Refer to the **"Installation"** section above. Uninstall the **sipgate App**, execute it, and move it to the **Applications** folder via the **Finder** menu.


# What is sipgate AI Assist?

Overview of sipgate AI Assist in the sipgate app – activate and use Summaries, Subjects, Smart Answers and other AI features.

AI Assist analyses your calls automatically and makes the results available directly in the sipgate app – for example as a summary, a meaningful call title, or as answers to questions you have defined in advance.

{% hint style="info" %}
AI Assist is different from **Conversation Intelligence (CI)**: AI Assist covers the features you see and control yourself in the sipgate app. CI features, on the other hand, are activated account-wide by admins/team leads and analyse content across the account without the results being visible to the individual user on the call event. Learn more in [What is sipgate Conversation Intelligence?](/use-sipgate/sipgate-app/what-is-sipgate-conversation-intelligence)
{% endhint %}

## Where do I find the AI features?

You'll find the AI features in the sipgate app under **Settings ➔ AI Assist**.

As soon as an AI feature is active, a transcript of your calls is created in the background. This transcript is the basis for all other features – it's generated automatically once at least one feature is active and isn't something you enable separately.

A transcript is only created for calls longer than **10 seconds**. You can cancel processing at any time during the call.

**Quota:**

* **Included:** 10 processings per month
* **Business and Premium:** unlimited

{% hint style="warning" %}
**Important:** Analysis is optimised for speech. Music or loud background noise can interfere with speech recognition. The time it takes to analyse a call can vary depending on the time of day and current load.
{% endhint %}

## Production features

### Summaries

When Summaries is active, every call ends with a summary. The AI identifies the key topics and main points and displays them as bullet points or short sentences.

**Activate Summaries:**

1. In the sipgate app, open **Settings ➔ AI Assist**.
2. Turn on **Summaries**. **Transfer a summary to your CRM:**

{% hint style="warning" %}
**Important:** Transferring to a CRM is only available with the sipgate app Business or Premium.
{% endhint %}

* **Manually:** Use the **Push to CRM** button to send the summary directly to the connected CRM.
* **Automatically:** Under **Settings ➔ Integrations**, open the relevant integration and turn on the **Summary** checkbox under **Add to logging automatically**. Summaries are then transferred to that CRM automatically. **Edit a summary:**

You can edit a summary as long as you handled the call yourself.

**Manage a summary:**

Open the call in your inbox and click the **three-dot button** above the summary. There you can copy or delete the summary, or switch between displaying it as running text or as bullet points.

### Subjects

Subjects gives every captured call a meaningful title. That way you can tell what a call was about straight from the inbox.

### Smart Answers

Smart Answers checks questions you've defined in advance against a call and then provides the answers that emerge from the conversation as a summary. You set the questions individually.

## Beta features

{% hint style="info" %}
Beta features are fully usable but still in the testing phase and are being expanded continuously.
{% endhint %}

### To-dos

To-dos picks up tasks agreed during a call and provides them as a list afterwards.

### Talk Ratios

Talk Ratios shows how much each participant spoke.

### Conversation Starters

Conversation Starters suggests prompts you can use to open or keep a conversation going.

## Choose an LLM provider

From version 2.12.1 you can set the preferred LLM provider for the AI features:

* **OpenAI** – US provider hosted in Europe
* **Mistral AI** – fully European and GDPR-friendly

{% hint style="warning" %}
**Important:** This choice can only be made by admins and applies to the entire account, i.e. to all users.
{% endhint %}

## Understanding feature status

sipgate develops AI features in several stages:

* **Lab features:** We test whether a new feature works in principle and adds value.
* **Beta features:** We're convinced by the feature and make it available to a wide group. It's still in the testing phase and is being expanded continuously.
* **Production features:** Features that have been iterated on several times, shaped by customer feedback, and brought to market maturity.


# What is sipgate Conversation Intelligence?

Conversation Intelligence (CI) explained: account-wide analysis of call content by admins, as distinct from the user-visible AI Assist features.

Conversation Intelligence (CI) analyses call content across the whole account. Unlike [AI Assist](/use-sipgate/sipgate-app/sipgate-app-ai-features), CI features are activated and configured by admins or team leads – the results relate to the calls of all users in the account, but aren't directly visible to the individual user on the call event in the sipgate app.

## What's the difference between CI and AI Assist?

|                      | AI Assist                                     | Conversation Intelligence (CI)                                         |
| -------------------- | --------------------------------------------- | ---------------------------------------------------------------------- |
| Who activates it?    | Each user for themselves                      | Admins/team leads, account-wide                                        |
| Whose call content?  | The user's own calls                          | Calls of all users in the account                                      |
| Where is it visible? | Directly on the call event in the sipgate app | Not on the call event, but in separate admin areas or external systems |

## CI features at a glance

* **CI Webhooks:** Admins set up webhooks in the **App Web** to automatically transfer transcripts, summaries, and other call data to external systems such as a CRM. Read more in [How do I set up CI Webhooks?](/use-sipgate/sipgate-app/how-do-i-set-up-ci-webhooks)

{% hint style="info" %}
**Note:** The sipgate.co.uk help centre currently doesn't have a dedicated article for Custom Fields yet – this is documented in the German help centre for now.
{% endhint %}

**Requirements** for CI features are admin access and an active transcription for the relevant channel or agent (Business or Premium tariff).


# How do I set up CI Webhooks?

Set up webhooks to automatically send Conversation Intelligence call data to a CRM or other systems.

CI Webhooks are part of [Conversation Intelligence](/use-sipgate/sipgate-app/what-is-sipgate-conversation-intelligence). With CI Webhooks, call data from sipgate calls can be automatically transferred to external systems such as a CRM. This lets you integrate call logs, summaries, and classifications directly into your existing processes.

{% hint style="info" %}
CI Webhooks are configured in the **App Web** and are different from the separate AI Assist Webhook, which is set up directly in the sipgate Desktop App (see [Can I retrieve my AI-generated channel data via API interface?](/use-sipgate/sipgate-app/can-i-retrieve-my-ai-generated-channel-data-via-api-interface)).
{% endhint %}

#### Requirements

* You have a target URL to which the data should be sent.
* Your system can process HTTP POST requests with a JSON payload using Transfer-Encoding: chunked.
* Webhooks only work for shared channels. Calls conducted over a private channel do not trigger CI Webhooks.

#### Typical use cases

* CRM integration: automatically pass call notes to customer records.
* Support systems: create tickets after inbound calls.
* Analytics: forward classifications to a reporting tool.

#### Setting up webhook targets

1. Log in as an admin in the **App Web**.
2. Open the Conversation Intelligence section in the settings.
3. Open the CI Webhooks configuration.
4. Enter the desired webhook URL.

#### How it works

* Once a call ends, sipgate sends the call data via HTTP POST to the stored webhook URL.
* The data is transmitted as a JSON payload.
* Your system can then store or further process this payload (e.g. in a CRM, ticketing system, or internal databases).

Example: A call ends ➔ a call log is created ➔ the data is automatically forwarded to your database ➔ your team has the information available immediately.

Example payload:

```json
{
  "version": "1",
  "call": {
    "id": "pbx-a1b2c3d4-e5f6-7890-abcd-ef1234567890",
    "from": "441614960000",
    "to": "441614960001",
    "startTime": "2026-04-08T09:22:41.663Z",
    "endTime": "2026-04-08T09:24:04.329Z",
    "duration": 82666,
    "direction": "IN",
    "users": [
      {
        "userId": "w0",
        "accountId": "1234567",
        "fullUserId": "1234567w0",
        "firstName": "Jamie",
        "lastName": "Smith",
        "fullName": "Jamie Smith"
      }
    ],
    "channel": {
      "id": "f47ac10b-58cc-4372-a567-0e02b2c3d479",
      "name": "Support Channel"
    }
  },
  "assist": {
    "provider": {
      "llm": "AZURE"
    },
    "transcription": {
      "content": "Caller: Hi, I'm calling about my contract. I received an invoice last week that was higher than expected.\nCallee: Hello, I'd be happy to look into that. Could you give me your customer number?\nCaller: Yes, it's 12345. I'd also like to know if I can switch tariffs.\nCallee: I can see the invoice. The amount is correct as an add-on package was booked. We can of course arrange a tariff change. I'll send you the options by email.",
      "chunks": [
        {
          "speaker": "CALLER",
          "startTime": 3200,
          "endTime": 12400,
          "content": "Hi, I'm calling about my contract. I received an invoice last week that was higher than expected."
        },
        {
          "speaker": "CALLEE",
          "startTime": 13100,
          "endTime": 18900,
          "content": "Hello, I'd be happy to look into that. Could you give me your customer number?"
        },
        {
          "speaker": "CALLER",
          "startTime": 19500,
          "endTime": 26300,
          "content": "Yes, it's 12345. I'd also like to know if I can switch tariffs."
        },
        {
          "speaker": "CALLEE",
          "startTime": 27000,
          "endTime": 40100,
          "content": "I can see the invoice. The amount is correct as an add-on package was booked. We can of course arrange a tariff change. I'll send you the options by email."
        }
      ]
    },
    "callScenarios": null,
    "callHeadline": {
      "content": "Invoice query and tariff change"
    },
    "summary": {
      "content": "The customer called about an unexpectedly high invoice. The amount was correct because an add-on package was active. A tariff change was also discussed, with options to be sent by email.",
      "keyPoints": [
        "The invoice was correct — the higher amount resulted from a booked add-on package.",
        "The customer wants to change their tariff.",
        "The available tariff options will be sent by email."
      ],
      "topics": [
        "Invoice",
        "Add-on package",
        "Tariff change"
      ]
    },
    "actionItems": [
      {
        "content": "Send tariff options to the customer by email."
      },
      {
        "content": "Check the add-on package and cancel it if necessary."
      }
    ],
    "smallTalkItems": [
      {
        "topic": "Greeting",
        "description": "Both participants greeted each other at the start of the call."
      }
    ]
  }
}
```

#### Security

To ensure that only requests from sipgate are forwarded to your webhook integration, check the source IP address of incoming requests. Add the following IP address to your allow list:\
217.116.118.254


# How can I connect my CRM system with sipgate?

How to connect your CRM system with sipgate using the sipgate app Business or Premium integration.

sipgate offers a variety of useful integrations, that can be connected with our sipgate App. To check if your CRM system is supported, simply visit our [website](https://www.sipgate.co.uk/features/integrations).

{% hint style="info" %}
**Important:** For seamless integration of your CRM system with sipgate, you need the sipgate App and must have booked the appropriate CRM package. Learn more about the sipgate App [here](https://www.sipgate.co.uk/app-download).
{% endhint %}

**Here's how it works**\
After downloading the sipgate App and logging in with your user credentials, you're ready to connect your CRM system.

{% hint style="info" %}
**Important:** To connect your CRM system with sipgate, you can book the sipgate App Business or Premium with extended functionality in your sipgate account.
{% endhint %}

Open the App, click on the user icon on the left side, and select Settings from the sidebar.

Navigate to the Integrations section, select your CRM system from the list, and click the **Connect to \[your CRM]** button (the button displays the name of your selected CRM system).

In the final step, enter the API URL and the API key. For some CRM systems, you may be redirected to log in to your CRM instance directly, without needing to enter the API information. This confirms the data exchange between sipgate and your CRM system.

{% hint style="warning" %}
**Tip:** [Here](https://teamhelp.sipgate.co.uk/hc/en-gb/categories/200640172-Integrations-and-connections) you can find specific information on where to locate the required API URLs and API keys for your CRM system.
{% endhint %}

Depending on the number of contacts being integrated, it may take a few minutes for them to display fully. Once completed, your CRM system will be fully set up in the sipgate App.


# How can I create system logs in the sipgate app?

How to export system logs from the sipgate app on macOS, Windows, and Linux for troubleshooting.

If you encounter errors that aren't immediately explainable, we may ask you to send us the log data from your sipgate app. But where can you find the log data? It only takes a few steps.

#### On macOS

* Open the sipgate app.
* In the Apple menu bar, go to **Help → Export Logs**.
* Save the **zip file** and attach it to your email to us.

#### On Windows

* Open the sipgate app.
* In the app, click the three-dot menu "..." and select **Help → Export Logs**.
* Save the **zip file** and attach it to your email to us.

#### On Linux

* Open the sipgate app.
* In the app, go to **Help → Export Logs.**
* Save the zip file and attach it to your email to us. Alternatively, you can enter the following path in your file manager: **\~/.config/sipgate-desktop/logs.**
* Check the **main.log** and **renderer.log** files for errors, or send them directly to support.


# How does the status display work in your sipgate app?

How the status display works in the sipgate app and how to view contact availability.

If a contact has an email address linked to a sipgate account and is marked as a favorite, you can view their status. Likewise, sipgate app users who have your email address can see your status.

**Why am I unable to see my sipgate contact's status?**

Make sure you've saved the contact with the correct email address. Additionally, the contact must be marked as a favorite.

{% hint style="warning" %}
**Tip:** How to add a contact to your favorites can be found in [this article](https://teamhelp.sipgate.co.uk/hc/en-gb/articles/22255490940189-How-can-I-create-contacts-and-set-favorites-in-the-sipgate-app-CLINQ).
{% endhint %}


# How do I set up the chrome extension in the sipgate app?

How to install and use the sipgate Chrome extension for Click-to-Dial calling from websites and CRMs.

With the free Google Chrome extension, you can call any phone number directly from websites, emails, or connected CRM systems with a simple click from your sipgate app.

Note: The Chrome extension can only be used in the Desktop App.

#### How to install the Chrome extension

* Open the sipgate app and navigate to **Settings**.
* Under **Advanced**, go to the **Click2Dial** section.
* Click **Open store** next to Google Chrome\\

  ![](/files/5WAIj2neEPUhxKDZ8Ner)
* You'll be redirected to the **Chrome Web Store**. Click **Add**.
* Confirm the installation by clicking **Add Extension**.

Exception: sipgate.AppImage on Linux

Since the sipgate app is only launched as an application, the Click2Dial feature using tel links doesn't work. Install the sipgate app via [AppImage Launcher](https://github.com/TheAssassin/AppImageLauncher). Afterward, you can highlight numbers in Chrome, right-click and select **Call with sipgate** or click on phone numbers linked as tel:.

**Issue: The displayed phone number gets extended with 20 and is unreachable when called**

Note: Phone numbers can be displayed with spaces as per [**RFC 3966 5.1.1.**](https://www.rfc-editor.org/rfc/rfc3966) **Separators in Phone Numbers.** However, the tel link itself must not contain spaces ("tel" URIs MUST NOT use spaces).

Check: Hover over the linked number with your mouse and verify whether it's linked as tel:+44xxxx or tel:+49 xxx xxx.

#### Google sheets phone number calling issue

* **Cause:** Google Sheets interprets =+ as a formula, not a phone number (e.g., =+44800...).
* **Workaround:** Save the link as ="+448003301000", then double-click the phone number and click on the sipgate logo.


# Data Protection and AI Features in the sipgate app

Data protection and privacy information about AI features in the sipgate app including transcription and GDPR compliance.

This article answers **key questions about AI features** and **data protection**. You'll learn about the mechanisms we've implemented to ensure **privacy** and **security** while using our services.

{% hint style="warning" %}
**Tip:** For more details, refer to sipgate's [Privacy Policy](https://www.sipgate.co.uk/privacy).
{% endhint %}

#### General Information about AI Features

### **What are the AI features in the sipgate app?**

The AI features in the sipgate app include call summaries, topic analysis and call forecasts. You activate these yourself and see the results directly on the call event. For account-wide analysis by admins, see [What is sipgate Conversation Intelligence?](/use-sipgate/sipgate-app/what-is-sipgate-conversation-intelligence)

### **How do I enable/disable the AI features?**

The AI features must be activated in the app's settings before use and can be deactivated at any time. As the admin of a sipgate account, you will also receive an email notification when AI features are activated by users for the first time.

### **Can I use the sipgate app without enabling AI features?**

Yes, the sipgate app can be used without enabling the AI features.

#### Audio Transcription (Speech-to-Text)

### **Why is transcription needed?**

Transcription enables various productivity features during phone calls, such as displaying relevant conversation details, detecting data for calendar entries, and call forecasting, like word count analysis.

### **What happens during audio transcription?**

During the call, audio streams from both parties are temporarily stored and converted into text. For this process, we use a large language model hosted and operated by sipgate. Once the transcription is completed, the audio data is deleted immediately, and the summary is based solely on the stored text version.

### **What information is captured during audio transcription?**

The transcription converts the spoken words of both participants into text. This enables features like displaying important conversation details, detecting data for calendar entries, and generating call statistics.

### **What is the legal basis for processing personal data?**

The legal basis is the user's consent according to Article 6(1)(a) GDPR.

### **What happens to the transcribed data?**

The transcription is used to provide AI features like call summaries or phone statistics. Data is processed according to GDPR.

### **How long is data stored at OpenAI?**

The data is temporarily stored at OpenAI to create the transcription and summary. Once the transcription is complete, the data is immediately deleted. There is no further storage of the data, and OpenAI does not use it for training its language models.

#### Call Summaries and Topic Analysis

### **How are summaries and topic analysis performed?**

The transcription of the call is summarized and analyzed based on the topics discussed using OpenAI's GPT service.

#### Call Forecasts

### **How do call forecasts work?**

Based on your calls with the sipgate App, machine learning analyzes the expected call volume for the upcoming week. These forecasts help you better plan your team's resources in advance.


# What keyboard shortcuts can I use in the sipgate app?

All keyboard shortcuts for the sipgate app at a glance – call and navigate faster. Including custom shortcuts.

In this article, you'll find the most important shortcuts for the sipgate app. You can now customize most of the shortcuts and assign them your own key combination.

## Setting your own shortcuts

You can adapt most shortcuts to suit your habits. Some shortcuts are fixed and cannot be changed – you can see which ones in the tables below in the **Customizable** column.

1. Open the **Settings**.
2. Go to the **Shortcuts** section.
3. Click the shortcut you want to change.
4. Press the desired key combination.

<figure><img src="/files/AND6BNlfY8MmeZkqVCcO" alt=""><figcaption></figcaption></figure>

{% hint style="info" %}
**Note:**\
When you change a shortcut, the respective default shortcut is shown as a suggestion. This way, you can return to the original assignment at any time.
{% endhint %}

{% hint style="warning" %}
**Conflicts with other programs:** Some key combinations are already used by other programs or by the operating system. In that case, choose a different combination. Examples of possible conflicts:

* MS Teams uses **Ctrl+Shift+A** to accept calls
* Edge uses **Ctrl+Shift+D** to save all tabs
  {% endhint %}

#### **General**

| Function               | Shortcut macOS | Shortcut Windows/Linux | macOS Browser | Windows/Linux Browser | Customizable |
| ---------------------- | -------------- | ---------------------- | ------------- | --------------------- | ------------ |
| Perform focused action | ENTER          | ENTER                  |               |                       | fixed        |
| Open Omnibar           | ⌘+K            | Ctrl+K                 | ⌘+⌥+K         | Ctrl+Alt+K            | yes          |
| Show/hide sidebar      | ⌘+.            | Ctrl+.                 | ⌘+⌥+.         | Ctrl+Alt+.            | yes          |
| Open settings          | ⌘+,            | Ctrl+,                 | ⌘+⌥+,         | Ctrl+Alt+,            | fixed        |

#### **Navigation**

| Function                                          | Shortcut macOS | Shortcut Windows/Linux | macOS Browser | Windows/Linux Browser   | Customizable |
| ------------------------------------------------- | -------------- | ---------------------- | ------------- | ----------------------- | ------------ |
| Open channel/call list (per channel by index 1–9) | ⌘+1 … ⌘+9      | Ctrl+1 … Ctrl+9        | ⌘+⌥+1 … ⌘+⌥+9 | Ctrl+Alt+1 … Ctrl+Alt+9 | fixed        |
| Go to the next item on a page                     | TAB or ↓       | TAB or ↓               |               |                         | fixed        |
| Go to the previous item on a page                 | TAB or ↑       | TAB or ↑               |               |                         | fixed        |

#### **View**

| Function         | Shortcut macOS | Shortcut Windows/Linux | macOS Browser | Windows/Linux Browser | Customizable |
| ---------------- | -------------- | ---------------------- | ------------- | --------------------- | ------------ |
| Zoom in          | ⌘++            | Ctrl++                 | ⌘++           | Ctrl++                | fixed        |
| Zoom out         | ⌘+−            | Ctrl+−                 | ⌘+−           | Ctrl+−                | fixed        |
| Reset to default | ⌘+0            | Ctrl+0                 | ⌘+0           | Ctrl+0                | fixed        |
| Reload app       | ⌘+R            | Ctrl+R                 | ⌘+R           | Ctrl+R                | fixed        |

#### **Incoming Calls**

| Function                              | Shortcut macOS | Shortcut Windows/Linux | macOS Browser | Windows/Linux Browser | Customizable          |
| ------------------------------------- | -------------- | ---------------------- | ------------- | --------------------- | --------------------- |
| Accept call (single key, in the app)  | A              | A                      | A             | A                     | yes (single key only) |
| Decline call (single key, in the app) | D              | D                      | D             | D                     | yes (single key only) |
| Accept call (outside the app)         | ⌘+⇧+A          | Ctrl+⇧+A               | –             | –                     | yes                   |
| Decline call (outside the app)        | ⌘+⇧+D          | Ctrl+⇧+D               | –             | –                     | yes                   |

{% hint style="info" %}
**Note:**\
The single keys **A** and **D** only work inside the app. To use them, enable the **Answering calls with a single key** toggle in the **Settings**.

The shortcuts for accepting and declining calls outside the app are only available in the desktop version. To use them, enable the **Handle calls outside the app** toggle.
{% endhint %}

#### **Active Call**

| Function                    | Shortcut macOS | Shortcut Windows/Linux | macOS Browser | Windows/Linux Browser | Customizable |
| --------------------------- | -------------- | ---------------------- | ------------- | --------------------- | ------------ |
| Toggle microphone           | ⌘+⇧+M          | Ctrl+⇧+M               | ⌘+⌥+⇧+M       | Ctrl+Alt+⇧+M          | yes          |
| Show/hide dialpad           | ⌘+⇧+K          | Ctrl+⇧+K               | ⌘+⌥+⇧+K       | Ctrl+Alt+⇧+K          | yes          |
| Start/stop recording        | ⌘+⇧+P          | Ctrl+⇧+P               | ⌘+⌥+⇧+P       | Ctrl+Alt+⇧+P          | yes          |
| Hold/resume                 | ⌘+⇧+H          | Ctrl+⇧+H               | ⌘+⌥+⇧+H       | Ctrl+Alt+⇧+H          | yes          |
| Add participant             | ⌘+⇧+A          | Ctrl+⇧+A               | ⌘+⌥+⇧+A       | Ctrl+Alt+⇧+A          | yes          |
| Switch between calls (swap) | ⌘+⇧+S          | Ctrl+⇧+S               | ⌘+⌥+⇧+S       | Ctrl+Alt+⇧+S          | yes          |
| Transfer call and hang up   | ⌘+⇧+T          | Ctrl+⇧+T               | ⌘+⌥+⇧+T       | Ctrl+Alt+⇧+T          | yes          |
| Start three-way conference  | ⌘+⇧+G          | Ctrl+⇧+G               | ⌘+⌥+⇧+G       | Ctrl+Alt+⇧+G          | yes          |
| End call                    | ⌘+⇧+D          | Ctrl+⇧+D               | ⌘+⌥+⇧+D       | Ctrl+Alt+⇧+D          | yes          |
| Open/close call logging     | ⌘+⇧+L          | Ctrl+⇧+L               | ⌘+⌥+⇧+L       | Ctrl+Alt+⇧+L          | yes          |

#### **Contacts**

| Function                                | Shortcut macOS | Shortcut Windows/Linux | macOS Browser | Windows/Linux Browser | Customizable |
| --------------------------------------- | -------------- | ---------------------- | ------------- | --------------------- | ------------ |
| Create contact                          | ⌘+N            | Ctrl+N                 | ⌘+⌥+N         | Ctrl+Alt+N            | yes          |
| Add phone number                        | ⌘+⇧+N          | Ctrl+⇧+N               | ⌘+⌥+⇧+N       | Ctrl+Alt+⇧+N          | yes          |
| Edit contact                            | ⌘+E            | Ctrl+E                 | ⌘+⌥+E         | Ctrl+Alt+E            | yes          |
| Save contact in edit mode               | ENTER          | ENTER                  |               |                       | fixed        |
| Cancel contact edit mode without saving | ESC            | ESC                    | ⌘+⌥+ESC       | Ctrl+Alt+ESC          | fixed        |

#### **Search**

| Function                  | Shortcut macOS | Shortcut Windows/Linux | macOS Browser | Windows/Linux Browser | Customizable |
| ------------------------- | -------------- | ---------------------- | ------------- | --------------------- | ------------ |
| Go to the next result     | TAB or ↓       | TAB or ↓               |               |                       | fixed        |
| Go to the previous result | TAB or ↑       | TAB or ↑               |               |                       | fixed        |
| Clear search input        | ESC            | ESC                    | ESC           | ESC                   | fixed        |


# Can I answer calls using the buttons on my headset with the sipgate app?

Headset HID button compatibility with the sipgate app for answering and ending calls.

You can **answer** and **end calls** in the sipgate app **using the HID buttons** on your headset. This article covers frequently asked questions on the topic.

{% hint style="info" %}
**Note**: Answering calls via the HID buttons on the headset does not work in the sipgate app on the web.
{% endhint %}

#### **Which headsets support the answer and end call buttons?**

Below is a list of headsets we've tested for compatibility with the sipgate app.

### **Jabra**

* **Bluetooth (Softphone) with Jabra Link 380 Dongle**
  * Jabra 2 Evolve 65 (Link)
  * Jabra 2 Evolve 30 SE
  * Jabra 2 Evolve 85
  * Jabra 710 (Speakerphone)
* **PSTN (Desk Phone)**
  * PRO 9470
  * PRO 9465 DUO
  * PRO 9460 DUO
  * PRO 9460
  * PRO 9450
  * PRO 920
  * PRO 925
  * PRO 935
  * Motion Office
* **USB (Softphone)**
  * BIZ2300
  * LINK230
  * LINK260
  * Link265
  * Evolve 80
  * Evolve 40
  * Evolve 30
  * Evolve 20
  * BIZ 2400
  * Link 280
  * PRO 935
  * Evolve 65 (Link360 dongle)
  * Motion (Link360 dongle)
  * Speak 510+ (Link360)
  * Supreme (Link360 dongle)
  * Stealth (Link360 dongle)
  * UCVoice 750a
  * UCVoice 550a
  * UCVoice250a
  * UCVoice150a
  * BIZ 2400
  * Link 280
  * Speak 510 (via USB)
  * Speak 410
  * Motion Office
  * Dial 550
  * Link 180

### **Sennheiser Epos Adapt 560**\\

**Yealink WH62**

#### **My headset is listed, but the buttons (answer & end) aren't working**

Here are known solutions for the issue

| **Cause**                                                            | **Solution**                                                       |
| -------------------------------------------------------------------- | ------------------------------------------------------------------ |
| Integrated Bluetooth on computer/laptop or non-Jabra USB dongle used | Use the original Jabra Link 380 Dongle or a USB-C cable connection |
| Headset is in audio playback mode                                    | Flip the microphone arm once                                       |
| Jabra headset selected                                               | Select Jabra Link 370/380                                          |

#### **My headset is listed, but the buttons (answer & end) don't work properly**

The following headsets may have issues where the buttons don't work as expected:

* Jabra PRO 930 (Call continues to ring even after being answered)
* Jabra PRO 935
* Jabra PRO 9470
* Jabra Engage 75
* Jabra Elite 7 Active
* Jabra Elite 85T
* Jabra Evolve2 65 Wireless
* Poly Voyager 6310
* Poly Voyager 4320
* Poly Voyager 4320 UC
* Plantronics Savi W740
* Yealink WH62
* Yealink WH66

We are working to resolve these issues. If you still want to use these headsets, we recommend disabling the HID Headset Button Support feature, available from version 1.8.1 of the sipgate app.

![](/files/WoVA6sOuAtT4uTihI28m)

#### **My headset isn't listed—will it still work?**

We can't guarantee it, but it might still be supported if it follows the same standard.

HID stands for **Human Interface Device**, which allows companies to connect devices like controllers, joysticks, headsets, and audio devices. We currently only support devices that use the **Telephony** page/standard.

#### **Why don't Jabra button commands (presence, flip-down microphone to answer) work with the sipgate app?**

An integration needs to be developed for the Jabra Direct software so the sipgate App can receive or send information to the Jabra software. Until then, only officially supported VoIP apps that offer such integration can be used.


# How do I enable microphone access on my device?

How to enable microphone access for the sipgate app on macOS and Windows devices.

#### For macOS

To make calls with the sipgate app, the app requires access to your Mac's microphone. For security reasons, macOS blocks microphone access for all apps by default.

During the initial setup, the sipgate App will request microphone access. If you grant it, no further adjustments are needed.\
However, if you denied access at that time, you can easily adjust the settings via your Mac's System Preferences.

Navigate to **System Settings ➔ Privacy & Security ➔ Microphone** and check the box next to sipgate to allow access. Once done, the sipgate app will be ready for calls.

![](/files/eWpEEToL7vaJMTX8GFZz)

{% hint style="info" %}
**Important:** The sipgate App only supports the latest versions of **macOS** and does not work with **GitHub** projects like **Open Core Legacy Patcher**.
{% endhint %}

#### For Windows

Go to **Settings ➔ Privacy & Security ➔ Microphone** in the Windows menu.\
Switch the **Microphone Access** toggle to ON, and then set **Allow apps to access your microphone** to ON.

**If audio devices are still not listed in the sipgate App**

* Check your software firewall and ensure it allows media/microphone access.


# Which audio settings can I adjust in the sipgate app?

Audio settings available in the sipgate app including microphone, speaker, ringtone, and noise suppression options.

#### **Where can I find the audio settings in the sipgate app?**

Open the sipgate app and click on the icon with your initials in the left sidebar. Then, go to **Settings** and select the **Audio** option.

#### **What audio settings can I adjust in the sipgate app?**

In the app, you can adjust the following audio settings:

* **Microphone:** Choose the microphone you want to use for calls and conferences. You can usually select from multiple microphones connected to your device.
* **Speaker:** Select the speaker for incoming calls and audio playback.
* **Ringtone: activate an additional device:** When receiving a call, another device besides your computer can ring.
* **Ringtones:** You can choose or customize the ringtone for incoming calls.

![](/files/WoVA6sOuAtT4uTihI28m)

The app also offers a range of automatic settings to improve call sound quality, including noise suppression, echo cancellation, and AI-powered noise reduction. You can also enable automatic volume control.

![](/files/lKCHX7943MxpmtTmUS8O)

#### **Which headsets can I use with the sipgate app?**

You can use any headset supported by your computer to make calls with the sipgate app.

{% hint style="warning" %}
**Tip:** Check out this article for detailed information on how to answer calls using headset buttons in the sipgate App.
{% endhint %}


# How can I forward/transfer calls with the sipgate app?

How to forward, transfer, and set up three-way conference calls using the sipgate app.

{% tabs %}
{% tab title="sipgate classic" %}

#### How do I forward an incoming or outgoing call?

Answer an incoming call or start a new call. In the interface, click on **Transfer**.\
Next, select a contact or manually enter the phone number you want to forward the call to.\
The target number should then answer the call. Briefly communicate the reason for the transfer and complete the process by clicking **Connect & leave**.\
You can switch between the caller and the target using the **Hold** option or initiate a three-way conference by selecting **Conference**.

{% hint style="info" %}
**Note:** Currently, more than three participants are not supported.
{% endhint %}

The call will end, and the caller will be connected to the target number. A brief confirmation will appear.

{% hint style="info" %}
**Important:** If the transfer fails and you hear the message "The participant has left the call," the interface may still show that the transfer is ongoing. Canceling the transfer at this stage would end the entire call. To retry the transfer, click the Transfer button again.
{% endhint %}

#### Creating a Three-Way Conference in the sipgate App

You can easily set up a three-way conference in the sipgate app. To do this, accept an incoming call and forward it to another person or phone number. Once the third party answers, click **Conference** to connect all three participants.\
Alternatively, during a call, open the keypad and enter **\*3** followed by a speed dial or phone number (**\*3SpeedDial#** or **\*3PhoneNumber#**). Confirm the transfer with **#**. Once the third party answers, press **\*5** to start the conference.
{% endtab %}

{% tab title="sipgate neo" %}

#### Transfer a call in the desktop app

Answer an incoming call or start a new call. Then click **Transfer**.

<figure><img src="/files/dbpHOr7oGXBUmG0QVhm9" alt="Start a transfer during an active call" width="370"><figcaption><p>Start a transfer during an active call</p></figcaption></figure>

Search for a contact or enter the desired phone number. Select the transfer destination and click **Start transfer**.

![Select a contact or phone number as the transfer destination](/files/Hf5DDBdg0eyB73jdnT9T)

The sipgate app now calls the transfer destination. The person you were previously speaking to is placed on hold.

The participant tile shows both people. The app indicates whom you are currently speaking to and who is on hold. Click the other person to switch between the calls.

<figure><img src="/files/CUij1ZLEmfa0WkjqcFjc" alt="Switch between the two call participants" width="370"><figcaption><p>Switch between the two call participants</p></figcaption></figure>

Once the transfer destination has answered, you can briefly explain the reason for the call. You then have the following options:

* **Transfer:** Connects the two other participants and ends your own call.
* **Conference:** Connects all three participants in a conference call.
* **Cancel:** Ends the transfer and returns you to the original call.

You can find additional call functions under **More**.

After a successful transfer, the two other participants are connected. A brief confirmation appears.

<figure><img src="/files/O0yDNjoNfui7EH5ryi36" alt="Successful transfer" width="518"><figcaption><p>Successful transfer</p></figcaption></figure>

{% hint style="info" %}
A conference call is currently limited to a maximum of three participants.
{% endhint %}
{% endtab %}
{% endtabs %}

#### Starting a Three-Way Conference on iPhone or Android

The steps for creating a three-way conference are the same on both iOS and Android. During a call, open the keypad and enter **\*3** followed by a speed dial or phone number (**\*3SpeedDial#** or **\*3PhoneNumber#**). Confirm the transfer with **#**. When the third party answers, press **\*5** to start the conference.

#### How to Transfer Calls on iPhone/Android

The process is identical for both iOS and Android. The following example shows how to transfer a call on an iPhone. Answer an incoming call and tap **Add**.\
Enter a name from your contacts or type in a phone number in the search bar. The sipgate app will call the new number while the original caller is placed on hold.\
Once the target number answers, briefly communicate the reason for the transfer.\
Switch between the two calls by tapping the held call (grayed out).\
To connect the calls, tap **Connect & leave**.

{% hint style="warning" %}
**Tip:** Alternatively, you can use keyboard shortcuts in the sipgate app. A full list of shortcuts can be found in this article.
{% endhint %}


# How can I create contacts and set favorites in the sipgate app?

How to create contacts and mark favorites in the sipgate app for quick access and calling.

#### How do I create new contacts?

First, open the sipgate app on your desktop. In the sidebar, go to **Contacts**. To create a new contact, click on the **+** symbol in the top right corner.

Next, choose your CRM or contact management tool. Fill out the required fields (Name, First Name, Company, Email, and Phone Number) and click **Save**.

#### How do I mark certain contacts as favorites?

Open the sipgate app and go to **Contacts**. Click the desired contact to open the **Contact details**. There you'll find the option **Add to favorites**. If a contact is already a favorite, remove them via **Remove from favorites**.

You can also mark a contact as a favorite while creating it: in the **Create Contact** dialog, select **Add to favorites**.

#### Where can I find my favorite contacts?

You'll find your favorites in your personal channel under the **Favorites** tab. If a favorite only has one phone number, you can call them directly by clicking on their name. If a favorite has multiple numbers, you'll need to choose which one to call.

{% hint style="warning" %}
**Note:** You can mark up to 30 contacts as favorites.
{% endhint %}


# What are the IP and firewall settings for the sipgate app?

IP addresses, ports, and firewall settings required for the sipgate app to connect and make calls.

In most cases, the sipgate app will work without additional configuration of routers or firewalls. However, in corporate networks, adjustments may be necessary, and specific domains and ports need to be allowed. Below, we have listed all the gateways and ports required for the sipgate app to connect.

#### Internet connection requirements

* A minimum bandwidth of 100-400 kbit/s download/upload is needed.
* Latency should be below 270 ms to avoid offline notifications in the client and issues with making calls.

#### Call setup (without audio)

Here's an overview of the domains, ports, and protocols used by the sipgate app for communication:

* gateway.clinq.com + Port: 443 + TCP (Call setup)
* api.q.clinq.com + Port: 443 + TCP (Negotiate codecs, etc., before accepting a call)
* socket.clinq.com + Port: 443 + TCP (CLINQ Client ↔ Google Server connection)
* Google IP ranges can be found [here](https://www.google.com).

For a typical home router, domains should be allowed by default without extra configuration. In highly restrictive corporate networks, where many domains and IPs are blocked, it may be necessary to work with your network administrator to allow specific domains and ports.

#### Call accepted with audio

* IP Range + UDP + Port range: 10,000 - 60,000 (Audio)

Fixed IP addresses used:

* 18.153.199.104
* 18.192.192.27
* 18.193.158.169
* 18.195.254.166
* 18.196.255.246
* 18.197.212.58
* 18.199.119.88
* 3.125.165.239
* 3.64.29.229
* 3.74.37.174
* 3.75.1.227
* 3.77.130.221
* 35.157.146.136
* 52.29.34.109

#### SIP Registration – Device IP Address

When using the sipgate app, the IP address of the VoIP device (viewable under "My Telephony" on the web) may differ from the IP address of the desktop running the app. This is because the SIP registration occurs through the app's backend services, not directly via the desktop client.

#### Login

* sipgate App Firebase (all logins): 35.208.0.0 - 35.247.255.255
* via Apple: [www.apple.com](http://www.apple.com) + appleid.apple.com + Port 443 + TLS 1.2
* via Microsoft: live.com + microsoftonline.com + microsoft.com + Port 443 + TLS 1.2

#### sipgate app Updates

Allow downloads from s3-eu-central-1.amazonaws.com (Amazon AWS).

#### **Voice and Signal Encryption**

Signals are encrypted via TLS, while voice encryption is done using SRTP.

#### **Errors and Solutions**

| Error                                                                     | Error Message                                                                                          | Cause                                                                                                                                                                  | Solution                                                                                                                  |
| ------------------------------------------------------------------------- | ------------------------------------------------------------------------------------------------------ | ---------------------------------------------------------------------------------------------------------------------------------------------------------------------- | ------------------------------------------------------------------------------------------------------------------------- |
| Login works, but outgoing calls fail / incoming calls cannot be answered. | "Audio connection could not be established, please check network and microphone."                      | **Analysis 1:** sipgate App → Help → Log → renderer.log: "Call could not be dialed -> Saving local call event {error: 'Timeout: Could not build a WebRTC connection.'" | Unblock gateway.v2.clinq.com:443 + TLS 1.2 in firewall/filter.                                                            |
|                                                                           |                                                                                                        | **Analysis 2:** Firewall temporarily blocked api.q.clinq.com + Port 443 and/or Audio IP ranges.                                                                        | Unblock api-q-clinq.com:433 and the Audio IP ranges (see above for audio).                                                |
|                                                                           |                                                                                                        | **Analysis 3:** Temporary sipgate App outage.                                                                                                                          | Wait for a fix from sipgate App support.                                                                                  |
| Calls have error code 500 + Nexu 502 error in logs                        |                                                                                                        |                                                                                                                                                                        | Report to sipgate App Support and wait for a resolution.                                                                  |
| Login works but error message appears                                     | "You are offline. Please check your internet connection."                                              | **Analysis:** sipgate App → Help → Logs → renderer.log: "\[error] \[ws] Socket error Error: websocket error false"                                                     | Unblock socket.clinq.com:433 + TLS 1.2 in firewall/filter.                                                                |
|                                                                           |                                                                                                        |                                                                                                                                                                        | Connection via WiFi in train with LTE (80-200 km/h) has +250ms latency.                                                   |
| Connection with Google failed                                             | "Connection with Google failed."                                                                       | google.bridge.clinq.com + 433 + TLS 1.2 blocked by firewall/filter.                                                                                                    | Unblock google.bridge.clinq.com:433.                                                                                      |
| Connection with Microsoft failed                                          | "Connection with Microsoft failed."                                                                    | outlook-contacts.bridge.clinq.com + 433 + TLS 1.2 blocked by firewall/filter.                                                                                          | Unblock outlook-contacts-bridge.clinq.com:433.                                                                            |
| Data could not be saved                                                   | "Data could not be saved."                                                                             | sipgate.bridge.clinq.com + 433 + TLS 1.2 blocked by firewall/filter.                                                                                                   | Unblock sipgate.cridge.clinq.com:433.                                                                                     |
| Microsoft Integration opens briefly and closes immediately                |                                                                                                        | microsoft.com and/or microsoftonline.com/live.com blocked by firewall.                                                                                                 | Unblock microsoft.com, microsoftonline.com, live.com.                                                                     |
| Update could not be installed                                             | "Update could not be installed."                                                                       | s3-eu-central-1.amazonaws.com + 433 + TLS 1.2 blocked by firewall/filter.                                                                                              | Unblock s3-eu-central-1.amazonaws.com.                                                                                    |
|                                                                           |                                                                                                        | CLINQ.AppImage is in a system folder without write permissions.                                                                                                        | Move CLINQ.AppImage to Downloads, update should now work.                                                                 |
|                                                                           |                                                                                                        | CLINQ.dmg / CLINQ.exe was installed from NAS/Network drive.                                                                                                            | Uninstall the sipgate App, copy sipgateApp.dmg/exe from the network drive to the local hard drive, reinstall, and update. |
| Outgoing calls not possible                                               | "Call could not be started. Please check your network connection."                                     | **Analysis:** sipgate App Log: renderer.log: "\[api] Could not create call event"                                                                                      | Unblock gateway.v2.clinq.com:433 + TLS 1.2 in firewall/filter.                                                            |
|                                                                           |                                                                                                        | **Analysis:** sipgate App → Logs → renderer.log: "\[error] \[ws] Socket disconnected transport close (<https://socket.clinq.com>)"                                     | Restart the sipgate App or press CMD+R/CTRL+R, or go to sipgate App → View → "Reload".                                    |
|                                                                           |                                                                                                        | Network change or sleep mode prevents reconnect.                                                                                                                       | End and restart the app, or press CMD+R/CTRL+R to reconnect.                                                              |
|                                                                           |                                                                                                        | Incorrect internet proxy configuration.                                                                                                                                | Disable the proxy and test the connection, then adjust proxy settings.                                                    |
|                                                                           |                                                                                                        | VPN blocking transmission.                                                                                                                                             | Test without VPN, if VPN is the issue, inform the VPN admin.                                                              |
|                                                                           |                                                                                                        | Docker with various network connections set up incorrectly.                                                                                                            | Test connection without virtual Docker network adapters, then review Docker settings.                                     |
| Software firewall blocks sipgate App                                      | "\[error] \[call] Could not build a WebRTC connection in 10s. Error: Could not get microphone stream." | **Analysis:** sipgate App → Help → Logs → renderer.log: (Firewall blocking connection)                                                                                 | Add sipgate App to trusted apps in the software firewall.                                                                 |


# Call Logging for all your devices

We are pleased to inform you that call logging now works completely across all the devices you use. This expanded functionality ensures a consistently logged communication experience, regardless of which terminal device you are currently using.

Provided you have the appropriate tariff and the integration (e.g. CRM) is connected, all calls will be automatically logged with the respective contact.

Even if the setup was previously only available for the Desktop App, logging will still be consistent for all the devices mentioned on the contact.

1. Navigate to the Integrations page[ https://app.sipgate.com/integrations](https://app.sipgate.com/integrations)
2. Click on “Connect” and select your suitable integration

<figure><img src="/files/w38yNlcWvslV0SYRhmgO" alt=""><figcaption></figcaption></figure>

3. Log in to your integration or enter the corresponding API
4. Done - now all your conversations across all your devices will be logged with the contact in the CRM.

<figure><img src="/files/DsELeesziLi9o8CGVjTB" alt=""><figcaption></figcaption></figure>


# Channels


# What are sipgate Channels and how do I set them up?

Learn what sipgate Channels are and how to set them up, including routing, greetings, call queues, ringing policies, and user management.

sipgate **Channels** provide a centralized hub for your team's communication. They streamline and organize all conversation content and tasks, making it easier to handle calls and customer inquiries efficiently. Each Channel has a single phone number with smart routing. The user-friendly dashboard lets you monitor call volume and team workload. For the best experience, use the [sipgate App](https://www.sipgate.co.uk/app-download). This article will show you how to set up and make the most of Channels.\
If you're unsure whether to use Channels or Groups, [learn about the differences between them here](https://teamhelp.sipgate.co.uk/hc/en-gb/articles/20704967025565-What-should-I-choose-Channels-or-Groups).

{% hint style="info" %}
**Note:** The Channels feature is currently available for the L and XL plans, but it will soon be offered for the S plan as well.
{% endhint %}

#### How do I set up Channels at sipgate?

As an Admin, you can set up one or more channels. To access your Channels, select the **Channels** option. In this section, you have an overview of already created Channels. Click on **+Add** to set up a new call distribution.

![](/files/vhukUOQLhvTPlcGmPmDd)

In the next step, give your Channel a **name**.

![](/files/X1LcJ0b9Gb3aRsmJOfqy)

Next, add the phone numbers that will be used in your \*\*Channel-\*\*Routing.

![](/files/glYg6mvZMxJlmOrWBrn0)

You can select one or more numbers at this stage. You can modify the routing details later if needed.

{% hint style="info" %}
**Note:** For Channels, Phone Numbers can only be routed after the porting process is completed.
{% endhint %}

Then, add your **Users**. This list can be edited at any time.

![](/files/ZVBfPqD8WbjgNlCO4Xh2)

After that, you can define the Call Distribution for Channels and set up any desired forwarding rules. The queue is always active and captures incoming calls for the Channels, distributing them to the logged-in Users. If no User is available or the maximum wait time is exceeded, the configured forwarding ensures that no call is lost.

![](/files/9SM0KnOcxyqjHv0kYkcO)

The structure of your Channels routing consists of the following components: Phone Numbers, Greeting, Queue, Ringing Rule, Users, and Time-out Announcement/forwarding. If you have already selected the Phone Numbers and Users in previous steps, your routing will appear as shown in the image. If you skipped these steps, you can click on the respective components in the routing and add the relevant information.

The Channel routing works as follows: A call comes in on one of your Channels numbers, the caller hears a greeting (if set up), and then is placed in the Queue where music or any audio file is played. Depending on the ringing rule you set, the waiting callers are assigned to the available users. If the call is not answered within a certain time, a message you selected is played, or the call is forwarded to a selected number.

{% hint style="info" %}
**Note:** The described routing applies during defined service hours, while outside these hours, a message can be played to the callers, or forwarding can be set up. Additionally, you can set up automatic routing for holidays or special absences such as vacations, company holidays, or training sessions. Information on setting up service hours (time filters) and holiday and absence profiles (date filters) for your channels can be found in this article.
{% endhint %}

{% hint style="info" %}
**Note:** The sipgate App makes using Channels even easier – find more details in our additional article.
{% endhint %}

#### How do I set up the greeting?

Click on the **Add greeting** in the routing.

![](/files/jzvWDOINFfQ8aTIGdmg4)

Here you have the option to select a greeting suggested by us or upload your audio file (MP3 10 MB).

![](/files/Sy0r9JwBvlYzoEDNOcVd)

#### How do I set up the Callqueue?

Click on **Callqueue** in the routing. Here you have the option to change the hold music.

![](/files/VlkcZe4bDf2YKVKrbwng)

Similar to the greeting, you can choose a music file suggested by us or upload your audio file (MP3 10 MB).

![](/files/P3irkYqDIecJPvX9v3Qn)

Additionally, you can set the maximum waiting time by clicking on the time display before the announcement in the routing.

![](/files/iFy2SKAqcgG0RDgJhsC4)

If callers stay in the Queue longer, the time-out announcement is played, and the call is automatically ended.

#### How do I set up the ringing policy?

Using the **ringing policy** function, you can determine how calls are forwarded to your Users. Click on **Longest Idle** in the routing. Here you can change the ringing rule.

![](/files/j5I5qiGhDSUbl8CPehCM)

You have two options for the ringing order. If you select the **Longest Idle** option, incoming calls are forwarded to the Users who have not handled a call for the longest time.

![](/files/9C8LspTVMcGc2tNVhuAY)

With the **Fixed Order** option, you can determine the forwarding order to your Users.

![](/files/1OAuqZNHjqKBnA6bXuaL)

In the next step, you can set the **ringing duration** for users by clicking on the gear icon next to it. The **ringing duration** refers to the time a call rings for users before being automatically forwarded.

![](/files/B2ioWlC7FAisSHKVWTIH)

You can activate the post-processing function for your Users, allowing them to leave notes on the last call without having to take other calls during this period.

#### How do I edit the announcement/forwarding for maximum wait time?

Similarly, you can edit the announcement when the maximum wait time is exceeded by going to the routing and clicking on **Change Announcement** and **Forwarding**.

![](/files/WMMLpxnJMtj7Uyt9hmZL)

Here you can choose whether to play an announcement or forward the call to another number. You can select this from a dropdown menu.

![](/files/GYs70SHRO5JWwF95wPvX)

Here you can choose whether to play an announcement or forward the call to another number. You can select this from a dropdown menu.

#### How do I set up Users as an admin?

As an Admin, you can configure devices for the respective users for the Channels function. Go to the Channels overview and click on the relevant users. By default, the VoIP device of the Users is always activated in the group routing. Additionally, you will see in this overview if one of the Channels has not been fully set up. This means no phone numbers and/or users have been assigned. If this is the case, a notification box will appear indicating the necessary actions.

{% hint style="info" %}
**Note:** It is currently possible to activate one device per User. This should be a VoIP phone, which can also be connected to a softphone client. Mobile phones cannot be used at this time.\
You can also track the status of your users: active (green), busy or in post-processing time (orange), and inactive (red).
{% endhint %}

#### How can I manage my status and devices in Channels as a User?

If you want to log in or out of Channels as a User, select **\*2#** on your Channels-configured device. You will receive an audio message confirming that your login or logout was successful. Under **My Telephony**, you will find an overview of your Channels status. Here you can also see an overview of your routings, including the Channels routing, and have the option to independently switch VoIP devices with a toggle.

![](/files/VljhF7A7FamGrEbXyz3X)

{% hint style="info" %}
**Note:** If you have set up **Do Not Disturb (DND)** and **Busy on Busy (BOB)** in the sipgate web app, these settings will be applied to the Channels status. However, please note that changes made directly on the device will not be reflected in the Channels status. For example, if you enable DND on your device, the Channels status will not change.
{% endhint %}


---

[Next Page](/llms-full.txt/1)